
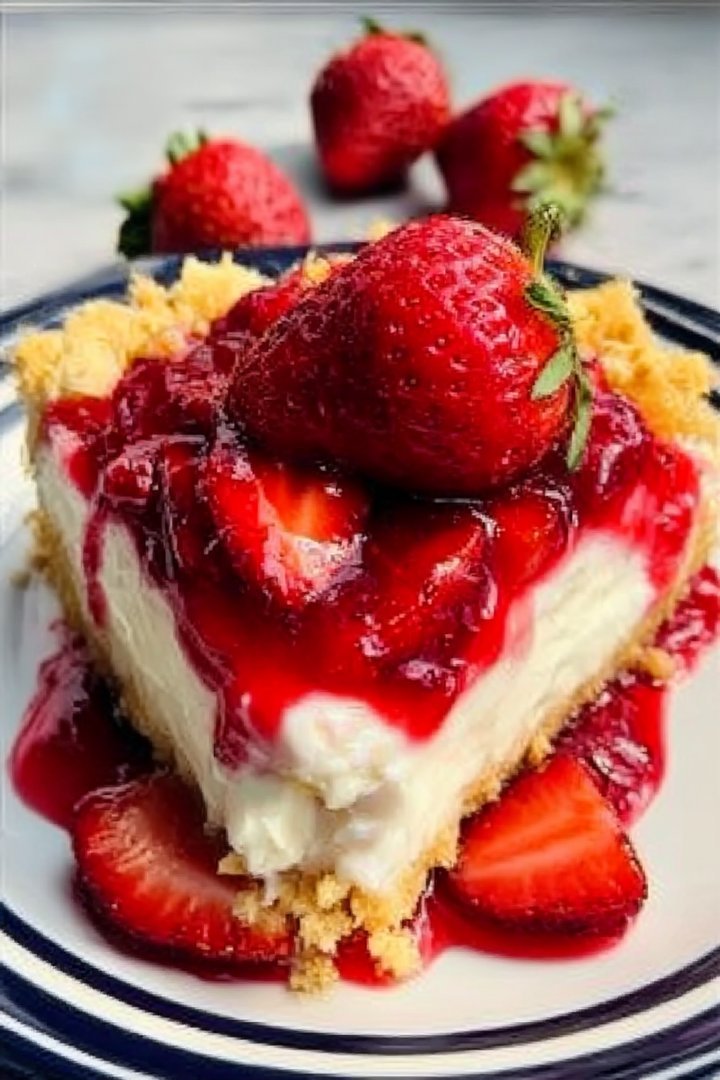
Imagine biting into a slice of heaven: warm, gooey strawberry delight nestled atop a creamy, tangy cheesecake layer, all crowned with a buttery, crumbly topping. Our Strawberry Cheesecake Dump Cake isn’t just dessert; it’s a symphony of textures and flavors that will make your taste buds sing.
This recipe is so simple, it’s practically foolproof, even if your baking skills are more “dump and pray” than “chef’s kiss.” Forget complicated steps and hours in the kitchen; this Strawberry Cheesecake Dump Cake is ready in a flash, perfect for those moments when you need a sweet escape without the fuss.
Here are a few reasons why you’ll fall head-over-heels for this Strawberry Cheesecake Dump Cake:
- It’s unbelievably easy to make, requiring minimal effort and ingredients, perfect for beginner bakers.
- The combination of sweet strawberries, creamy cheesecake, and buttery cake creates a delightful flavor explosion.
- The vibrant colors and textures make it a visually appealing dessert that’s sure to impress your guests.
- Whether it’s a potluck, birthday, or just a cozy night in, this dump cake is versatile enough for any occasion.
Ingredients for Strawberry Cheesecake Dump Cake
Here’s what you’ll need to make this delicious dish:
The full ingredients list, including measurements, is provided in the recipe card directly below.
How to Make Strawberry Cheesecake Dump Cake
Follow these simple steps to prepare this delicious dish:
Step 1: Get Ready to Bake
Preheat your oven to 350°F (175°C). Grease a 9×13 inch baking dish with cooking spray or butter to prevent sticking.
Step 2: Create the Cheesecake Layer
In a large bowl, beat the softened cream cheese, eggs, and Alcohol-free vanilla extract until smooth and creamy. This forms the rich cheesecake base.
Step 3: Assemble the Cake
Pour the strawberry pie filling evenly into the prepared baking dish. Spread the cream cheese mixture evenly over the pie filling.
Step 4: Add the Cake Mix Topping
Sprinkle the dry yellow cake mix evenly over the cream cheese layer. Try to cover the entire surface for a uniform topping.
Step 5: Drizzle with Butter
Pour the melted butter evenly over the dry cake mix. This helps to create a golden brown and crumbly topping.
Step 6: Bake to Perfection
Bake for 45-50 minutes, or until the topping is golden brown and the filling is bubbly. Let it cool slightly before serving.
Serve warm with a scoop of vanilla ice cream or a dollop of whipped cream for the perfect finishing touch.
Perfecting the Cooking Process
To achieve culinary bliss with this Strawberry Cheesecake Dump Cake, layer the ingredients carefully. Start with the cake mix, then the cheesecake filling, and finally, the strawberries. This order ensures even baking and a delightful texture.
Add Your Touch
Feel free to experiment with different berries! Blueberries, raspberries, or a mixed berry medley can add a unique twist. Consider adding a sprinkle of almond slivers for extra crunch and a touch of nutty flavor. Get creative and make it your own!
Storing & Reheating
To maintain its delightful texture, store any leftover Strawberry Cheesecake Dump Cake in the refrigerator, covered, for up to three days. Reheat individual portions gently in the microwave or oven until warmed through. Enjoy it all over again!
Here are a few tips to help you bake the best Strawberry Cheesecake Dump Cake:
- Ensure your cream cheese is softened fully for a lump-free cheesecake layer that melts perfectly into the cake.
- Don’t overbake! The dump cake is ready when the top is golden brown and the filling is set, usually around 45 minutes.
- For a more intense strawberry flavor, macerate the strawberries with a little sugar for about 30 minutes before adding them to the cake.
(Personal anecdote formated as paragraph subheading)
I once brought this Strawberry Cheesecake Dump Cake to a potluck, and it was gone in minutes! Everyone raved about how easy it was to eat and how delicious the combination of flavors was.
Conclusion for Strawberry Cheesecake Dump Cake
This Strawberry Cheesecake Dump Cake is truly a champion in the world of desserts. It’s incredibly easy to make, requiring minimal effort and ingredients, yet the result is a delightful combination of flavors and textures. The buttery cake mix crust, the creamy cheesecake filling, and the burst of juicy strawberries create a symphony of deliciousness in every bite. Perfect for potlucks, family gatherings, or even just a simple weeknight treat, this dump cake is guaranteed to impress!
Print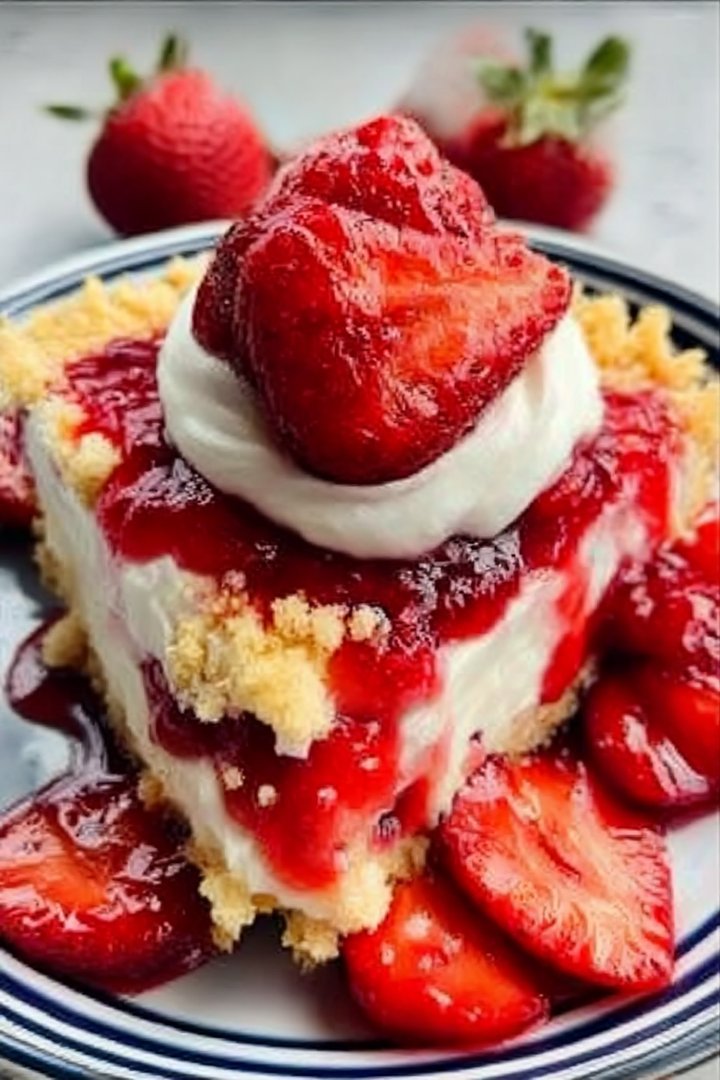
Strawberry Cheesecake Dump Cake
Delicious strawberry cheesecake dump cake recipe with detailed instructions and nutritional information.
- Total Time: 35 minutes
- Yield: 4 servings 1x
Ingredients
- 1 (21 ounce) can strawberry pie filling
- 1 (8 ounce) package cream cheese, softened
- 1/2 cup granulated sugar
- 1 teaspoon vanilla extract
- 1 (15.25 ounce) package yellow cake mix
- 1/2 cup (1 stick) cold butter, cut into pats
- 1/4 cup sliced almonds (optional)
- 1 tablespoon milk
Instructions
- Step 1: Preheat oven to 350 degrees F (175 degrees C). Grease a 9×13 inch baking dish.
- Step 2: In a medium bowl, beat together the softened cream cheese, sugar, vanilla extract, and milk until smooth and creamy. Spread the cream cheese mixture evenly over the bottom of the prepared baking dish.
- Step 3: Spread the strawberry pie filling evenly over the cream cheese layer.
- Step 4: Sprinkle the dry yellow cake mix evenly over the strawberry pie filling.
- Step 5: Distribute the cold butter pats evenly over the top of the cake mix. Sprinkle with sliced almonds, if desired.
- Step 6: Bake in the preheated oven for 40-45 minutes, or until the top is golden brown and the cake is set. Let cool slightly before serving.
Notes
- For the best flavor and texture, store any leftover dump cake covered in the refrigerator for up to 3 days.
- A quick zap in the microwave for 30 seconds will slightly warm your slice, enhancing the buttery flavor.
- Serve this delightful dump cake with a dollop of whipped cream or a scoop of vanilla ice cream for an extra touch of decadence.
- For easier butter distribution, lightly flatten the butter pats with your fingers before placing them on the cake mix.
- Prep Time: 15 minutes
- Cook Time: 20 minutes
- Method: Stovetop
- Cuisine: American
FAQs
Can I use frozen strawberries in this Strawberry Cheesecake Dump Cake recipe?
Absolutely! Frozen strawberries work wonderfully. Just thaw them slightly and drain any excess juice before adding them to the cake pan. This prevents the dump cake from becoming too soggy. In fact, using frozen berries is a fantastic way to enjoy this delightful dessert year-round, regardless of whether fresh strawberries are in season. You might even find the flavor is more intense with frozen berries! Experiment and see what you prefer for your own perfect Strawberry Cheesecake Dump Cake.
How do I store leftover Strawberry Cheesecake Dump Cake?
Storing your Strawberry Cheesecake Dump Cake is simple! Just cover it tightly with plastic wrap or transfer it to an airtight container. Keep it refrigerated, and it will stay fresh and delicious for up to three days. This dump cake is also surprisingly good cold, straight from the fridge. So, if you’re looking for a sweet treat after a long day, leftover Strawberry Cheesecake Dump Cake is the perfect solution. Trust me; you won’t regret having some on hand.
What can I serve with Strawberry Cheesecake Dump Cake?
This Strawberry Cheesecake Dump Cake is delicious all on its own, but a few simple additions can elevate it even further. A dollop of whipped cream or a scoop of vanilla ice cream adds a cool and creamy contrast to the warm, fruity cake. You could also drizzle it with a little melted white chocolate or a simple glaze made from powdered sugar and milk. For a touch of elegance, garnish with fresh mint leaves. Any way you serve it, it’s sure to be a hit!
Can I make this Strawberry Cheesecake Dump Cake ahead of time?
Yes, you certainly can! While this Strawberry Cheesecake Dump Cake is best served warm, you can assemble it ahead of time and bake it later. Simply prepare the dump cake as instructed, cover it tightly with plastic wrap, and refrigerate it for up to 24 hours before baking. When you’re ready to bake, remove it from the refrigerator and let it sit at room temperature for about 30 minutes before putting it in the oven. This will ensure even baking and prevent the cake from becoming too dense.


Leave a Comment