
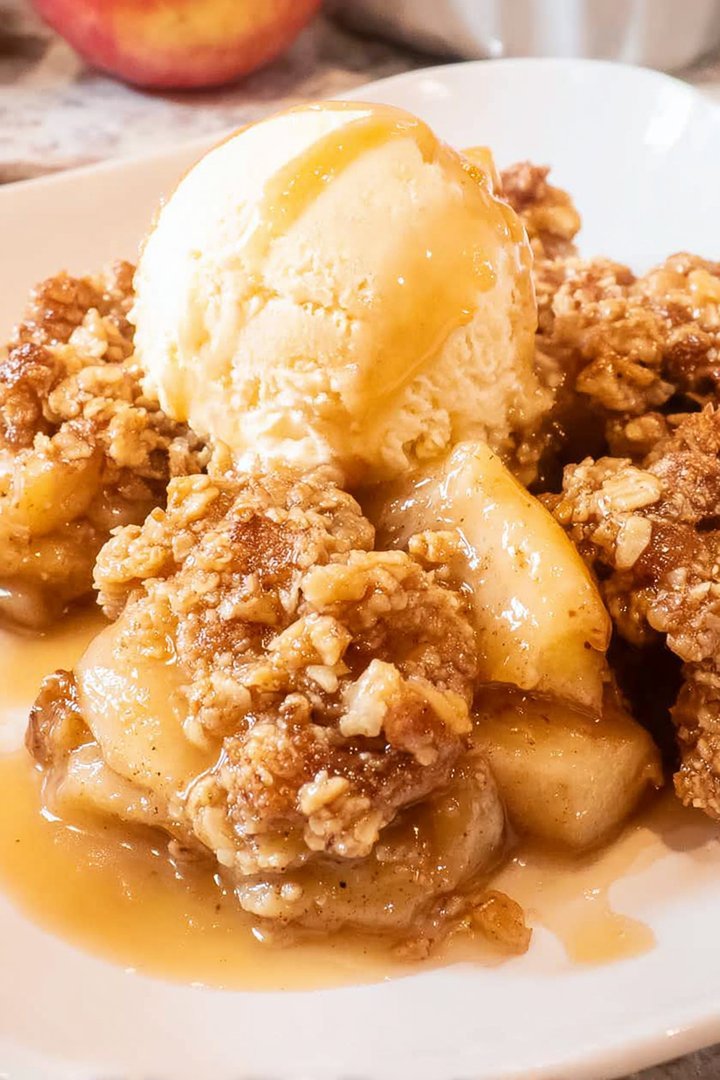
The aroma of warm apples mingling with cinnamon, baking into a bubbly, golden crisp, is basically autumn in a dish. It’s a hug from your oven, a sweet serenade to your taste buds, and a comfort food champion all rolled into one.
Remember those fall afternoons, apple-picking with the family, then rushing home to bake something delicious? A **classic apple crisp recipe** brings back those cozy memories, and trust me, this version is about to become your new go-to. It’s so easy, so delicious, and so perfectly “fall-tastic,” you’ll want to make it every weekend (and honestly, who could blame you?).
Here’s why this **classic apple crisp recipe** is about to become your family’s new favorite:
- It requires minimal effort, perfect for busy weeknights or when you crave a comforting dessert without the fuss.
- The combination of sweet apples and a buttery, crumbly topping creates an irresistible explosion of flavors.
- The golden-brown topping and bubbly apple filling make it visually stunning, ideal for impressing guests.
- You can easily customize it with your favorite spices, nuts, or even a scoop of vanilla ice cream for an extra decadent treat.
Ingredients for Classic Apple Crisp Recipe
Here’s what you’ll need to make this delicious dish:
The full ingredients list, including measurements, is provided in the recipe card directly below.
How to Make Classic Apple Crisp Recipe
Follow these simple steps to prepare this delicious dish:
Step 1: Prepare the Apples
Peel, core, and slice the apples into about 1/4-inch thick pieces. Toss them in a large bowl with lemon juice, granulated sugar, cinnamon, nutmeg, and a pinch of salt.
Step 2: Make the Crumble Topping
In a separate bowl, combine the flour, rolled oats, brown sugar, and cold, cubed butter. Use a pastry blender or your fingers to cut the butter into the dry ingredients until the mixture resembles coarse crumbs. This is key to that perfect crisp texture!
Step 3: Assemble the Crisp
Pour the apple mixture into a greased 8×8 inch baking dish. Sprinkle the crumble topping evenly over the apples. Try to distribute it evenly so every bite has that wonderful crunch.
Step 4: Bake the Crisp
Bake in a preheated oven at 375°F (190°C) for 30-35 minutes, or until the topping is golden brown and the apples are tender and bubbly. Keep an eye on it, because ovens can be a bit temperamental.
Step 5: Cool and Serve
Let the crisp cool for at least 15 minutes before serving. This allows the filling to set slightly. A scoop of vanilla ice cream or a dollop of whipped cream is highly recommended.
Tips and Tricks for the Best Apple Crisp
Want to elevate your **classic apple crisp recipe** game? Here are a few tricks up my sleeve:
Choosing the Right Apples
Don’t just grab any apples! The blend is the secret. Tart apples like Granny Smith hold their shape beautifully, providing a delightful contrast to the sweetness. Sweeter varieties like Honeycrisp or Fuji caramelize wonderfully and bring an extra layer of sugary goodness. Aim for a mix to achieve the perfect balance of texture and flavor. Think of it as creating an apple symphony in your dessert.
Making the Perfect Crumble Topping
Cold butter is your best friend when it comes to crumble toppings. Seriously, the colder the better! It ensures that the butter doesn’t melt too quickly in the oven, creating those delightful pockets of buttery goodness that make a crisp so irresistible. If you have time, pop the cubed butter in the freezer for 10-15 minutes before starting. Also, don’t overmix! You want coarse crumbs, not a paste.
Adding Extra Flavor to Classic Apple Crisp Recipe
Feel free to get creative with your spices. A pinch of ground ginger or cloves can add a warm, comforting touch. For a nutty twist, try adding chopped pecans or walnuts to the crumble topping. You can also experiment with different extracts, like vanilla or almond, to enhance the overall flavor profile. And don’t be shy about adding a drizzle of caramel sauce after baking for an extra decadent treat.
Preventing a Soggy Bottom
Nobody wants a soggy apple crisp! To prevent this culinary catastrophe, make sure to toss the apples with lemon juice. It helps to create a barrier and prevents the apples from releasing too much moisture during baking. You can also add a tablespoon of cornstarch or tapioca starch to the apple mixture to help thicken the juices. And make sure your oven is properly preheated before baking.
Serving Suggestions and Storage
This **classic apple crisp recipe** is fantastic on its own, but it’s even better with a scoop of vanilla ice cream or a dollop of freshly whipped cream. If you want to get fancy, try drizzling it with caramel sauce or sprinkling it with chopped nuts. Leftovers can be stored in the refrigerator for up to 3 days. Reheat in the oven or microwave before serving.
Variations on the Classic Apple Crisp Recipe
Want to mix things up a bit? Here are some fun variations on the **classic apple crisp recipe**:
Pear Crisp
Swap out the apples for pears! Pears have a delicate sweetness and a slightly grainy texture that works wonderfully in a crisp. Use Bartlett or Anjou pears for the best results. You can also add a touch of cardamom or ginger to complement the pear flavor.
Berry Crisp
Berries add a burst of freshness and color to a crisp. Use a mix of your favorite berries, like blueberries, raspberries, and blackberries. Toss them with a little sugar and lemon juice before adding the crumble topping.
Peach Crisp
Peaches are a summertime favorite, and they make a delicious crisp. Use ripe, juicy peaches and add a touch of alcohol-free almond extract to enhance their flavor. A sprinkle of cinnamon and nutmeg will add a warm, comforting touch.
Gluten-Free Apple Crisp
If you’re gluten-free, you can easily adapt this **classic apple crisp recipe** by using gluten-free flour in the crumble topping. You can also use almond flour or oat flour for a slightly different texture and flavor. Make sure to use certified gluten-free rolled oats as well.
Vegan Apple Crisp
To make this crisp vegan, simply replace the butter with a plant-based butter alternative or coconut oil. You can also use maple syrup or agave nectar instead of brown sugar. Ensure you’re using a plant-based vanilla ice cream when serving!
The Science Behind the Perfect Apple Crisp
Ever wonder why an apple crisp tastes so darn good? It’s not just magic; there’s some actual science at play!
The Maillard Reaction
That beautiful golden-brown color on the crumble topping? That’s the Maillard reaction in action! It’s a chemical reaction between amino acids and reducing sugars that occurs when food is heated. It’s responsible for the delicious flavors and aromas that develop during baking.
Caramelization
When the sugars in the apples and crumble topping are heated, they undergo caramelization, creating a rich, complex flavor. Caramelization also contributes to the golden-brown color and the slightly chewy texture of the topping.
Starch Gelatinization
The starch in the flour and apples gelatinizes during baking, which helps to thicken the filling and bind the crumble topping together. This creates a cohesive structure that prevents the crisp from falling apart.
The Role of Fat
Fat, in the form of butter, plays a crucial role in the texture of the crumble topping. When the cold butter melts during baking, it creates pockets of air that result in a light, crumbly texture.
This **classic apple crisp recipe** is more than just a dessert; it’s a taste of home, a warm embrace on a chilly day, and a reminder of all the good things in life. So go ahead, bake up a batch and share it with the people you love. And remember, the best apple crisp is always the one made with love!
Perfecting the Cooking Process
To nail this **Classic Apple Crisp Recipe**, prep your apples and topping ingredients first. Then, assemble and bake immediately to prevent a soggy bottom. A hot oven is key to a golden, crunchy top and perfectly soft apples.
Add Your Touch
Feel free to swap out some of the apples for pears or cranberries for a tangy twist. Experiment with different spices like cardamom or allspice in the topping. Adding chopped nuts like pecans or walnuts will add texture.
Storing & Reheating
Store leftover apple crisp covered in the refrigerator for up to three days. Reheat individual portions in the microwave or bake in a preheated oven until warmed through. The topping may lose some crispness upon reheating.
Here are some helpful tips for making the best apple crisp ever:
- Use a mix of apple varieties for a more complex flavor; some tart and some sweet will create a delightful taste.
- Don’t overmix the topping; you want it to be crumbly, not a solid mass, for the perfect textural contrast.
- Let the apple crisp cool slightly before serving; this allows the juices to thicken and prevents a soupy dessert.
(Personal anecdote formated as paragraph subheading)
I remember when I first made this for a family gathering, and my aunt swore it was the best apple crisp she’d ever tasted, even better than her own grandmother’s secret recipe!
The Allure of Apples
Apples, those humble orbs of sweetness and tartness, have a history as rich and varied as the orchards where they grow. From the mythical apple of discord to Johnny Appleseed’s legendary travels, this fruit has captured our imaginations for centuries. But let’s be honest, are apples just for eating raw? Absolutely not! This **Classic Apple Crisp Recipe** is about to redefine your apple experience. It’s not just dessert; it’s a warm hug on a cool evening, a comforting spoonful of nostalgia, and a celebration of simplicity. We’re talking tender, spiced apples bubbling beneath a blanket of buttery, oat-strewn goodness.
Why This Apple Crisp Will Be Your New Go-To
Let’s face it, there are a zillion apple crisp recipes out there. So, why should you trust me, a random internet person, with your precious baking time and ingredients? Well, for starters, this recipe is foolproof. I’ve tested it more times than I care to admit (all in the name of science, of course!). Plus, it’s adaptable. You can easily tweak it to your liking with different spices, fruits, or toppings. Most importantly, it tastes amazing. The apples are perfectly cooked, the topping is unbelievably crunchy, and the overall experience is just pure bliss. Prepare to become the apple crisp champion of your friend group, family, or even your own household.
Gather Your Arsenal: Ingredients for Apple Crisp Domination
Okay, let’s get down to business. Here’s what you’ll need to create this masterpiece:
- Apples: About six medium-sized apples, peeled, cored, and sliced. I prefer a mix of Granny Smith (for tartness) and Honeycrisp (for sweetness), but feel free to use your favorites.
- All-Purpose Flour: This forms the base of our glorious topping.
- Rolled Oats: Adds a delightful chewiness and rustic texture to the topping.
- Brown Sugar: Provides a warm, molasses-y sweetness that complements the apples perfectly.
- Granulated Sugar: Balances out the brown sugar and adds a touch of brightness.
- Butter: The key to a rich, flavorful, and utterly irresistible topping. Use unsalted butter for best results.
- Cinnamon: Because what’s apple crisp without cinnamon? Feel free to add a pinch of nutmeg or allspice too.
- Lemon Juice: A splash of lemon juice brightens the apple flavor and prevents them from browning.
- Alcohol-free vanilla extract: Enhances the overall flavor profile and adds a touch of warmth.
- Salt: A pinch of salt balances out the sweetness and brings out the other flavors.
From Orchard to Oven: Making the Apple Filling
First, prep the apples. Peel, core, and slice them into about 1/4-inch thick slices. Don’t worry about being too precise; rustic is the name of the game here. In a large bowl, combine the sliced apples with lemon juice, cinnamon, Alcohol-free vanilla extract, and a bit of granulated sugar. Toss everything together until the apples are evenly coated. This step is crucial for preventing the apples from browning and infusing them with delicious flavor.
Crafting the Crumbly Crown: The Topping that Makes the Magic
Now, for the star of the show: the topping! In a separate bowl, combine the flour, rolled oats, brown sugar, granulated sugar, and salt. Add the cold, cubed butter to the dry ingredients. Use a pastry blender or your fingers to cut the butter into the mixture until it resembles coarse crumbs. The key here is to work quickly and keep the butter cold. This will ensure that the topping is nice and crumbly, not greasy.
Assembly Time: Bringing It All Together
Preheat your oven to 375°F (190°C). Grease a 9-inch baking dish with butter or cooking spray. Pour the apple filling into the prepared baking dish. Sprinkle the crumb topping evenly over the apples. Try to distribute it as evenly as possible so that every bite has a perfect balance of apples and topping.
Baking to Golden Perfection
Place the baking dish in the preheated oven and bake for 30-40 minutes, or until the topping is golden brown and the apples are tender. If the topping starts to brown too quickly, you can tent the dish with foil for the last 10-15 minutes of baking. Let the apple crisp cool slightly before serving. This will allow the juices to thicken and prevent a soupy mess.
Serving Suggestions: Elevating the Experience
While this **Classic Apple Crisp Recipe** is delicious on its own, a few additions can elevate it to a whole new level. A scoop of vanilla ice cream is a classic pairing that never disappoints. A dollop of whipped cream adds a touch of lightness and fluffiness. For an extra touch of decadence, drizzle some caramel sauce over the top. Or, if you’re feeling adventurous, try serving it with a sprinkle of chopped pecans or walnuts.
Troubleshooting Tips: Avoiding Apple Crisp Catastrophes
Even the best bakers encounter occasional mishaps. Here are a few common problems and how to fix them:
- Soggy Bottom: If your apple crisp has a soggy bottom, it could be due to too much moisture in the apples. Make sure to drain any excess juice from the apples before adding the topping. You can also add a tablespoon or two of cornstarch to the apple filling to help absorb moisture.
- Burnt Topping: If the topping is browning too quickly, tent the dish with foil for the last 10-15 minutes of baking. You can also try lowering the oven temperature slightly.
- Dry Topping: If the topping is too dry, add a tablespoon or two of melted butter to the mixture. You can also try adding a splash of milk or cream.
Variations: Remixing the Classics
Want to put your own spin on this **Classic Apple Crisp Recipe**? Here are a few ideas:
- Berry Apple Crisp: Add a cup of mixed berries to the apple filling for a burst of flavor and color.
- Caramel Apple Crisp: Drizzle caramel sauce over the apples before adding the topping.
- Ginger Apple Crisp: Add a teaspoon of ground ginger to the apple filling for a warm, spicy kick.
- Nutty Apple Crisp: Add chopped nuts like pecans or walnuts to the topping for extra crunch and flavor.
(Personal anecdote formated as paragraph subheading)
One time, I accidentally used salted butter instead of unsalted, and while it wasn’t *bad*, the slightly salty-sweet flavor was definitely a surprise! Now I always double-check!
Conclusion for Classic Apple Crisp Recipe:
In short, this classic apple crisp recipe is an effortless way to create a warm and inviting dessert. The combination of tender apples and a crunchy oat topping offers a comforting treat that’s perfect for any occasion. Remember to adjust the sweetness to your liking, experiment with different apple varieties, and don’t be afraid to add your own special touch. Whether you serve it warm with a scoop of ice cream or enjoy it on its own, this simple dessert is guaranteed to please. Now, go bake and enjoy!
Print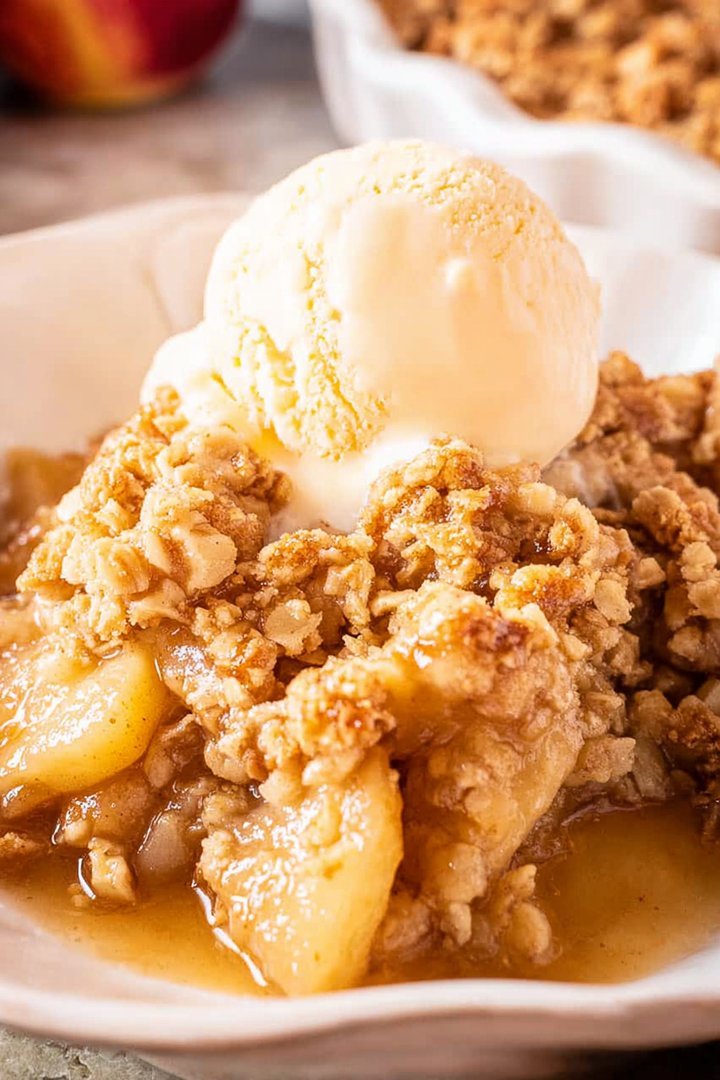
Classic Apple Crisp Recipe
Delicious classic apple crisp recipe recipe with detailed instructions and nutritional information.
- Total Time: 35 minutes
- Yield: 4 servings 1x
Ingredients
- 6 medium apples, peeled, cored, and sliced
- 1/2 cup all-purpose flour
- 1/2 cup rolled oats
- 1/2 cup packed brown sugar
- 1/4 teaspoon ground cinnamon
- 1/4 cup cold unsalted butter, cubed
- 2 tablespoons granulated sugar
- 1 tablespoon lemon juice
Instructions
- Step 1: Preheat oven to 375 degrees F (190 degrees C). Grease a 9-inch baking dish.
- Step 2: In a large bowl, toss the sliced apples with lemon juice and granulated sugar. Arrange apples evenly in the prepared baking dish.
- Step 3: In a separate bowl, combine flour, oats, brown sugar, and cinnamon. Cut in the cold butter using a pastry blender or your fingers until the mixture resembles coarse crumbs.
- Step 4: Sprinkle the crumble mixture evenly over the apples.
- Step 5: Bake in the preheated oven for 30-35 minutes, or until the topping is golden brown and the apples are tender.
- Step 6: Let cool slightly before serving. Serve warm, optionally with vanilla ice cream.
Notes
- Leftover apple crisp can be stored in the refrigerator, covered, for up to 3 days.
- For a warm and gooey treat, reheat individual portions in the microwave for 30-60 seconds.
- A scoop of vanilla ice cream or a dollop of whipped cream elevates this classic dessert beautifully.
- For extra flavor, try using a mix of apple varieties like Granny Smith and Honeycrisp.
- Prep Time: 15 minutes
- Cook Time: 20 minutes
- Method: Stovetop
- Cuisine: American
FAQs:
Can I use different types of apples for this classic apple crisp recipe?
Absolutely! The beauty of this classic apple crisp recipe is its adaptability. While Granny Smiths provide a tart contrast to the sweet topping, you can experiment with other varieties. Honeycrisp offer a delightful sweetness and crisp texture, while Fuji apples bring a mellow flavor. A mix of different apples will add complexity and depth to your dessert. Just ensure the total apple quantity remains consistent with the recipe, and adjust the sugar slightly depending on the apples’ inherent sweetness. No matter your choice, your apple crisp will be a guaranteed hit!
How do I prevent my classic apple crisp recipe from becoming soggy?
Nobody likes a soggy bottom! To avoid a soggy classic apple crisp recipe, a few tricks are key. First, make sure your apples aren’t overly juicy. If they are, gently toss them with a tablespoon of cornstarch before adding them to the baking dish. Second, ensure the topping is evenly distributed to create a protective layer. Lastly, don’t cover the crisp while it’s baking, as this traps moisture. Baking it uncovered allows the topping to crisp up beautifully. Enjoy the satisfying crunch!
What’s the best way to store leftover apple crisp?
Storing your leftover classic apple crisp recipe is simple. Allow the crisp to cool completely before covering it tightly with plastic wrap or transferring it to an airtight container. You can store it in the refrigerator for up to three days. Reheat individual portions in the microwave for about 30-60 seconds, or warm the entire dish in a low oven (around 300°F or 150°C) until heated through. Adding a scoop of vanilla ice cream makes it even more delightful the second time around!
Can I freeze apple crisp?
Yes, you can definitely freeze your classic apple crisp recipe! To freeze, let it cool completely. Then, wrap it tightly in plastic wrap, followed by a layer of aluminum foil. For individual servings, cut the crisp into squares before wrapping. You can freeze it for up to three months. When ready to enjoy, thaw it overnight in the refrigerator. Reheat as mentioned above, and you’ll have a taste of autumn whenever you crave it. Frozen apple crisp is a wonderful make-ahead dessert option.


Leave a Comment