
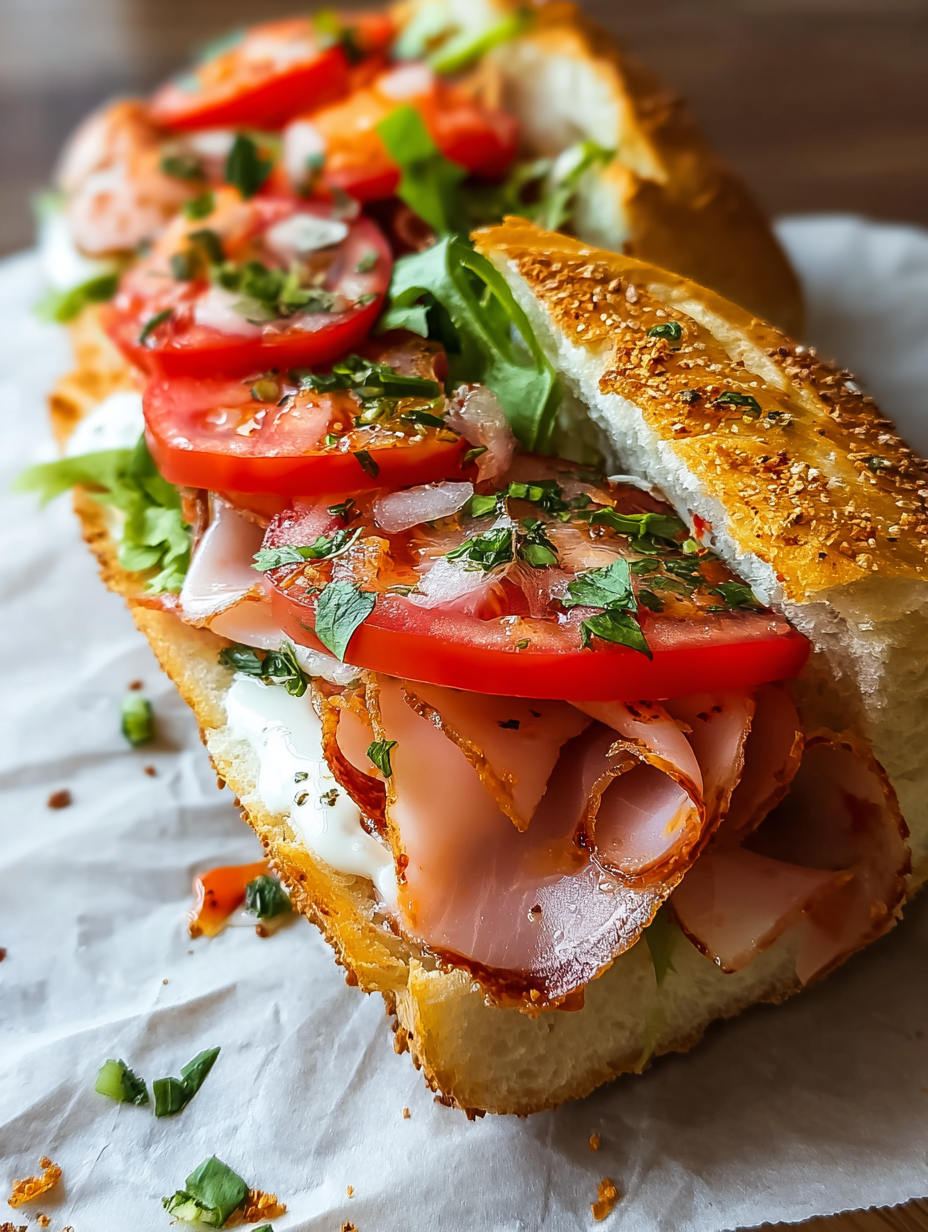
Oh, the Classic Italian Sub! Just envision layers of savory goodness, a symphony of flavors dancing on your taste buds. Picture this: fresh bread hugging juicy meats, crisp veggies, and a tangy vinaigrette, all coming together in perfect harmony.
This isn’t just a sandwich; it’s a culinary journey. It’s the kind of meal that makes you close your eyes and savor every single bite, a reminder of simpler times and happy moments. Get ready to assemble a masterpiece!
- Effortless to assemble, making it the perfect quick lunch or picnic treat.
- A vibrant explosion of flavors, combining savory meats, crunchy vegetables, and zesty dressing.
- Beautiful layers create a visually appealing sub that is sure to impress everyone.
- Fully customizable with your favorite ingredients, offering endless possibilities and flavor combinations.
Ingredients for Classic Italian Sub
Here’s what you’ll need to make this delicious dish:
The full ingredients list, including measurements, is provided in the recipe card directly below.
How to Make Classic Italian Sub
Follow these simple steps to prepare this delicious dish:
Step 1: Bread Prep
Slice the Italian bread horizontally, creating a top and bottom half. Drizzle a little olive oil over the cut sides of both halves. This helps prevent the bread from getting soggy when you add the fillings.
Step 2: Cheese Layering
On the bottom half of the bread, start by layering provolone cheese slices. Make sure the cheese covers the entire surface to create a barrier between the bread and the moist ingredients.
Step 3: Meat Medley
Next, layer the sliced turkey breast, roast beef, and chicken breast on top of the cheese. Distribute the meats evenly to ensure every bite is packed with flavor. Don’t be shy, but also don’t overstuff it to the point where it’s impossible to eat.
Step 4: Veggie Power
Arrange the romaine lettuce, tomato slices, red onion slices, and banana peppers on top of the meat layers. Try to spread the veggies evenly for a balanced flavor profile and satisfying crunch in every bite.
Step 5: Dressing Drizzle
Generously drizzle Italian dressing over the vegetables and meats. This adds a tangy, zesty flavor that ties all the ingredients together. Feel free to adjust the amount of dressing to your personal preference.
Step 6: Final Assembly
Carefully place the top half of the bread over the fillings. Gently press down to compress the sub slightly. If desired, slice the sub in half or into smaller portions for easier serving. Serve immediately and enjoy the explosion of flavors!
Perfecting the Cooking Process
To achieve the ultimate culinary masterpiece, start by prepping all your ingredients. Construct the sub assembly line style to allow for quick construction, ensuring each component is ready for the final assembly. This process will make the whole thing seamless.
Add Your Touch
Feel free to swap out the provolone for mozzarella if you’re feeling adventurous. Kick up the spice with some pickled peppers, or add marinated artichoke hearts for a tangy twist. Don’t be afraid to experiment and make it your own creation.
Storing & Reheating
Wrap any leftover subs tightly in plastic wrap and store them in the refrigerator. If you intend to reheat, consider doing so in a toaster oven to keep the bread crisp. You want to avoid a soggy sandwich at all costs!
- Use a serrated knife to slice the bread evenly for a picture-perfect Classic Italian Sub every time.
- Don’t overload the bread with too many fillings to avoid a messy situation; quality over quantity.
- Toast the bread lightly before assembling to prevent it from getting soggy from the sauces and fillings.
(Personal anecdote formated as paragraph subheading)
I still remember the time my friend insisted on adding pineapple to his Italian sub, and the look on his face when he realized the error of his ways. Some things are best left untouched, folks.
A Sub Above the Rest: Diving into the Classic Italian Sub
Ah, the Classic Italian Sub. It’s not just a sandwich; it’s a culinary adventure, a symphony of flavors all nestled between two slices of delicious bread. I like to think of it as the edible equivalent of a really good action movie – exciting, satisfying, and leaves you wanting more. But let’s be honest, making a truly great sub at home can sometimes feel like navigating a minefield. Fear not, fellow food enthusiasts! I am here to guide you through the delicious chaos with a recipe that’s both foolproof and utterly fantastic. Forget the deli line; your kitchen is about to become the hottest sub shop in town.
The Bread: Our Foundation of Flavor
First things first, let’s talk bread. This isn’t just any old loaf; this is the foundation upon which our flavor palace will be built. You want something sturdy enough to hold all those glorious fillings, but also soft enough to yield with each bite. An Italian loaf, a hoagie roll, or even a crusty baguette will work wonders here.
But here’s a pro tip: lightly toast the bread before you start piling on the goodies. This creates a subtle crunch and acts as a barrier against soggy fillings. Trust me, nobody wants a soggy sub; it’s like wearing wet socks – just a universally unpleasant experience. We are aiming for structural integrity.
The Meats: Building a Flavorful Profile
Now for the fun part – the meats! A truly authentic Italian sub boasts a trio of delectable choices: thinly sliced chicken, savory beef, and flavorful turkey. Each contributes its unique character to the overall flavor profile.
But remember, quality is key. Head to your local deli counter and ask for the good stuff. You (and your taste buds) deserve it. I am a firm believer that life is too short for mediocre cold cuts. If you are feeling fancy, consider adding a layer of prosciutto-style cured chicken or beef to really amp up the flavor.
The Cheeses: Creamy, Dreamy Goodness
Next up, let’s talk cheese. Provolone is the classic choice for a reason – its mild, slightly tangy flavor complements the meats perfectly. But hey, rules are meant to be broken, right? If you’re feeling adventurous, try swapping it out for some fresh mozzarella or creamy Havarti.
The key is to choose a cheese that melts beautifully and adds a touch of richness to the sub. And don’t be shy! A generous layer of cheese is never a bad thing in my book. I always say, more cheese, please!
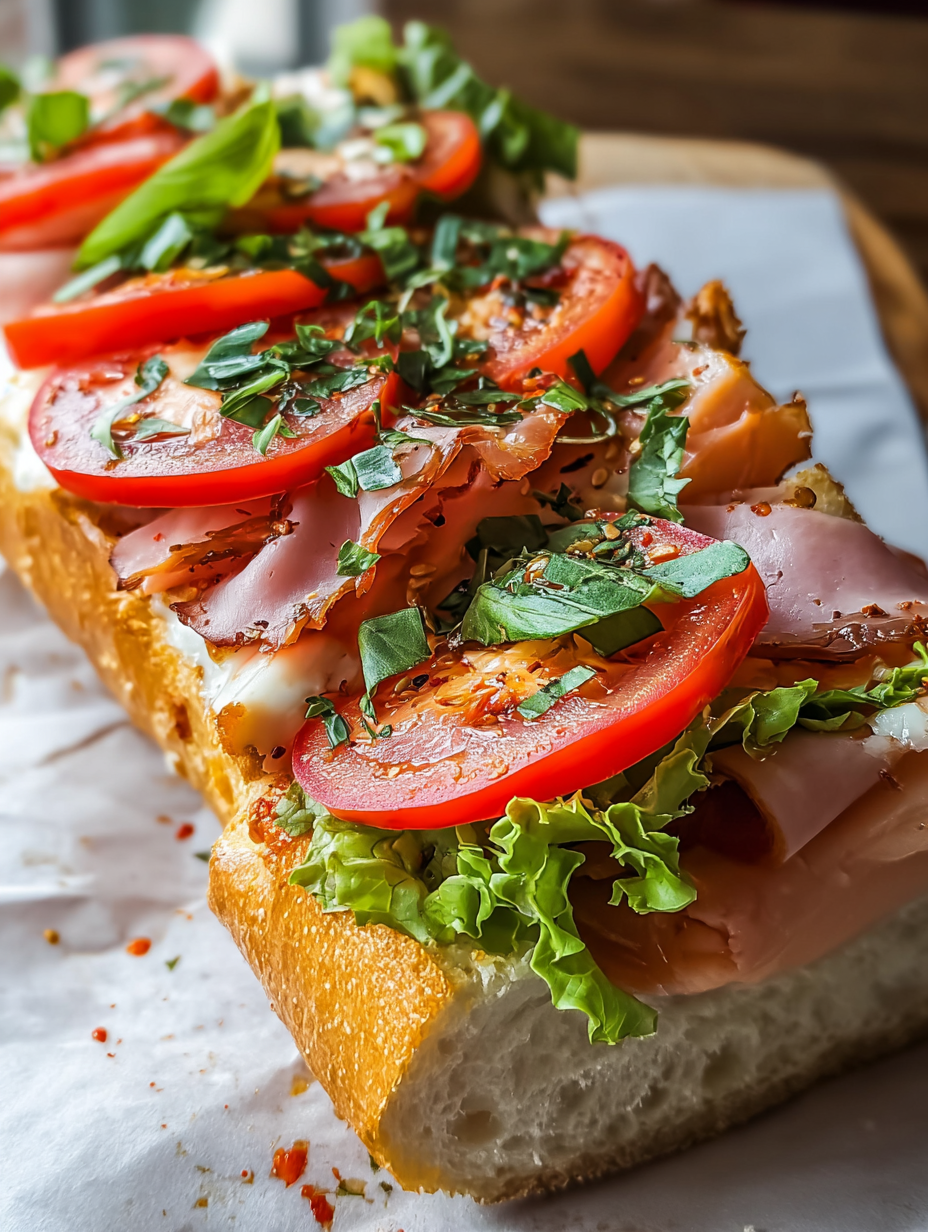
The Veggies: Adding Freshness and Crunch
No Italian sub is complete without a colorful array of fresh veggies. Crisp lettuce, juicy tomatoes, thinly sliced onions, and tangy banana peppers are all essential players in this flavor symphony.
But here’s where you can really get creative. Add some roasted red peppers for a touch of sweetness, some marinated artichoke hearts for a briny bite, or even some peppery arugula for a hint of bitterness. The possibilities are endless! Just remember to pat your veggies dry before adding them to the sub to prevent it from getting soggy. Soggy is the enemy, remember?
The Dressing: The Grand Finale
Last but not least, let’s talk dressing. This is what ties all the flavors together and elevates the sub from good to great. A simple vinaigrette made with olive oil, red wine vinegar, garlic, oregano, and a pinch of salt and pepper is the classic choice.
But if you’re feeling fancy, try whipping up a batch of pesto mayo or a creamy balsamic vinaigrette. And don’t forget the spicy mustard! A little bit of heat can really bring out the flavors of the meats and cheeses. Just be careful not to overdo it – you want to complement the flavors, not overpower them.
Crafting Your Classic Italian Sub: The Recipe
Alright, enough chit-chat! Let’s get down to business and make this amazing Classic Italian Sub.
Ingredients for Your Masterpiece
- 1 Italian loaf, hoagie roll, or baguette
- 4 ounces thinly sliced chicken
- 4 ounces thinly sliced beef
- 4 ounces thinly sliced turkey
- 4 ounces provolone cheese, sliced
- 1/2 cup shredded lettuce
- 1/2 cup sliced tomatoes
- 1/4 cup thinly sliced red onion
- 1/4 cup banana peppers
- 2 tablespoons olive oil
- 1 tablespoon red wine vinegar
- 1 clove garlic, minced
- 1/2 teaspoon dried oregano
- Salt and pepper to taste
- Spicy mustard (optional)
Step-by-Step Sub Construction Guide
1. First, slice the bread lengthwise and lightly toast it, if desired.
2. Next, drizzle the olive oil and red wine vinegar over the bread.
3. Rub the minced garlic over the bread for added flavor.
4. Then, layer the meats and cheese on the bottom half of the bread.
5. Top with lettuce, tomatoes, red onion, and banana peppers.
6. Sprinkle with oregano, salt, and pepper.
7. Spread spicy mustard on the top half of the bread, if desired.
8. Finally, close the sub and slice it in half.
9. Serve immediately and enjoy your creation!
Variations on a Theme: Level Up Your Sub Game
Okay, so you’ve mastered the basic Classic Italian Sub. Now what? Time to get creative! Here are a few ideas to take your sub game to the next level:
- **The Spicy Sub:** Add some pickled jalapeños, hot sauce, or a sprinkle of red pepper flakes for an extra kick.
- **The Veggie-Lover’s Sub:** Load up on roasted red peppers, marinated artichoke hearts, and grilled zucchini.
- **The Mediterranean Sub:** Add some feta cheese, Kalamata olives, and a drizzle of olive oil.
- **The Ultimate Sub:** Combine all of the above for a truly epic culinary experience.
The beauty of the Classic Italian Sub is that it’s a blank canvas. Feel free to experiment with different ingredients and flavors until you find your perfect combination. Don’t be afraid to get a little messy – that’s part of the fun!
The Secret Ingredient: Love (and Good Bread)
At the end of the day, the most important ingredient in any Classic Italian Sub is love. Okay, and maybe good bread too. But seriously, take your time, use high-quality ingredients, and put your heart into it. The result will be a sub that’s not only delicious but also a reflection of your own culinary passion.
So go forth and create! Your taste buds (and your friends and family) will thank you for it. And remember, life’s too short for boring sandwiches. Embrace the chaos, savor the flavors, and enjoy the delicious journey of crafting the perfect Classic Italian Sub.
Conclusion for Classic Italian Sub
This isn’t just any sandwich; it’s a portal to a sun-drenched Italian deli (minus the plane ticket). With layers of flavor that dance on your tongue, it’s an instant crowd-pleaser. From the perfectly crusty bread to the tangy vinaigrette, every component plays its part in creating a symphony of deliciousness. So ditch the boring lunch routine and treat yourself to a classic Italian sub. Your taste buds (and your stomach) will thank you for it!
Print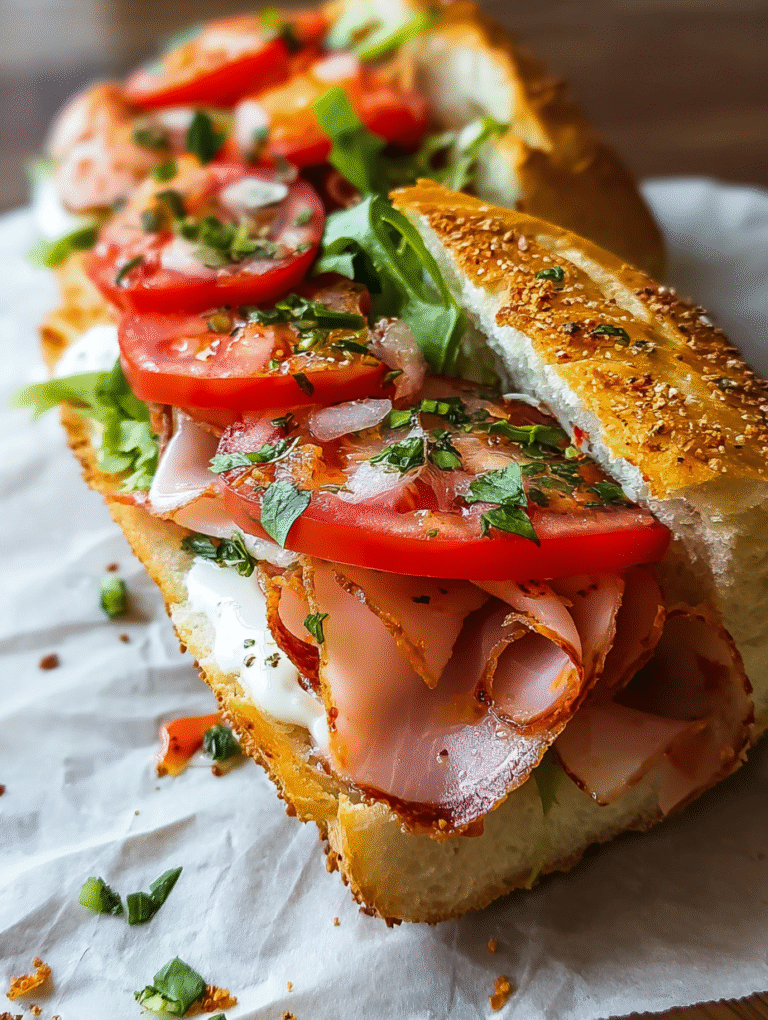
Classic Italian Sub
Delicious classic italian sub recipe with detailed instructions and nutritional information.
- Total Time: 35 minutes
- Yield: 4 servings
Ingredients
- Italian Hoagie Roll: 1 large
- Genoa Salami: 4 ounces, thinly sliced
- Capicola: 4 ounces, thinly sliced
- Provolone Cheese: 4 ounces, thinly sliced
- Shredded Lettuce: 1 cup
- Tomato: 1 medium, sliced
- Red Onion: 1/4 medium, thinly sliced
- Italian Dressing: 2 tablespoons
Instructions
- Step 1: Slice the hoagie roll horizontally, being careful not to cut all the way through, creating a top and bottom half.
- Step 2: Layer the provolone cheese on the bottom half of the roll.
- Step 3: Arrange the salami and capicola on top of the cheese.
- Step 4: Add the shredded lettuce, tomato slices, and red onion slices over the meats.
- Step 5: Drizzle the Italian dressing over the vegetables.
- Step 6: Close the sandwich with the top half of the roll and serve immediately.
Notes
- To prevent sogginess, wrap the assembled sub tightly in plastic wrap and refrigerate for up to 2 hours before serving.
- This sub is best enjoyed fresh, but if you must reheat it, try toasting the bread separately for a few minutes to restore some crispness.
- Serve this classic sub with a side of crispy potato chips or a simple pasta salad for a complete and satisfying meal.
- For an extra flavor boost, marinate the sliced tomatoes and onions in a little of the Italian dressing for about 15 minutes before assembling the sub.
- Prep Time: 15 minutes
- Cook Time: 20 minutes
- Method: Stovetop
- Cuisine: American
FAQs
What Makes This Classic Italian Sub So Darn Delicious?
Okay, picture this: You’re strolling through Italy (in your mind, because let’s face it, plane tickets are expensive). You stumble upon a tiny deli, the air thick with the aroma of cured meats and tangy vinegar. This classic Italian sub is *that* experience, bottled up in a sandwich. We’re talking layers of savory sliced turkey, juicy tomatoes, crisp lettuce, and a zesty vinaigrette that’ll make your taste buds sing opera. The magic lies in the quality ingredients and the perfect balance of flavors. It’s a symphony of deliciousness in every bite!
Can I Customize My Classic Italian Sub at Home?
Absolutely! Think of this recipe as a guideline, not a gospel. Feel free to swap out the turkey for sliced chicken or roast beef. Don’t like tomatoes? Add some roasted red peppers instead! The beauty of a great sub is its versatility. You can add pickles, banana peppers, or even a sprinkle of Parmesan cheese for extra flavor. Just remember to keep the core components—good bread, quality fillings, and a tangy dressing—consistent. Get creative and make it your own signature creation!
What Kind of Bread is Best for an Italian Sub?
Alright, let’s talk bread, because it’s the foundation of any good sandwich. You want something sturdy enough to hold all those delicious fillings without getting soggy, but also soft enough to bite into easily. An Italian loaf or a hoagie roll is ideal. If you can find a locally baked loaf, even better! A good crust provides a satisfying chew, while the soft interior soaks up all the flavorful dressing. Don’t skimp on the bread; it’s worth the extra effort.
How Do I Prevent My Sub From Getting Soggy?
Soggy subs are the bane of every sandwich lover’s existence. The key is to build it strategically. Start by layering the lettuce next to the bread to create a moisture barrier. Avoid piling wet ingredients directly on the bread. Also, don’t dress the sub until just before serving. If you’re making it ahead of time, keep the dressing separate and add it when you’re ready to eat. Trust me, a little planning goes a long way in preventing the dreaded soggy sandwich scenario. You can also lightly toast the bread to give it a bit more structural integrity.


Leave a Comment