

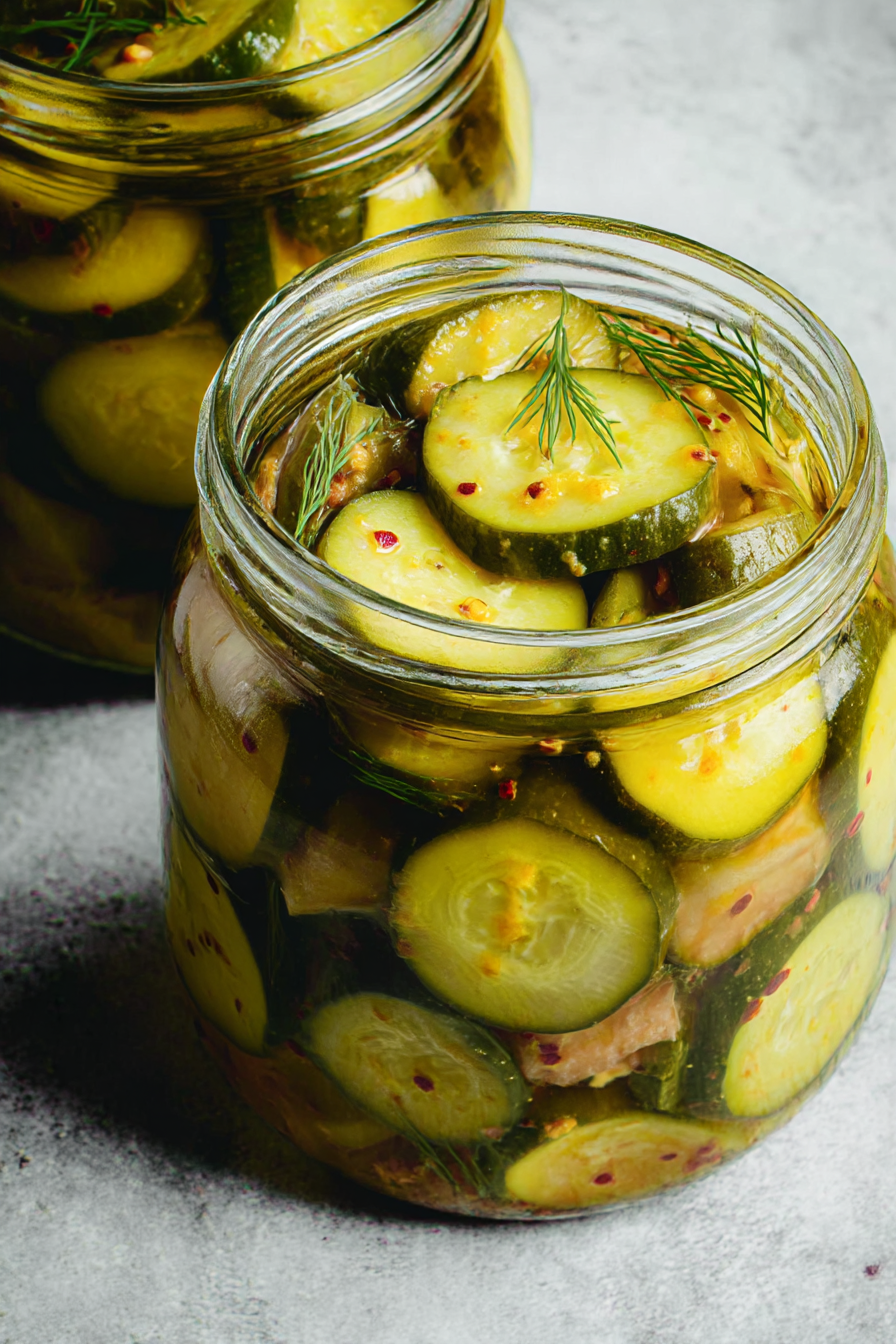
Oh, the tangy, sweet, and utterly irresistible charm of bread and butter pickles! Imagine biting into a crisp, golden slice, the sweetness dancing on your tongue, followed by a delightful tang that makes your taste buds sing. It is like a burst of sunshine in every bite.
These aren’t just any pickles; they’re a nostalgic trip to simpler times, a perfect blend of sweet and sour that elevates everything from sandwiches to cheese boards. They bring a delightful crunch and vibrant flavor that makes every meal feel like a celebration. Trust me, you are in for a treat.
Here are a few reasons why you’ll absolutely adore this bread and butter pickles recipe:
This recipe offers a straightforward process, making it perfect for both beginner and seasoned pickle enthusiasts.
The delightful flavor profile strikes the perfect balance between sweetness, tanginess, and a hint of spice.
The vibrant yellow hue and perfectly crisp texture make these pickles a visually appealing addition to any dish.
Enjoy them straight from the jar, on sandwiches, burgers, or as a tasty complement to cheese and charcuterie boards.
Ingredients for Bread and Butter Pickles
Here’s what you’ll need to make this delicious dish:
The full ingredients list, including measurements, is provided in the recipe card directly below.
How to Make Bread and Butter Pickles
Follow these simple steps to prepare this delicious dish:
Step 1: Prepare the Vegetables
Wash and thinly slice the cucumbers, onions, and bell pepper. Place them in a large bowl. You want consistent slices for even pickling.
Step 2: Combine and Salt
Sprinkle the salt over the sliced vegetables. Toss well to ensure the salt is evenly distributed. Cover the bowl with a clean cloth or plastic wrap, and let it sit for at least 2 hours, or preferably overnight, in the refrigerator. This step helps draw out excess moisture, resulting in crisper pickles.
Step 3: Make the Brine
In a large, non-reactive pot (stainless steel or enamel), combine the white vinegar, sugar, turmeric powder, mustard seeds, and celery seeds. Bring the mixture to a boil over medium-high heat, stirring until the sugar is completely dissolved. This creates the flavorful pickling brine.
Step 4: Combine Vegetables and Brine
Drain the salted vegetables thoroughly, rinsing them under cold water if desired to remove excess salt. Add the drained vegetables to the boiling brine. Bring the mixture back to a boil, then reduce the heat and simmer for about 10 minutes, stirring occasionally. This step ensures the vegetables are properly infused with the brine.
Step 5: Jar the Pickles
Carefully transfer the hot pickles and brine into sterilized jars, leaving about 1/2 inch of headspace at the top. Remove any air bubbles by gently tapping the jars on the counter. Wipe the jar rims clean with a damp cloth.
Step 6: Process for Storage
Place the lids and rings on the jars, tightening them until they are finger-tight. Process the jars in a boiling water bath for 10 minutes for pint jars or 15 minutes for quart jars. This ensures a proper seal for long-term storage. If you prefer to skip the water bath, you can store the pickles in the refrigerator for up to a month.
Let the jars cool completely before checking the seals. The lids should be concave and not flex when pressed. Store any unsealed jars in the refrigerator and consume within a few weeks. Enjoy your homemade bread and butter pickles on sandwiches, burgers, or as a delicious side!
Perfecting the Cooking Process
For impeccably crisp pickles, maintaining a steady simmering temperature is key. Combine your brine ingredients first, ensuring the sugar and salt are fully dissolved before adding the cucumbers. This prevents hot spots and guarantees consistent flavor penetration.
Add Your Touch
Unleash your inner pickle Picasso! Add a pinch of red pepper flakes for a zesty kick, or incorporate sliced onions and garlic for depth. Experiment with different vinegar types for a unique flavor profile – rice vinegar can be a delightful twist.
Storing & Reheating
Once cooled, transfer your **Bread and Butter Pickles** to airtight jars and refrigerate. These pickles are best enjoyed cold, straight from the fridge. Stored properly, they’ll maintain their delightful crunch for up to two weeks.
Three expert tips for amazing **Bread and Butter Pickles**:
- Slice your cucumbers uniformly; this ensures they pickle evenly and each bite is as satisfying as the last.
- Don’t overcook the brine; a gentle simmer is all you need to meld those flavors into perfect pickled harmony.
- Allow the pickles to mature in the refrigerator for at least 24 hours; this allows the flavors to fully develop.
(Personal anecdote formated as paragraph subheading)
My grandma always said the secret to great pickles was a pinch of patience. I scoffed then, but now, letting them sit overnight truly makes all the difference in the world of flavor.
The Quirky Tale of Pickles and Me
Oh, pickles. Where do I even begin? My relationship with these crunchy, tangy delights is a rollercoaster of epic proportions. As a kid, I thought they were only good for sneaking out of the jar when my mom wasn’t looking. Now, I consider myself a connoisseur, a pickle professor, if you will. And **Bread and Butter Pickles**? They hold a special place in my heart (and my fridge).
You see, I used to think all pickles were created equal. Dill pickles were the standard, the baseline. But then, one fateful summer barbecue, I encountered a jar of homemade **Bread and Butter Pickles**. The sweet, slightly sour, subtly spiced symphony that exploded in my mouth changed my pickle perception forever. I was a convert, a disciple, a card-carrying member of the **Bread and Butter Pickles** fan club.
I’ve been on a quest to perfect the **Bread and Butter Pickles** recipe ever since. There have been triumphs (the time I nailed the brine ratio) and epic fails (the batch that tasted suspiciously like potpourri). But through it all, I’ve learned that making pickles is more than just following a recipe; it’s about channeling your inner mad scientist, embracing the unexpected, and having a whole lot of fun.
So, buckle up, buttercup, because we’re about to embark on a pickling adventure together. We’ll laugh, we’ll learn, and hopefully, we’ll end up with a jar full of the most delicious **Bread and Butter Pickles** you’ve ever tasted. And who knows, maybe you’ll even join my fan club.
What Makes These Pickles So Darn Special?
Alright, let’s dive into the nitty-gritty of what makes **Bread and Butter Pickles** so irresistible. It’s not just the crunch (though that’s definitely a factor). It’s the perfect balance of sweet and tangy, the subtle warmth of the spices, and the way they just seem to brighten up any dish they grace.
Unlike their dill-dominated cousins, **Bread and Butter Pickles** boast a sweeter profile, thanks to the generous addition of sugar to the brine. But don’t let that fool you – they’re not cloyingly sweet. The vinegar provides a necessary counterpoint, creating a complex flavor that dances on your tongue.
Then there’s the spice blend. Turmeric lends a beautiful golden hue and a subtle earthy note, while mustard seeds and celery seeds add a delightful aromatic depth. A touch of onion and bell pepper contributes a savory element, rounding out the flavor profile and preventing the pickles from being one-dimensional.
In short, **Bread and Butter Pickles** are a flavor explosion in every bite. They’re the perfect accompaniment to sandwiches, burgers, salads, or even just eaten straight from the jar (no judgment here!).
Gather Your Arsenal: The Ingredient Rundown
Before we get our hands dirty, let’s make sure we have all the necessary weapons in our culinary arsenal. Here’s a breakdown of the key ingredients you’ll need to create **Bread and Butter Pickles** that will knock your socks off:
- **Cucumbers:** The star of the show! Choose firm, fresh cucumbers, preferably pickling cucumbers (such as Kirby cucumbers) for the best crunch. Slice them into even rounds, about 1/4 inch thick.
- **Vinegar:** White vinegar is the traditional choice, but feel free to experiment with other varieties, such as rice vinegar or apple cider vinegar. The acidity of the vinegar is crucial for preserving the pickles and giving them their signature tang.
- **Sugar:** Granulated sugar is the most common sweetener, but you can also use brown sugar or even honey for a slightly different flavor. Adjust the amount of sugar to your liking, depending on how sweet you prefer your pickles.
- **Onion and Bell Pepper:** These add a savory element and a touch of sweetness. Use yellow onion and any color bell pepper you like (green, red, or yellow all work well).
- **Spices:** Turmeric, mustard seeds, celery seeds, and black peppercorns are the classic spice blend. Don’t be afraid to experiment with other spices, such as coriander seeds, dill seeds, or red pepper flakes.
- **Salt:** Pickling salt is ideal, as it doesn’t contain iodine, which can discolor the pickles. However, kosher salt can be used as a substitute.
- **Water:** Distilled water is recommended, as it doesn’t contain any minerals that can affect the flavor or color of the pickles.
Step-by-Step: From Cucumber to Crunchy Goodness
Alright, aspiring pickle pros, let’s get down to business! Here’s a detailed, step-by-step guide to making **Bread and Butter Pickles** that will have everyone begging for more:
1. **Prep the Cucumbers: ** Wash and slice your cucumbers into even rounds. Place them in a large bowl.
2. **Add Veggies: ** Add sliced onion and bell pepper to the bowl with the cucumbers.
3. **Brine Time: ** In a large pot, combine vinegar, sugar, salt, turmeric, mustard seeds, celery seeds, and black peppercorns. Bring the mixture to a simmer over medium heat, stirring until the sugar and salt are dissolved.
4. **Pour and Wait: ** Pour the hot brine over the cucumbers and vegetables. Let the mixture sit for at least 2 hours, or preferably overnight, in the refrigerator. This allows the cucumbers to release some of their excess water and absorb the flavors of the brine.
5. **Jar It Up: ** Pack the cucumber mixture into sterilized jars, leaving about 1/2 inch of headspace at the top.
6. **Simmer Again: ** Pour the brine into the pot and bring to a simmer over medium heat.
7. **Seal the Deal: ** Carefully pour the hot brine over the cucumbers in the jars, leaving about 1/2 inch of headspace. Remove any air bubbles by gently tapping the jars on the counter.
8. **Process (Optional): ** For long-term storage, process the jars in a boiling water bath for 10 minutes. This ensures that the pickles are properly sealed and will remain shelf-stable. If you’re not planning on canning the pickles, you can skip this step and simply store them in the refrigerator.
9. **Cool and Wait (Again!): ** Let the jars cool completely at room temperature. You should hear a “pop” as the lids seal.
10. **Refrigerate and Enjoy: ** Store the pickles in the refrigerator for at least 24 hours before eating. This allows the flavors to fully develop and meld together.
Troubleshooting Your Pickle Predicaments
Even the most seasoned pickle maker can run into a few snags along the way. Here are some common pickle problems and how to fix them:
- **Soft Pickles:** This is usually caused by using cucumbers that are not fresh or by not using enough vinegar. Make sure to use firm, fresh cucumbers and follow the recipe carefully, paying attention to the vinegar-to-water ratio.
- **Pickles That Are Too Sweet:** Reduce the amount of sugar in the brine next time. You can also add a splash of vinegar to balance out the sweetness.
- **Pickles That Are Too Sour:** Add a little more sugar to the brine. You can also try using a milder vinegar, such as rice vinegar.
- **Discolored Pickles:** This can be caused by using iodized salt or by not processing the jars properly. Use pickling salt or kosher salt and make sure to follow the canning instructions carefully.
Serving Suggestions: Beyond the Sandwich
While **Bread and Butter Pickles** are a classic sandwich topping, their culinary versatility extends far beyond the realm of lunchtime. Here are some creative ways to incorporate these tangy treats into your meals:
- **Burger Bonanza:** Elevate your burgers with a generous helping of **Bread and Butter Pickles**. Their sweet and tangy flavor perfectly complements the savory richness of the beef.
- **Salad Sensation:** Add chopped **Bread and Butter Pickles** to your favorite salads for a burst of flavor and crunch. They’re especially delicious in potato salad, coleslaw, and tuna salad.
- **Charcuterie Champion:** Include **Bread and Butter Pickles** on your charcuterie board alongside cheeses, meats, and crackers. They provide a refreshing counterpoint to the richer elements.
- **Snack Attack:** Enjoy **Bread and Butter Pickles** straight from the jar as a satisfying and flavorful snack.
(Personal anecdote formated as paragraph subheading)
I once added chopped **Bread and Butter Pickles** to my scrambled eggs on a whim. My friends thought I was crazy, but they were converts after one bite!
The Final Crunch
So there you have it: everything you need to know to create your own batch of amazing **Bread and Butter Pickles**. Don’t be afraid to experiment with different ingredients and spices to create a flavor that’s uniquely your own. And remember, the most important ingredient is love (and maybe a little bit of vinegar). Happy pickling!
Conclusion for Bread and Butter Pickles :
So, there you have it: a delicious dive into the world of Bread and Butter Pickles! These sweet and tangy treats are surprisingly easy to make at home. They’re versatile, adding a burst of flavor to everything from sandwiches to salads. Whether you choose to can them for long-term enjoyment or whip up a batch for the fridge, get ready for a pickle experience that’s anything but ordinary. Now, go forth and pickle! You won’t regret it.
Print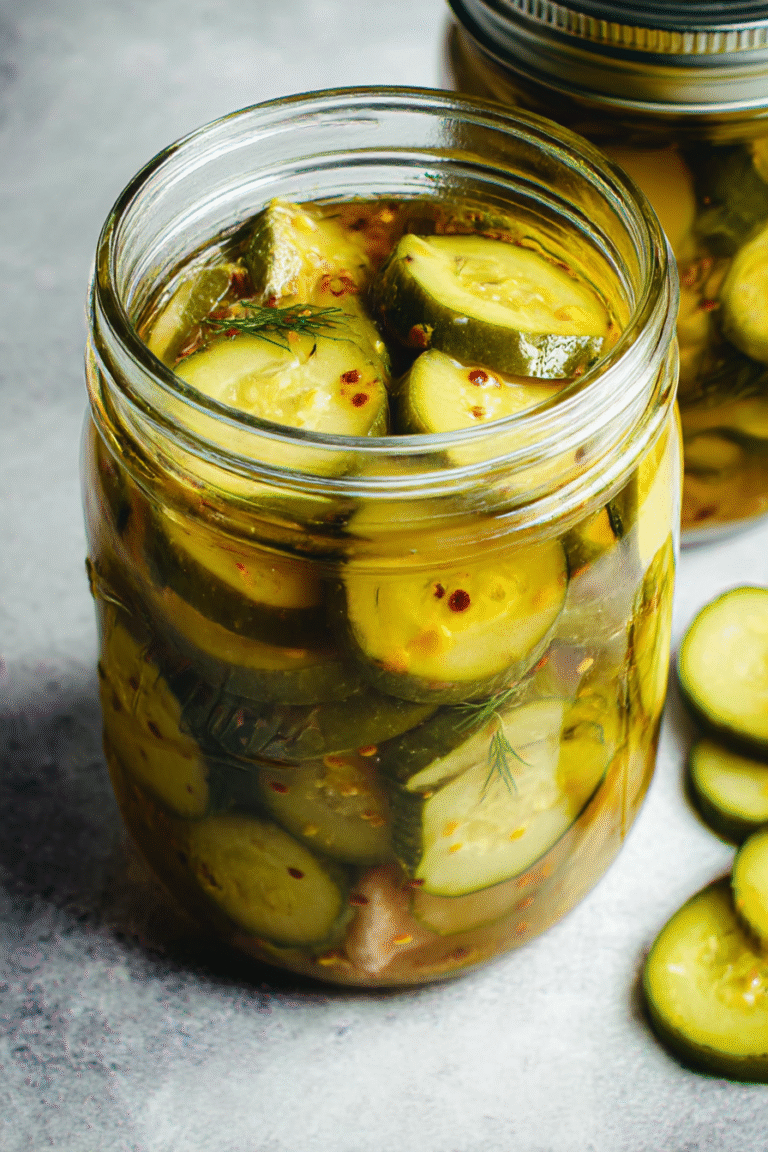
Bread and Butter Pickles
Delicious bread and butter pickles recipe with detailed instructions and nutritional information.
- Total Time: 35 minutes
- Yield: 4 servings
Ingredients
- Cucumbers (4-6 inches long) – 4 pounds
- White Vinegar – 5 cups
- Granulated Sugar – 4 cups
- Pickling Salt – 2 tablespoons
- Mustard Seeds – 2 tablespoons
- Celery Seeds – 1 tablespoon
- Turmeric – 1 teaspoon
- Onion, thinly sliced – 1 large
Instructions
- Step 1: Wash cucumbers thoroughly. Slice into 1/4-inch thick rounds. Place cucumber slices and thinly sliced onion in a large bowl.
- Step 2: In a separate large, non-reactive pot, combine the vinegar, sugar, pickling salt, mustard seeds, celery seeds, and turmeric. Bring the mixture to a boil over medium-high heat, stirring until the sugar and salt are dissolved.
- Step 3: Pour the hot vinegar mixture over the cucumber and onion slices. Stir gently to ensure all the vegetables are coated in the brine.
- Step 4: Cover the bowl and let the mixture sit at room temperature for at least 2 hours, or preferably overnight, to allow the cucumbers to release some of their moisture.
- Step 5: Pack the cucumber and onion slices into sterilized jars, leaving 1/2 inch headspace. Pour the hot brine over the cucumbers, leaving 1/2 inch headspace. Remove any air bubbles.
- Step 6: Process the jars in a boiling water bath for 10 minutes for pint jars or 15 minutes for quart jars (adjust time based on altitude). After processing, remove the jars and let them cool completely. Check the seals before storing in a cool, dark place for at least 2 weeks before enjoying.
Notes
- For optimal flavor, resist the urge to open a jar right away; two weeks of pickling allows the spices to fully meld.
- These pickles are delicious alongside grilled cheese sandwiches or as a tangy addition to a charcuterie board.
- Don't discard leftover brine after the pickles are gone; it can be used to marinate chicken or add zing to potato salad.
- To ensure a crispier pickle, add a handful of grape leaves to the bottom of each jar before filling, as the tannins help maintain firmness.
- Prep Time: 15 minutes
- Cook Time: 20 minutes
- Method: Stovetop
- Cuisine: American
FAQs :
What exactly *are* Bread and Butter Pickles?
Okay, let’s clear this up right away. These aren’t pickles slathered in butter, thank goodness! Imagine crispy, sweet, tangy cucumbers, swimming in a vinegary brine. The “bread and butter” part comes from their historical reputation as a pantry staple; they were often traded *for* bread and butter. These pickles are a delightful mix of sweet and sour. They are perfect for snacking straight from the jar or adding a zing to your favorite dishes.
How do I store my homemade Bread and Butter Pickles?
Storing your tangy treats properly is key! Once your jars are sealed and cooled, store them in a cool, dark place. A pantry or basement works great. Properly canned pickles can last for a year or even longer. Once opened, store them in the refrigerator, and they should stay crisp and tasty for a few weeks. Just make sure to keep them submerged in their delicious brine. Nobody likes a sad, lonely, half-exposed pickle!
What dishes go well with homemade Bread and Butter Pickles?
The possibilities are endless! Think beyond the burger. These pickles are amazing with creamy salads, like chicken or egg salad. Dice them up and add them to your favorite potato salad recipe for a sweet and tangy kick. They’re also fantastic alongside grilled chicken or beef. The sweetness cuts through the richness perfectly. And of course, a simple cheese and cracker plate is instantly elevated with a few slices of these sweet and sour delights. Don’t be afraid to experiment!
Can I make Bread and Butter Pickles without canning them?
Absolutely! If you’re intimidated by the canning process, don’t worry. You can make refrigerator pickles. Simply follow the recipe, let the pickles cool completely, and then store them in an airtight container in the refrigerator. Refrigerator pickles won’t last as long as canned pickles. Aim to eat them within a couple of weeks. But let’s be honest, they probably won’t last that long anyway. They’re just too good!

Leave a Comment