

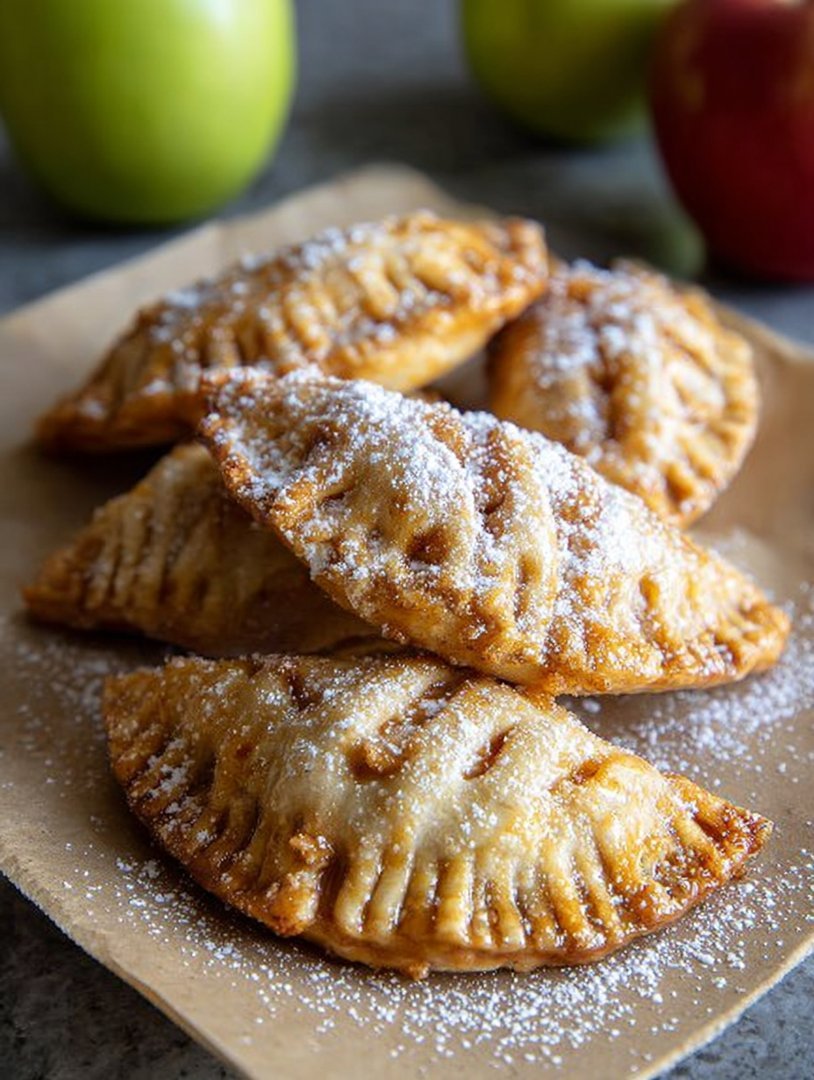
Imagine biting into a miniature, golden-brown pastry, the flaky crust shattering to reveal a warm, spiced apple filling that practically screams autumn. These Apple Hand Pies Fall Dessert are not just a treat; they’re a cozy hug on a chilly day, a portable slice of happiness that fits right in your hand.
Picture yourself curled up with a cup of tea, the aroma of cinnamon and baked apples filling the air as you savor every delicious bite of this perfect fall dessert. These Apple Hand Pies Fall Dessert capture the essence of the season. They bring the warmth and comfort of fall into every delicious mouthful.
- Effortlessly crafted with simple ingredients, these hand pies are ready in under an hour, perfect for spontaneous autumnal cravings.
- The delightful combination of sweet apples and warm spices creates an irresistible flavor symphony that dances on your palate.
- Their charming, individual size makes them ideal for parties, picnics, or even a solo indulgence, bringing joy to any occasion.
- Customize these pies with your favorite spices or a drizzle of glaze for a unique twist that reflects your personal taste.
Ingredients for Apple Hand Pies Fall Dessert
Here’s what you’ll need to make this delicious dish:
The full ingredients list, including measurements, is provided in the recipe card directly below.
How to Make Apple Hand Pies Fall Dessert
Follow these simple steps to prepare this delicious dish:
Step 1: Prepare the Dough
In a large bowl, whisk together the flour, salt, and sugar. Cut in the cold butter and vegetable shortening using a pastry blender or your fingers until the mixture resembles coarse crumbs. Gradually add the ice water, one tablespoon at a time, mixing until the dough just comes together. Divide the dough in half, flatten into disks, wrap in plastic wrap, and refrigerate for at least 30 minutes.
Step 2: Make the Apple Filling
In a large bowl, combine the diced apples, granulated sugar, brown sugar, cornstarch, cinnamon, nutmeg, and lemon juice. Toss well to ensure the apples are evenly coated. Set aside while you roll out the dough.
Step 3: Assemble the Hand Pies
Preheat your oven to 375°F (190°C). On a lightly floured surface, roll out one disk of dough to about 1/8 inch thickness. Use a round cookie cutter or a knife to cut out circles (about 4 inches in diameter). Place a spoonful of the apple filling in the center of each circle.
Step 4: Seal and Bake
Fold the dough over the filling to form a half-moon shape. Crimp the edges with a fork to seal. Cut a few slits in the top of each pie to allow steam to escape. Brush the tops with the egg wash and sprinkle with turbinado sugar.
Step 5: Bake the Hand Pies
Place the hand pies on a baking sheet lined with parchment paper. Bake for 20-25 minutes, or until the crust is golden brown and the filling is bubbling. Let them cool slightly on the baking sheet before transferring them to a wire rack to cool completely.
Step 6: Serve and Enjoy
Serve these warm apple hand pies with a scoop of vanilla ice cream or a dollop of whipped cream for the perfect fall treat. These pies are best enjoyed fresh, but they can be stored in an airtight container at room temperature for up to 2 days.
Tips for Perfect Apple Hand Pies Fall Dessert
To guarantee that your Apple Hand Pies Fall Dessert are the talk of the town, let’s dive into some insider secrets and nifty tips. These will elevate your baking game to legendary status. We are about to embark on an Apple Hand Pies Fall Dessert journey where every pie is a masterpiece.
Choosing the Right Apples
Selecting the right apples is crucial for achieving the perfect balance of flavors and textures in your hand pies. Opt for a mix of sweet and tart varieties, such as Honeycrisp, Fuji, and Granny Smith. Honeycrisp apples provide sweetness and crispness, while Granny Smith apples offer a tartness that cuts through the sweetness. Fuji apples add a subtle sweetness and a slightly softer texture.
Keeping the Dough Cold
The key to a flaky crust is keeping the dough cold throughout the preparation process. Cold butter and shortening create layers of fat that separate when baked, resulting in a light and airy texture. Make sure your butter and shortening are well-chilled before cutting them into the flour. Use ice water to bring the dough together. Chill the dough for at least 30 minutes before rolling it out. If the dough becomes too warm while you are working with it, return it to the refrigerator to chill for a few minutes.
Mastering the Filling
Achieving the perfect apple filling is all about balancing flavors and textures. Too much moisture can result in soggy pies, while too little moisture can make the filling dry and dense. Using a thickening agent like cornstarch helps to absorb excess moisture and create a luscious, jam-like consistency. Be sure to toss the apples with lemon juice to prevent browning and add a touch of brightness to the filling. Don’t overfill the pies; a small spoonful of filling is enough to prevent the crust from bursting during baking.
Sealing the Edges
Properly sealing the edges of the hand pies is essential for preventing the filling from leaking out during baking. After folding the dough over the filling, use a fork to crimp the edges firmly. This not only seals the pie but also creates a decorative border. You can also brush the edges with egg wash before crimping to create an even stronger seal.
Achieving a Golden-Brown Crust
A golden-brown crust is not only visually appealing but also adds to the overall flavor and texture of the hand pies. Brushing the tops of the pies with egg wash before baking helps to achieve that perfect golden hue. Sprinkle the tops with turbinado sugar for added sweetness and a delightful crunch. Bake the pies until the crust is golden brown and the filling is bubbling.
Variations on Apple Hand Pies Fall Dessert
Okay, listen up, because we’re about to take your Apple Hand Pies Fall Dessert game from “basic” to “boujee” with these scrumptious variations!
Caramel Apple Hand Pies
Imagine the classic caramel apple, but in convenient hand pie form! Simply add a layer of homemade or store-bought caramel sauce to the apple filling before sealing and baking. After baking, drizzle with more caramel and sprinkle with sea salt for a sweet and salty treat that will have everyone begging for more.
Cranberry Apple Hand Pies
For a festive twist, add dried cranberries to the apple filling. The tartness of the cranberries pairs perfectly with the sweetness of the apples, creating a flavor combination that is both comforting and refreshing. These are perfect for Thanksgiving or any holiday gathering.
Spiced Pear Hand Pies
Swap out the apples for pears for a delightful variation that celebrates the flavors of fall. Pears have a slightly softer texture and a more delicate flavor than apples, making them a wonderful alternative. Add a pinch of cardamom or ginger to the filling for an extra layer of warmth and spice.
Apple Cheddar Hand Pies
Okay, hold on, don’t knock it ’til you try it! Adding a layer of sharp cheddar cheese to the apple filling might sound crazy, but it’s a flavor combination that works surprisingly well. The sharpness of the cheddar cheese balances the sweetness of the apples, creating a savory-sweet treat that is both unexpected and delicious.
Mini Apple Hand Pies
For bite-sized treats that are perfect for parties, make mini apple hand pies! Use a smaller cookie cutter to cut out the dough circles and reduce the baking time accordingly. These are great for serving as appetizers or desserts at your next gathering.
Storing and Reheating Apple Hand Pies Fall Dessert
So, you’ve baked a batch of these delectable Apple Hand Pies Fall Dessert and somehow managed to resist devouring them all in one sitting (congrats on that willpower, by the way!). Now, let’s talk about how to keep these little pockets of autumnal joy fresh and delicious for as long as possible.
Storing Your Apple Hand Pies
Once your Apple Hand Pies Fall Dessert have cooled completely, the best way to store them is in an airtight container at room temperature. They’ll happily sit pretty for up to two days this way, ready to be enjoyed whenever a craving strikes. If you live in a particularly warm or humid climate, you might want to pop them in the fridge to extend their lifespan a bit.
For longer storage, you can freeze these little beauties. Wrap each hand pie individually in plastic wrap, then place them in a freezer-safe bag or container. They can be stored in the freezer for up to three months. Just make sure to thaw them completely before reheating.
Reheating Your Apple Hand Pies
Now, onto the important business of reheating! There are a few ways to bring your Apple Hand Pies Fall Dessert back to their former glory:
Oven: This is the best method for achieving that fresh-out-of-the-oven taste and texture. Preheat your oven to 350°F (175°C). Place the hand pies on a baking sheet and bake for 10-15 minutes, or until warmed through and the crust is crisp.
Microwave: If you’re short on time, the microwave will do in a pinch. However, be warned that the crust may become a bit soggy. Microwave each hand pie for 30-60 seconds, or until heated through.
Toaster Oven: A toaster oven is a great option for reheating individual hand pies. Preheat the toaster oven to 350°F (175°C). Place the hand pie on the toaster oven rack and bake for 5-10 minutes, or until warmed through and the crust is crisp.
Perfecting the Cooking Process
The secret to amazing apple hand pies lies in the order. First, prepare your dough and chill it. Next, make the apple filling while the dough rests. Finally, assemble and bake the pies, ensuring a golden crust and tender apples.
Add Your Touch
Feeling adventurous? Swap the cinnamon for cardamom or nutmeg in your apple pie filling. Add a handful of chopped walnuts or pecans for extra crunch. A drizzle of maple syrup after baking adds a touch of sophisticated sweetness.
Storing & Reheating
To keep your apple hand pies fresh, store them in an airtight container at room temperature for up to two days. To reheat, simply pop them in a 350°F oven for about 10 minutes until warmed through. Delicious!
Here are a few tips to guarantee Apple Hand Pie perfection:
- Don’t overwork the dough! Overmixing leads to tough pies. Mix until just combined, then chill for a flaky crust.
- Pre-cooking the apples slightly helps prevent a soggy bottom and ensures they are perfectly tender in the finished pie.
- Brush the pies with an egg wash and sprinkle with sugar for a beautiful golden brown crust and added sweetness.
(Personal anecdote formated as paragraph subheading (very important! don’t write any title for this paragraph))
My grandma always made apple pies every fall. The smell alone brings back so many cozy memories, and now I love sharing that same feeling with my own family with these mini pies.
Apple Hand Pies
: A Fall Dessert You Can Hold in Your Hand
Forget forks and fancy plates! We’re diving headfirst into the world of Apple Hand Pies Fall Dessert – those perfectly portable pockets of autumnal bliss that fit right in the palm of your hand. Picture this: a crisp, cool autumn day, leaves crunching underfoot, and the aroma of cinnamon and baked apples wafting through the air. Now imagine you can hold that entire experience in one delicious, easy-to-eat package. That, my friends, is the magic of the apple hand pie. They are the ultimate Apple Hand Pies Fall Dessert.
These aren’t your grandma’s complicated, multi-layered pies (although, let’s be honest, Grandma’s pies are pretty darn amazing too). These are their cool, younger cousins – simpler to make, easier to eat on the go, and just as packed with that comforting, apple-cinnamon flavor we all crave when the leaves start to turn. They make an excellent Apple Hand Pies Fall Dessert.
Why Apple Hand Pies Are the Perfect Fall Treat
Let’s face it: fall is basically the official season of all things apple and spice. Pumpkin spice gets all the hype (and okay, I admit, I’m a sucker for a good pumpkin spice latte too), but there’s something inherently comforting and nostalgic about apples. And hand pies? Well, they’re just pure, unadulterated fun. There are several reasons why you should consider them your next Apple Hand Pies Fall Dessert.
Portability is Key
In today’s fast-paced world, who has time to sit down and gracefully eat a slice of pie with a fork? Apple hand pies are the answer! They are perfectly sized for snacking on the go, packing in lunchboxes, or bringing to a fall picnic. No forks, no knives, no fuss! It is the perfect portable Apple Hand Pies Fall Dessert.
Perfectly Portioned
Forget the guilt of that oversized slice of pie. Hand pies are individual portions, so you can indulge without feeling like you’ve completely derailed your healthy eating habits (or at least, that’s what I tell myself!). The portion size makes them an ideal Apple Hand Pies Fall Dessert.
Easy to Customize
Want to add some cranberries? Go for it! Feeling nutty? Throw in some chopped pecans! Apple hand pies are incredibly versatile, and you can easily adapt the filling to suit your taste preferences. Get creative and make them your own!
They’re Just Plain Fun
Let’s be honest, there’s something inherently playful about eating a hand pie. Maybe it’s the satisfying crunch of the crust, the warm burst of apple filling, or the fact that you can eat it with one hand while scrolling through Instagram with the other. Whatever the reason, they bring a smile to your face. That is what makes them a memorable Apple Hand Pies Fall Dessert.
Gathering Your Ingredients: The Apple Pie Dream Team
Before we embark on our apple hand pie adventure, let’s make sure we have all the necessary ingredients. Don’t worry; it’s a pretty straightforward list. This Apple Hand Pies Fall Dessert dream team makes it easy!
- **Apples:** Of course! I prefer a mix of sweet and tart apples, like Honeycrisp and Granny Smith, for the best flavor. But honestly, any apple you enjoy will work just fine.
- **Pie Crust:** You can use store-bought pie crust to save time, or you can make your own from scratch if you’re feeling ambitious. If you go the store-bought route, be sure to get the kind that comes rolled up, not the pre-formed pie shells.
- **Sugar:** Granulated sugar is my go-to for the filling, but you could also use brown sugar for a richer, more caramel-like flavor.
- **Spices:** Cinnamon is a must, in my opinion, but you can also add a pinch of nutmeg, cloves, or allspice for extra warmth.
- **Butter:** A little bit of butter adds richness and flavor to the filling.
- **Lemon Juice:** A squeeze of lemon juice helps to brighten the flavor of the apples and prevent them from browning.
- **Egg:** We’ll use an egg wash to brush the tops of the pies for a beautiful golden-brown color.
- **Turbinado Sugar:** A sprinkle of turbinado sugar (also known as raw sugar) adds a lovely crunch and sparkle to the finished pies.
**Making the Magic Happen: Step-by-Step Apple Hand Pie Instructions**
Alright, let’s get down to business! Here’s how to make these delightful apple hand pies. Don’t worry, it’s easier than you think. These instructions make the Apple Hand Pies Fall Dessert experience a breeze.
**Step 1: Prepare the Apple Filling**
Peel, core, and dice your apples. In a large bowl, combine the diced apples with sugar, cinnamon, a pinch of nutmeg (optional), melted butter, and a squeeze of lemon juice. Mix well to ensure all the apples are coated in the delicious spice mixture. This filling is the heart of your Apple Hand Pies Fall Dessert!
**Step 2: Roll Out the Dough**
On a lightly floured surface, roll out your pie crust. If you’re using store-bought crust, you may need to let it sit at room temperature for a few minutes to soften it slightly. Use a round cookie cutter or a knife to cut out circles of dough. I usually aim for about 4-inch circles, but you can make them bigger or smaller depending on your preference.
**Step 3: Fill ‘Er Up!**
Place a spoonful of apple filling in the center of each dough circle. Don’t overfill them, or the filling will ooze out during baking. Trust me, a little restraint goes a long way.
**Step 4: Seal the Deal**
Fold the dough circle in half to form a half-moon shape. Crimp the edges with a fork to seal the filling inside. This is important! You don’t want any apple escapees during baking.
**Step 5: Brush and Sprinkle**
In a small bowl, whisk together an egg with a tablespoon of water to make an egg wash. Brush the tops of the hand pies with the egg wash, then sprinkle with turbinado sugar. This will give them a beautiful golden-brown color and a satisfying crunch.
**Step 6: Bake to Perfection**
Place the hand pies on a baking sheet lined with parchment paper. Bake in a preheated oven at 375°F (190°C) for 20-25 minutes, or until the crust is golden brown and the filling is bubbly.
**Step 7: Cool and Enjoy!**
Let the hand pies cool on a wire rack for a few minutes before devouring them. They’re delicious served warm or at room temperature.
Apple Hand Pie Variations: Because Variety is the Spice of Life
One of the best things about apple hand pies is how easy they are to customize. Here are a few ideas to get your creative juices flowing: Get creative to make your personalized Apple Hand Pies Fall Dessert
- **Cranberry Apple Hand Pies:** Add dried cranberries to the apple filling for a tart and festive twist.
- **Caramel Apple Hand Pies:** Drizzle caramel sauce over the baked hand pies for an extra layer of decadence.
- **Apple Cheddar Hand Pies:** Add a sprinkle of shredded cheddar cheese to the apple filling for a savory-sweet combination. Don’t knock it ’til you try it!
- **Spiced Apple Hand Pies:** Experiment with different spices, such as ginger, cardamom, or allspice, to create unique flavor profiles.
Troubleshooting Your Apple Hand Pies: A Little Help When You Need It
Even the most experienced bakers encounter hiccups sometimes. Here are a few common problems and how to fix them:
- **Soggy Bottoms:** This is usually caused by too much filling or not pre-cooking the apples. Make sure to use a moderate amount of filling and consider pre-cooking the apples slightly before adding them to the pie.
- **Filling Oozing Out:** This can happen if you overfill the pies or if the crust isn’t properly sealed. Be mindful of the amount of filling you use and make sure to crimp the edges tightly with a fork.
- **Crust Not Browning:** This could be due to not using an egg wash or not baking the pies long enough. Brush the tops of the pies with egg wash and bake until they are a deep golden brown.
- **Tough Crust:** Overworking the dough can lead to a tough crust. Mix the dough until just combined and avoid over-handling it.
Perfecting the Cooking Process
The order of operations matters! Prepare the apple filling first, allowing the flavors to meld. While the filling rests, roll out the dough and cut the circles. Assemble and bake to achieve the perfect golden-brown crust and tender apple filling.
Add Your Touch
Get creative! Swap out cinnamon for warming spices like nutmeg or cloves. Mix in chopped pecans or walnuts for added crunch. A drizzle of maple syrup after baking will elevate the flavor of this Apple Hand Pies Fall Dessert.
Storing & Reheating
Keep your apple hand pies fresh by storing them in an airtight container at room temperature for up to two days. Reheat in a 350°F oven for 10 minutes to restore their warm, crispy goodness of this Apple Hand Pies Fall Dessert.
Here are a few tips to guarantee Apple Hand Pie perfection:
- For a flaky crust, ensure your butter is cold and avoid overmixing the dough. Lumps of butter create steam, resulting in layers.
- Pre-cooking the apples will prevent a soggy crust and ensure they are perfectly tender. A quick sauté on the stovetop does the trick!
- Don’t skip the egg wash and turbinado sugar. They create a beautiful shine and added sweetness, making them more delicious.
(Personal anecdote formated as paragraph subheading (very important! don’t write any title for this paragraph))
I remember one Thanksgiving, I accidentally used salt instead of sugar in the crust. Surprisingly, the savory-sweet combination was a hit, and now it’s a family tradition!
Conclusion for Apple Hand Pies Fall Dessert :
These Apple Hand Pies Fall Dessert are more than just a sweet treat; they’re a warm hug on a chilly day. With their flaky crust, juicy apple filling, and comforting spices, they capture the essence of autumn in every bite. Whether you’re making them for a festive gathering or a cozy night in, these hand pies are sure to impress. So, gather your ingredients, preheat your oven, and get ready to create some fall magic. Happy baking!
Print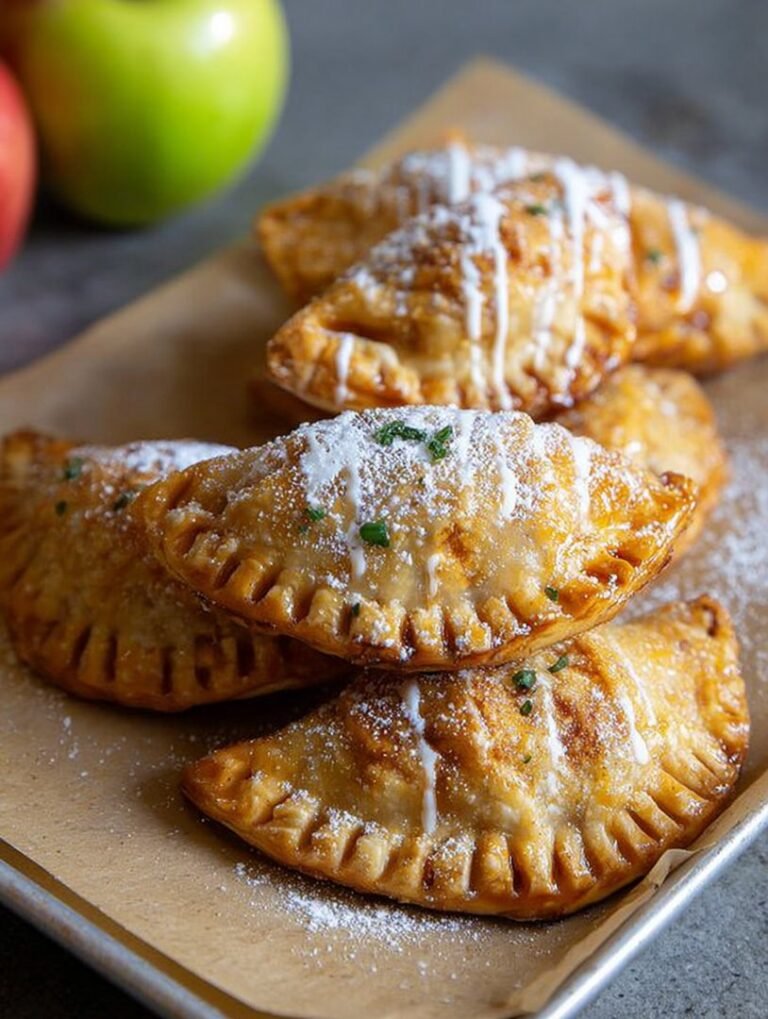
Apple Hand Pies Fall Dessert
Delicious apple hand pies fall dessert recipe with detailed instructions and nutritional information.
- Total Time: 35 minutes
- Yield: 4 servings
Ingredients
- All-purpose flour: 2 1/2 cups
- Cold unsalted butter: 1 cup (2 sticks), cubed
- Ice water: 6-8 tablespoons
- Apples (such as Honeycrisp or Granny Smith): 4 medium, peeled and diced
- Brown sugar: 1/2 cup
- Ground cinnamon: 1 teaspoon
- Lemon juice: 1 tablespoon
- Egg: 1 large, beaten
Instructions
- Step 1: Prepare the dough: In a large bowl, whisk together flour and a pinch of salt. Cut in the cold butter using a pastry blender or your fingers until the mixture resembles coarse crumbs. Gradually add ice water, 1 tablespoon at a time, mixing until the dough just comes together. Divide dough in half, flatten into disks, wrap in plastic wrap, and refrigerate for at least 30 minutes.
- Step 2: Make the apple filling: In a medium saucepan, combine the diced apples, brown sugar, cinnamon, and lemon juice. Cook over medium heat, stirring occasionally, until the apples are softened and the juices have thickened, about 8-10 minutes. Remove from heat and let cool slightly.
- Step 3: Assemble the hand pies: Preheat oven to 375°F (190°C). On a lightly floured surface, roll out one dough disk into a 1/8-inch thick circle. Use a round cookie cutter or a knife to cut out circles (about 4-inch diameter). Repeat with the second dough disk.
- Step 4: Fill and seal: Place a spoonful of the apple filling in the center of each dough circle. Brush the edges of the circle with the beaten egg. Fold the dough over to create a half-moon shape, and crimp the edges with a fork to seal. Cut a small slit in the top of each hand pie to allow steam to escape.
- Step 5: Bake: Place the hand pies on a baking sheet lined with parchment paper. Brush the tops with the remaining beaten egg. Bake for 20-25 minutes, or until golden brown. Let cool slightly before serving.
Notes
- Store cooled hand pies in an airtight container at room temperature for up to 2 days, or in the refrigerator for up to 4 days.
- Reheat in a 350°F (175°C) oven for 5-10 minutes to restore their crispness.
- Serve warm with a scoop of vanilla ice cream or a dollop of whipped cream for extra indulgence.
- For the flakiest crust, ensure your butter and water are very cold before starting the dough.
- Prep Time: 15 minutes
- Cook Time: 20 minutes
- Method: Stovetop
- Cuisine: American
FAQs :
Can I make these Apple Hand Pies Fall Dessert ahead of time?
Absolutely! You can prepare the apple filling and the dough separately a day in advance. Store the filling in an airtight container in the refrigerator and the dough wrapped tightly in plastic wrap, also in the fridge. When you’re ready to bake, just assemble the pies. This makes it a fantastic option when you’re expecting company and want to minimize last-minute fuss. Who doesn’t love a dessert that gives you a head start?
What kind of apples are best for Apple Hand Pies Fall Dessert?
For the most delightful apple hand pies, I recommend using a mix of apple varieties. A combination of sweet and tart apples, like Honeycrisp and Granny Smith, creates a balanced flavor profile. Other great options include Fuji, Gala, or Braeburn. The important thing is to choose apples that hold their shape well during baking and don’t turn to complete mush. Experiment and find your personal favorite blend!
How do I prevent the Apple Hand Pies Fall Dessert from getting soggy bottoms?
Nobody likes a soggy bottom! To avoid this culinary catastrophe, make sure your oven is preheated properly. Also, consider placing a baking sheet on the rack below to help deflect some of the heat. Blind-baking the pie crust for a short time before adding the filling can also create a barrier against moisture. And, of course, don’t overfill the pies – a little breathing room helps the crust bake evenly.
What can I use if I don’t have apple pie spice for these Apple Hand Pies Fall Dessert?
No apple pie spice? No problem! You can easily create your own blend. Simply mix together cinnamon, nutmeg, and a pinch of allspice. If you’re feeling fancy, you could even add a tiny bit of ground ginger or cloves. Start with equal parts cinnamon and nutmeg, then add the allspice sparingly. Taste and adjust to your preference. Homemade apple pie spice is a fantastic way to customize the flavor of your fall baking.


Leave a Comment