

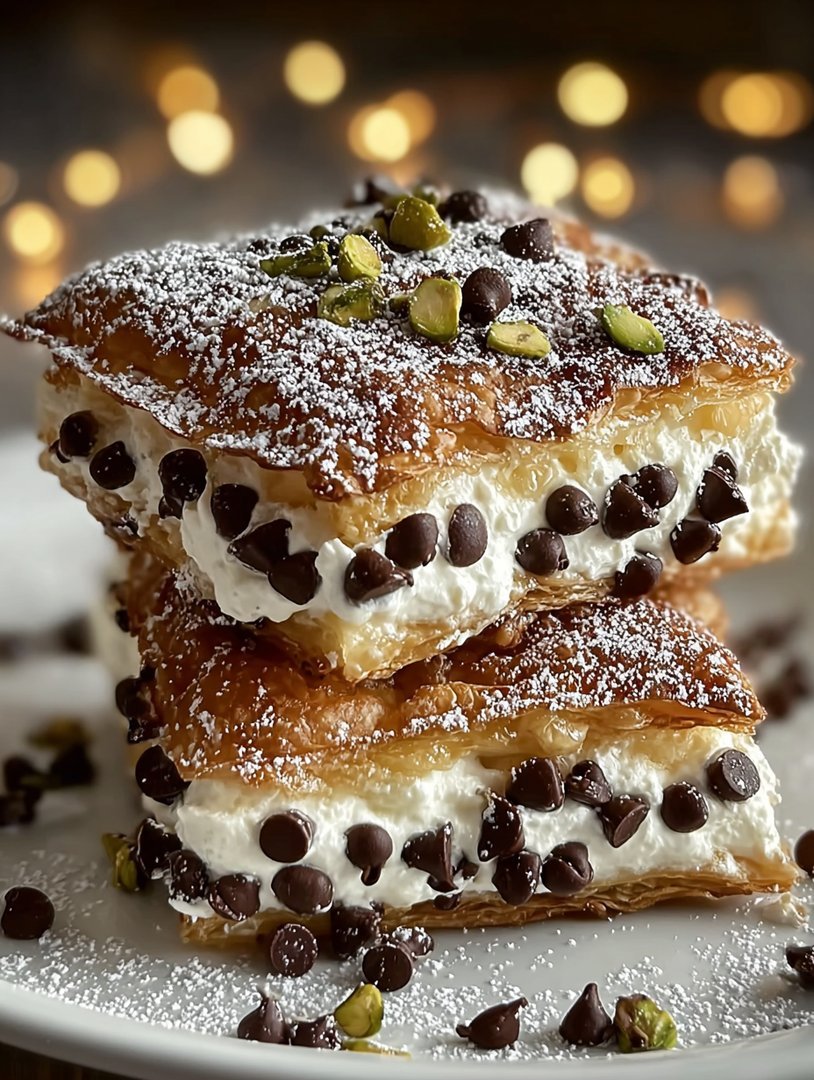
Oh, cannoli, cannoli, where have you been all my life? These Classic Cannoli Squares That Will Wow Your Taste Buds take everything you love about the traditional Italian pastry and transform it into an easy-to-make, crowd-pleasing dessert. Get ready for a flavor explosion!
I remember my first cannoli. It was at a street fair, the sun was blazing, and the creamy filling was a sweet escape from the summer heat. These cannoli squares bring that same joy, but without the fuss. They are perfect for any gathering, big or small.
- Effortless to create, this recipe simplifies the complex cannoli process for a quick dessert fix.
- The creamy, sweet ricotta filling, combined with crisp layers, delivers an unforgettable taste sensation.
- Visually stunning with a dusting of powdered sugar, these squares make an elegant dessert presentation.
- Adaptable for any occasion, these squares are a guaranteed hit at parties, potlucks, or cozy nights in.
Ingredients for Classic Cannoli Squares That Will Wow Your Taste Buds
Here’s what you’ll need to make this delicious dish:
The full ingredients list, including measurements, is provided in the recipe card directly below.
How to Make Classic Cannoli Squares That Will Wow Your Taste Buds
Follow these simple steps to prepare this delicious dish:
Step 1: Prepare the Wonton Layers
Preheat your oven to 375°F (190°C). Lightly brush each wonton wrapper with melted unsalted butter. Layer six wonton wrappers in the bottom of a greased 9×13 inch baking pan.
Step 2: Bake the Base
Bake the wonton wrapper base for 8-10 minutes, or until golden brown and crispy. Let it cool completely before adding the filling. This creates the perfect crunchy foundation.
Step 3: Make the Cannoli Filling
In a large bowl, combine the ricotta cheese, mascarpone cheese, powdered sugar, orange extract, and cinnamon. Mix until smooth and creamy, ensuring there are no lumps. Gently fold in the mini chocolate chips.
Step 4: Assemble the Cannoli Squares
Spread the ricotta mixture evenly over the cooled wonton wrapper base. Top with another six wonton wrappers, brushed with butter, and baked until golden and crispy
Step 5: Chill and Serve
Let the assembled cannoli squares cool completely. Dust generously with powdered sugar before cutting into squares. Chill for at least 30 minutes before serving to allow the filling to set.
Transfer to plates and serve. Enjoy these Classic Cannoli Squares That Will Wow Your Taste Buds with your favorite hot drink for the perfect finishing touch.
Perfecting the Cooking Process
To achieve dessert nirvana, prep all your ingredients first. Making the filling while the shells cool is a game-changer. This way, you avoid a frantic, sticky situation and end up with perfectly delightful Classic Cannoli Squares That Will Wow Your Taste Buds.
Add Your Touch
Want to get adventurous? Mix in mini chocolate chips or chopped pistachios into the filling. For a citrusy twist, add some orange or lemon zest. These little tweaks can transform the dessert to suit your preferences.
Storing & Reheating
These delectable squares are best enjoyed fresh, but can be stored in an airtight container in the refrigerator for up to 2 days. They don’t really need reheating because you enjoy them cold! The flavors meld together even more, if that’s even possible.
Here are some pro tips for the best Classic Cannoli Squares:
- Don’t overmix the ricotta filling! Overmixing can lead to a runny consistency, so gently fold in the ingredients until just combined.
- Ensure your pastry sheets are evenly rolled out to guarantee uniform thickness and even baking for perfectly crisp layers.
- Dust the baked pastry sheets with powdered sugar immediately after baking to help it adhere while the pastry is still warm, for an even coating.
(Personal anecdote formated as paragraph subheading)
Once, I brought these to a potluck, and they disappeared faster than free pizza! Everyone kept asking for the recipe, which is always the best compliment a baker can receive.
The Story Behind These Dreamy Squares
Have you ever had that moment where a single bite transports you to another place? Maybe it’s your grandma’s kitchen, or that charming little bakery you visited on vacation. That’s what I aimed for when I created this recipe. It is a tribute to a beloved Italian classic, reimagined for the modern baker. These Classic Cannoli Squares That Will Wow Your Taste Buds are more than just a dessert; they’re an experience.
Why Cannoli Squares? Because Regular Cannoli Are So Last Century
Let’s be honest, traditional cannoli can be a bit fussy. The shells crack, the filling squirts out, and suddenly you’re wearing half your dessert. These squares solve all those problems. They’re easier to make, easier to serve, and infinitely less messy. Plus, they’re absolutely perfect for sharing (or not, I won’t judge). Think of them as the sophisticated, laid-back cousin of the classic cannoli.
The Quest for the Perfect Recipe
It took me a while to get this recipe just right. There were soggy crusts, grainy fillings, and enough powdered sugar explosions to rival a movie special effects scene. But after countless trials (and taste tests, of course), I finally cracked the code. This recipe delivers the authentic cannoli flavor you crave, without all the fuss. It’s a journey, and these Classic Cannoli Squares That Will Wow Your Taste Buds are the delicious destination.
Ingredient Breakdown: The Key to Cannoli Bliss
Let’s talk ingredients. Each one plays a crucial role in creating the perfect balance of textures and flavors. We’re aiming for creamy, crunchy, and just the right amount of sweetness.
Ricotta Cheese: The Heart of the Matter
The star of our filling is, without a doubt, ricotta cheese. But not just any ricotta will do. Look for whole milk ricotta, as it will yield the richest, creamiest results. Drain it well before using to avoid a watery filling. I usually let mine sit in a cheesecloth-lined strainer for at least an hour, or even overnight in the fridge. This ensures that the Classic Cannoli Squares That Will Wow Your Taste Buds have the perfect consistency.
Pastry Sheets: The Foundation of Flavor
Instead of making cannoli shells from scratch (because who has time for that?), we’re using ready-made pastry sheets. These are easy to work with and bake up beautifully crisp and golden. Just make sure to thaw them properly before using, following the package instructions.
Sweeteners and Spices: The Magic Touch
A combination of powdered sugar and a touch of vanilla extract adds the perfect amount of sweetness and warmth to the filling. I also like to add a pinch of cinnamon for a hint of spice. Feel free to experiment with other flavorings like almond extract or orange zest.
Garnish: The Finishing Flourish
No cannoli square is complete without a generous dusting of powdered sugar. I also like to add mini chocolate chips and chopped pistachios for extra flavor and texture. Get creative and use whatever toppings you like! Consider candied citrus peel or a drizzle of melted chocolate for that wow factor for these Classic Cannoli Squares That Will Wow Your Taste Buds.
Step-by-Step Guide: Making Cannoli Squares Like a Pro
Alright, let’s get down to business. This recipe is surprisingly easy, even for novice bakers. Just follow these simple steps, and you’ll be enjoying your own batch of cannoli squares in no time.
Preparing the Pastry
First, preheat your oven to 375°F (190°C). Unfold the thawed pastry sheets on a lightly floured surface. Gently roll them out to even out any creases. Cut the pastry into equal-sized squares (about 2-3 inches each). Place the squares on a baking sheet lined with parchment paper. Bake for 12-15 minutes, or until golden brown and crisp. Let them cool completely on a wire rack.
Creating the Dreamy Filling
While the pastry is cooling, it’s time to make the filling. In a large bowl, combine the drained ricotta cheese, powdered sugar, and vanilla extract. Mix until smooth and creamy. Gently fold in the mini chocolate chips and chopped pistachios (if using). Cover the bowl and refrigerate for at least 30 minutes to allow the flavors to meld.
Assembling the Masterpiece
Once the pastry squares are cool and the filling is chilled, it’s time to assemble. Spread a generous layer of the ricotta filling on top of each pastry square. Dust with powdered sugar and sprinkle with additional chocolate chips and pistachios. Serve immediately and watch them disappear! These Classic Cannoli Squares That Will Wow Your Taste Buds are truly a crowd-pleaser.
Troubleshooting Tips: Avoiding Common Cannoli Catastrophes
Even the best recipes can sometimes go awry. Here are a few common problems and how to fix them:
Soggy Pastry
If your pastry squares are soggy, it could be due to a few reasons. Make sure you’re using pastry sheets, not pie crust. Also, ensure they are fully baked and cooled before adding the filling. You can even brush them with a thin layer of melted butter before baking for extra crispness.
Runny Filling
A runny filling is usually caused by using ricotta cheese that hasn’t been drained properly. Be sure to drain it well before using. You can also add a tablespoon of cornstarch to the filling to help thicken it up.
Too Sweet or Not Sweet Enough
Taste the filling as you go and adjust the amount of powdered sugar to your liking. Remember, you can always add more, but you can’t take it away!
Variations and Twists: Unleash Your Inner Baker
The beauty of this recipe is that it’s incredibly versatile. Feel free to experiment with different flavors and toppings to create your own signature cannoli squares.
Citrus Infusion
Add a tablespoon of orange or lemon zest to the filling for a bright, citrusy twist. This pairs especially well with pistachios.
Chocolate Lover’s Dream
Use chocolate pastry sheets instead of plain ones. Add cocoa powder to the filling for an extra dose of chocolate goodness. Drizzle with melted chocolate before serving.
Nutty Delight
Try using different nuts in the filling and as a garnish. Almonds, walnuts, or even hazelnuts would be delicious.
Spice It Up
Add a pinch of cardamom or nutmeg to the filling for a warm, exotic flavor.
Serving Suggestions: Elevate Your Cannoli Game
These cannoli squares are delicious on their own, but here are a few ideas to take them to the next level:
- Serve with a scoop of vanilla ice cream or gelato.
- Arrange them on a platter with fresh berries and a drizzle of honey.
- Pair them with a strong cup of coffee or espresso.
- Bring them to your next potluck or party and watch them disappear! These Classic Cannoli Squares That Will Wow Your Taste Buds are guaranteed to be a hit.
Conclusion for Classic Cannoli Squares That Will Wow Your Taste Buds :
Classic Cannoli Squares offer a delightful twist on a beloved Italian dessert. They combine the iconic flavors of cannoli with the convenience of a bar. This reinvention makes it easier than ever to enjoy that creamy, crunchy goodness. The recipe’s adaptability allows for personalized touches, ensuring a crowd-pleasing treat for any occasion. Remember the importance of good ricotta. The make-ahead tip helps minimize stress when you have company. Enjoy this delicious and simple dessert that will truly wow your taste buds!
Print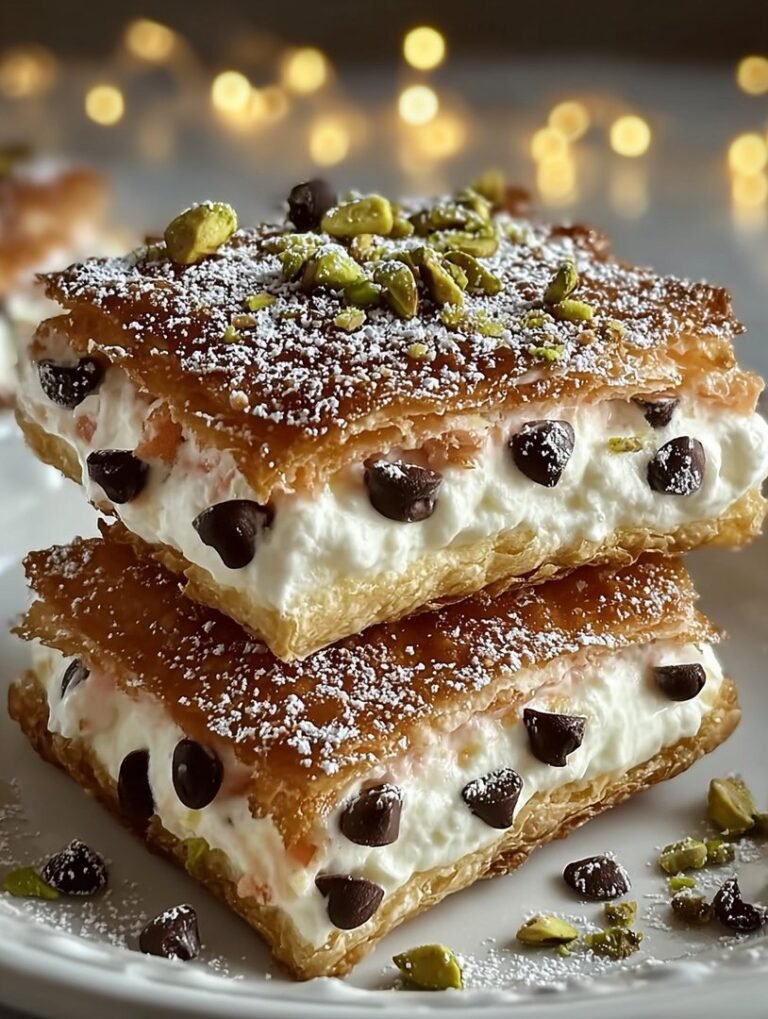
Classic Cannoli Squares That Will Wow Your Taste Buds
Delicious classic cannoli squares that will wow your taste buds recipe with detailed instructions and nutritional information.
- Total Time: 35 minutes
- Yield: 4 servings 1x
Ingredients
- 1 (15-ounce) container whole milk ricotta cheese, drained
- 1 cup powdered sugar
- 1 teaspoon vanilla extract
- 1/2 teaspoon ground cinnamon
- 1 (16-ounce) package mini cannoli shells, crushed
- 1/2 cup chocolate chips, mini or regular
- 1/4 cup chopped pistachios, for garnish (optional)
Instructions
- Step 1: In a large bowl, beat the drained ricotta cheese with an electric mixer until smooth and creamy.
- Step 2: Gradually add the powdered sugar to the ricotta cheese, mixing until well combined and smooth.
- Step 3: Stir in the vanilla extract and cinnamon until evenly distributed.
- Step 4: Gently fold in the crushed cannoli shells and chocolate chips.
- Step 5: Spread the mixture evenly into an 8×8 inch baking dish lined with parchment paper.
- Step 6: Cover and refrigerate for at least 2 hours to allow the squares to set. Before serving, cut into squares and garnish with chopped pistachios, if desired.
Notes
- For best results, store any leftover cannoli squares in an airtight container in the refrigerator for up to 3 days.
- If the squares become too firm after refrigeration, let them sit at room temperature for 10-15 minutes to soften slightly before serving.
- Serve these delightful cannoli squares chilled as a refreshing dessert or a sweet addition to a brunch spread.
- Don't overmix after adding the cannoli shells and chocolate chips; gentle folding ensures a light and airy texture in your squares.
- Prep Time: 15 minutes
- Cook Time: 20 minutes
- Method: Stovetop
- Cuisine: American
FAQs :
What are the origins of cannoli and how did you reinvent them into squares?
Cannoli, those crispy, creamy Sicilian delights, have a history as rich and layered as their filling. Traditionally, they’re fried tubes of pastry filled with sweetened ricotta. My inspiration struck during a chaotic holiday baking session. I was staring at the mountain of cannoli shells, the overflowing ricotta bowl, and thought, “There has to be an easier way!” Hence, the Classic Cannoli Squares were born. The concept brings all the traditional flavors into an easily manageable format. This updated approach still delivers that amazing flavor, and it minimizes the mess, it is perfect for parties or a quick dessert fix.
Can I prepare the Classic Cannoli Squares ahead of time?
Absolutely! In fact, I encourage it. The flavors meld together beautifully as they sit, making them even more delicious the next day. Prepare the crust and the filling separately. Store the crust in an airtight container at room temperature and the filling in the refrigerator. Assemble the Classic Cannoli Squares a few hours before serving. This prevents the crust from becoming soggy. If you assemble them too far in advance, the moisture from the filling will soften the crust. Nobody wants a soggy cannoli square! The make-ahead aspect makes these squares perfect for entertaining.
How can I customize my Classic Cannoli Squares with different flavors or toppings?
This is where the fun begins! Think of the recipe as your canvas. For flavor variations, consider adding a teaspoon of almond or vanilla extract to the ricotta filling. Orange zest is another amazing addition that brightens the whole thing up. For toppings, go wild! Mini chocolate chips, chopped pistachios, candied citrus peel, or a dusting of cocoa powder are all fantastic options. Get creative and personalize your squares to match your taste. You can even create a toppings bar and let your guests customize their own squares!
What’s the best type of cheese to use for the filling in the Classic Cannoli Squares?
The key to a truly amazing Classic Cannoli Square is using high-quality ricotta cheese. Look for whole-milk ricotta, as it has the richest flavor and creamiest texture. Drain the ricotta well before using it in the filling. Excess moisture will make the squares soggy. To drain the ricotta, line a colander with cheesecloth and let it sit in the refrigerator for at least an hour, or even overnight. Trust me; this extra step makes all the difference. The result is a light and airy filling that perfectly complements the crispy crust.


Leave a Comment