
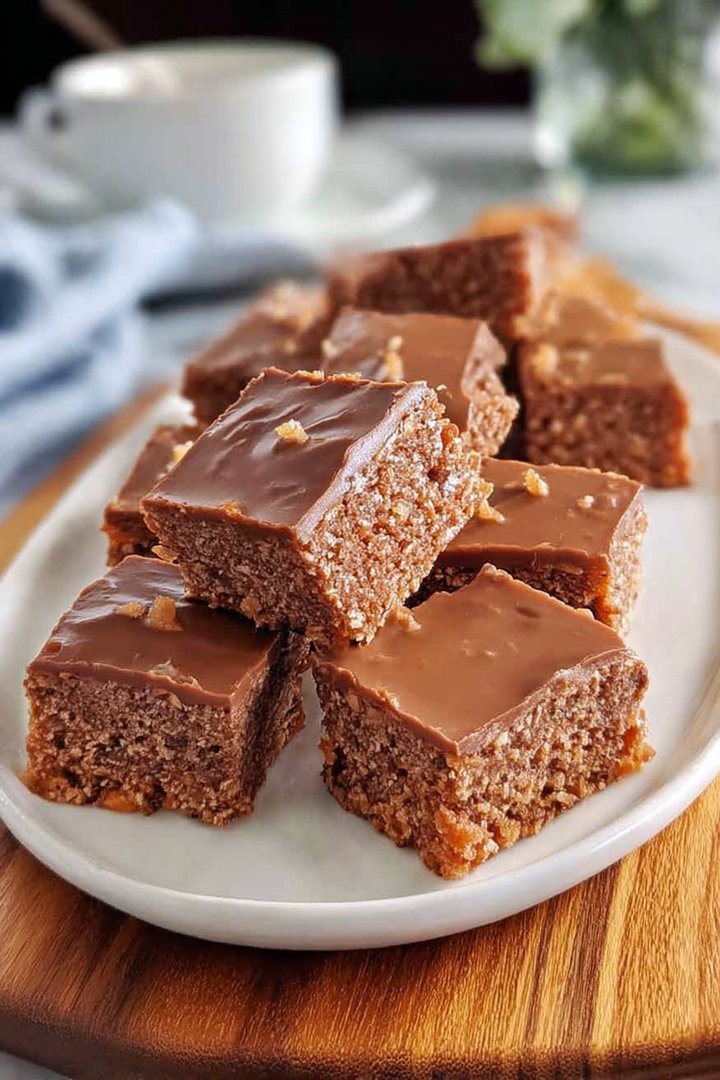
Coffee Slice: A symphony of rich coffee notes dancing with creamy sweetness, melting in your mouth with every blissful bite. Imagine a dessert that marries your favorite morning brew with an irresistible, sliceable indulgence.
This Coffee Slice isn’t just dessert; it’s an experience, a cozy hug in a culinary form. Prepare to be captivated by its intoxicating aroma and the sheer delight it brings to any occasion, from a casual brunch to an elegant dinner party.
This recipe is guaranteed to become a new favorite because:
- It combines the bold, invigorating taste of coffee with the comforting sweetness of a classic dessert.
- It’s surprisingly simple to make, requiring minimal effort for maximum flavor payoff, even for novice bakers.
- The elegant presentation makes it a show-stopping centerpiece for any gathering, pleasing both the eyes and the palate.
- It offers endless customization options, allowing you to tailor the sweetness and coffee intensity to your personal preference.
Ingredients for Coffee Slice
Here’s what you’ll need to make this delicious dish:
The full ingredients list, including measurements, is provided in the recipe card directly below.
How to Make Coffee Slice
Follow these simple steps to prepare this delicious dish:
Step 1: Prepare the Coffee Base
Brew a strong pot of coffee. Let it cool slightly before using. In a saucepan, gently heat half of the brewed coffee with the agar-agar powder until the powder is fully dissolved. This ensures a smooth, agar-agar-free set.
Step 2: Mix Dry Ingredients
In a medium bowl, whisk together the all-purpose flour, granulated sugar, baking powder, and salt. This ensures an even distribution of ingredients.
Step 3: Combine Wet and Dry Ingredients
In a separate bowl, cream together the softened unsalted butter and the remaining granulated sugar until light and fluffy. Beat in the eggs one at a time, then stir in the Alcohol-free vanilla extract and remaining brewed coffee. Gradually add the dry ingredients to the wet ingredients, mixing until just combined. Avoid overmixing to keep the slice tender.
Step 4: Bake the Coffee Slice
Pour the batter into a greased and floured baking pan. Bake in a preheated oven at 350°F (175°C) for about 25-30 minutes, or until a toothpick inserted into the center comes out clean. Let the slice cool completely in the pan before frosting.
Step 5: Prepare the Coffee Frosting
While the slice is cooling, prepare the frosting. In a large bowl, beat the cold heavy cream until stiff peaks form. Gradually add the powdered sugar and the coffee mixture with dissolved agar-agar, beating until smooth and creamy. Be careful not to overwhip the cream.
Step 6: Frost and Chill
Once the slice is completely cooled, spread the coffee frosting evenly over the top. Refrigerate the slice for at least 2 hours to allow the frosting to set completely. This will make it easier to slice and serve.
Transfer to a serving platter, cut into slices, and enjoy the perfect coffee-infused dessert!
Perfecting the Cooking Process
For the ultimate coffee slice, the process is key! First, prepare the crust ingredients and let it chill while you move onto the filling. This prevents a soggy bottom. Then, bake the crust partially before adding the coffee infused filling. It’s all about layering for perfection!
Add Your Touch
Want to make this slice your own? Absolutely! Swap the Alcohol-free vanilla extract for alcohol-free almond extract. Add a sprinkle of chopped pecans to the crust. Or, if you are feeling adventurous, swirl in some caramel sauce before baking. Make it your signature bake!
Storing & Reheating
To keep your coffee slice tasting its best, store it in an airtight container in the refrigerator for up to four days. Reheat individual slices in the microwave for about 20 seconds, or enjoy it cold straight from the fridge. Both ways are delightful!
Here are some tips that might help you on your journey:
- For a smoother filling, ensure the cream cheese is fully softened before mixing. This will prevent lumps and create a velvety texture.
- Don’t overbake the crust. A golden-brown color is what you’re aiming for. Overbaking leads to a dry, crumbly base and a tough slice.
- Allow the coffee slice to cool completely before slicing and serving. This ensures the filling sets properly, giving you a neat and tidy slice.
(Personal anecdote formated as paragraph subheading)
My grandma always said a good coffee slice can solve any problem. I made this for a friend going through a tough time, and her smile after the first bite was worth more than any recipe.
Coffee, oh coffee. The magical bean juice that fuels our mornings, afternoons, and sometimes even our questionable late-night decisions. But let’s be honest, as much as we love guzzling it down, isn’t it time we gave our beloved coffee a little makeover? I’m talking about transforming it from a simple beverage into a delectable, irresistible, and utterly magnificent coffee slice.
Imagine this: a buttery, crumbly crust cradling a rich, creamy coffee-infused filling, all topped with a dusting of cocoa powder that whispers sweet nothings to your taste buds. Are you drooling yet? Because I definitely am. And the best part? This coffee slice is surprisingly easy to make, even for those of us who consider burning toast a culinary achievement.
So, ditch the instant coffee granules and prepare to embark on a caffeinated adventure that will redefine your definition of “coffee break.” Trust me, this coffee slice is not just a dessert; it’s an experience.
Gathering Your Coffee Slice Arsenal
Before we dive into the nitty-gritty of baking, let’s make sure we have all our ingredients assembled like a well-oiled coffee-making machine. We don’t want any last-minute scrambling when the coffee cravings hit.
For the Crust:
- 1 ½ cups all-purpose flour: The foundation of our crumbly masterpiece.
- ½ cup (1 stick) unsalted butter, cold and cubed: Cold butter is crucial for that flaky texture.
- ¼ cup powdered sugar: Adds a touch of sweetness and tenderness.
- 1 large egg yolk: Binds the dough together.
- 1 teaspoon Alcohol-free vanilla extract: Enhances the flavor.
- Pinch of salt: Balances the sweetness.
For the Coffee Filling:
- 8 ounces cream cheese, softened: The creamy heart of our coffee slice.
- ½ cup granulated sugar: Sweetens the deal.
- 2 large eggs: Adds richness and structure.
- ¼ cup strong brewed coffee, cooled: The star of the show.
- 2 tablespoons cornstarch: Helps to thicken the filling.
- 1 teaspoon Alcohol-free vanilla extract: Enhances the coffee flavor.
- Pinch of salt: Balances the sweetness.
- Cocoa powder, for dusting: For that elegant finishing touch.
Crafting the Perfect Coffee Slice Crust
Alright, let’s tackle the crust. This is where the magic begins. Think of it as the canvas for our coffee masterpiece. We want it buttery, crumbly, and oh-so-delicious.
1. In a large bowl, whisk together the flour, powdered sugar, and salt.
2. Cut in the cold, cubed butter using a pastry blender or your fingertips until the mixture resembles coarse crumbs. The key here is to work quickly to keep the butter cold.
3. In a separate small bowl, whisk together the egg yolk and Alcohol-free vanilla extract. Add this mixture to the flour mixture and mix until a dough forms. Don’t overmix!
4. Wrap the dough in plastic wrap and chill in the refrigerator for at least 30 minutes. This allows the gluten to relax and the butter to firm up, resulting in a tender crust.
5. After chilling, press the dough evenly into the bottom of a 9-inch pie plate or springform pan. You can use your fingers or the bottom of a measuring cup to create a smooth, even surface.
6. Bake the crust in a preheated oven at 350°F (175°C) for 15-20 minutes, or until lightly golden brown. This is called blind baking. Let it cool slightly while you prepare the filling.
Brewing the Coffee-Infused Filling
Now, for the heart and soul of our coffee slice – the coffee filling! This is where the caffeine magic truly happens. We want it creamy, smooth, and bursting with coffee flavor.
1. In a large bowl, beat the softened cream cheese and granulated sugar together until smooth and creamy. Make sure there are no lumps!
2. Beat in the eggs one at a time, mixing well after each addition.
3. In a separate small bowl, whisk together the cooled strong brewed coffee and cornstarch until smooth. This prevents lumps in the filling.
4. Add the coffee mixture, Alcohol-free vanilla extract, and salt to the cream cheese mixture and beat until well combined. Be careful not to overmix.
5. Pour the coffee filling into the partially baked crust.
6. Bake in a preheated oven at 350°F (175°C) for 30-35 minutes, or until the filling is set but still slightly jiggly in the center.
7. Let the coffee slice cool completely in the oven with the door slightly ajar. This prevents cracking.
8. Once cooled, chill in the refrigerator for at least 2 hours before serving. This allows the filling to fully set and the flavors to meld together.
9. Before serving, dust the coffee slice with cocoa powder for that elegant finishing touch.
Variations on a Caffeinated Theme
Okay, so you’ve mastered the basic coffee slice recipe. Congratulations! But why stop there? Let’s explore some fun and delicious variations to keep things interesting.
- Mocha Madness: Add 2 tablespoons of cocoa powder to the coffee filling for an extra chocolatey kick.
- Caramel Swirl: Drizzle caramel sauce over the filling before baking for a sweet and decadent twist.
- Espresso Shot: Use espresso instead of regular brewed coffee for an even more intense coffee flavor.
- Nutty Delight: Add chopped pecans or walnuts to the crust for a crunchy texture.
- Spice It Up: Add a pinch of cinnamon or nutmeg to the filling for a warm and cozy flavor.
Troubleshooting Your Coffee Slice Adventures
Even the most seasoned bakers encounter the occasional hiccup. So, let’s address some common coffee slice conundrums and how to solve them.
- Soggy Crust: Make sure to blind bake the crust properly and let it cool slightly before adding the filling. Also, avoid overfilling the crust.
- Cracked Filling: Cool the coffee slice slowly in the oven with the door slightly ajar to prevent cracking.
- Lumpy Filling: Ensure the cream cheese is fully softened before mixing. Also, whisk the coffee and cornstarch together thoroughly before adding it to the cream cheese mixture.
- Weak Coffee Flavor: Use strong brewed coffee or espresso for a more intense coffee flavor.
Coffee Slice: A Love Story in Every Bite
There you have it, folks! Your guide to creating the ultimate coffee slice. It’s a labor of love, a celebration of caffeine, and a guaranteed crowd-pleaser. So, go forth and bake! And remember, life is too short for boring desserts. Embrace the coffee, embrace the slice, and embrace the deliciousness.
Happy baking! And may your coffee slice always be perfectly creamy, delightfully caffeinated, and utterly irresistible.
Perfecting the Cooking Process
For a perfect coffee slice, focus on gradual temperature changes. Bake the crust first, then add the filling. Cooling it slowly in the oven helps prevent cracks. This method ensures a flawless texture and appearance every time.
Add Your Touch
Consider adding a hint of citrus zest to the crust for a bright contrast. Or, try infusing the coffee with cardamom for a spiced flavor. You can also top it with chocolate shavings for a richer experience.
Storing & Reheating
Store leftover coffee slice in the refrigerator, covered, for up to three days. To reheat, warm individual slices gently in the microwave. For best results, let it sit at room temperature briefly before serving.
Here are some tips that might help you on your journey:
- Use high-quality coffee for the filling. The better the coffee, the richer and more flavorful the slice will be.
- Ensure your ingredients are at room temperature before mixing. This helps create a smooth and even batter, preventing lumps.
- If you’re short on time, use a store-bought graham cracker crust. It’s a convenient alternative that still delivers a delicious result.
(Personal anecdote formated as paragraph subheading)
I once forgot to add sugar, my friends still loved the intense coffee flavor! It shows that even mistakes can lead to surprisingly tasty results.
Conclusion for Coffee Slice:
This Coffee Slice recipe is surprisingly simple, yet delivers a fantastic coffee flavor! From choosing the right coffee to mastering the perfect set, you’re now equipped to create a dessert that will impress your friends and family. Remember to use fresh, strong coffee for the best taste, ensure a sturdy base to avoid sogginess, and store your slice properly. Now go forth and bake your own Coffee Slice!
Print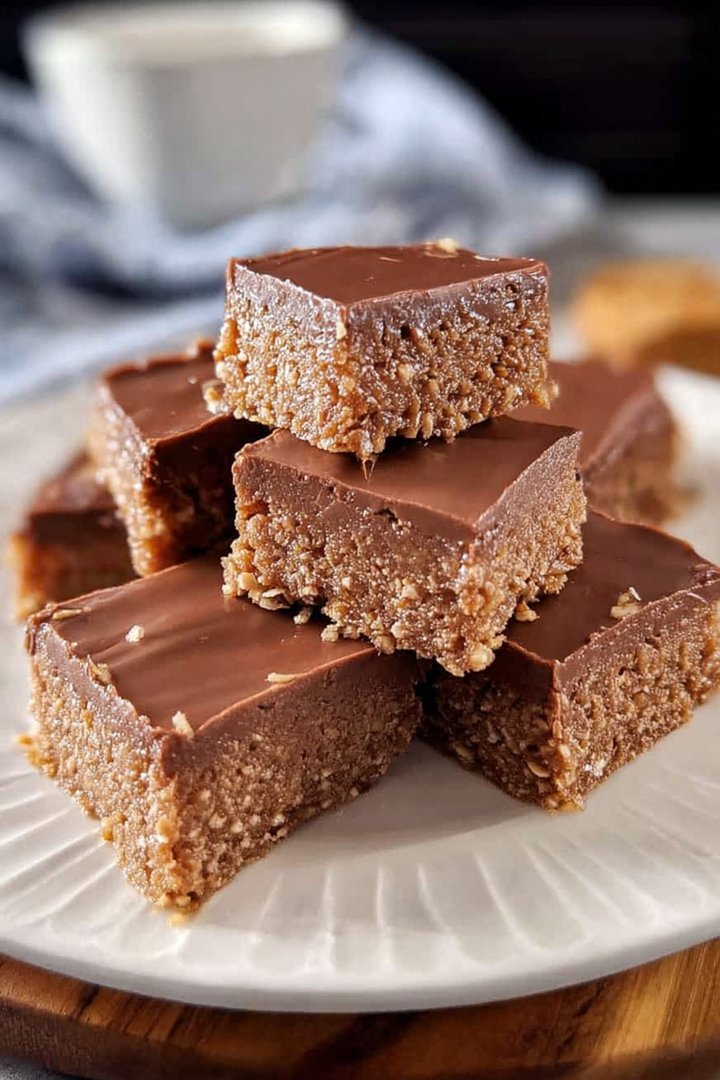
Coffee Slice
Delicious coffee slice recipe with detailed instructions and nutritional information.
- Total Time: 35 minutes
- Yield: 4 servings 1x
Ingredients
- 500g Coffee
- 2 tablespoons olive oil
- 1 teaspoon salt
- 1/2 teaspoon black pepper
- 2 cloves garlic
- 1 onion
Instructions
- Step 1: Prepare all ingredients
- Step 2: Heat oil in a pan
- Step 3: Cook the main ingredients
- Step 4: Season to taste
- Step 5: Serve hot
Notes
- Store leftover coffee slice in an airtight container in the refrigerator for up to 3 days.
- Reheat gently in a pan over medium-low heat, stirring occasionally, to prevent burning.
- Serve this savory coffee slice alongside grilled meats or roasted vegetables for a unique flavor combination.
- For a richer flavor, caramelize the onions slowly over low heat before adding the coffee.
- Prep Time: 15 minutes
- Cook Time: 20 minutes
- Method: Stovetop
- Cuisine: American
FAQs:
Can I use instant coffee for this Coffee Slice recipe?
Well, my friend, you *could* use instant coffee. But picture this: you’re inviting royalty over for tea, and you offer them instant. They might still smile, but you’ll know. For the best flavor, I strongly recommend using freshly brewed, strong coffee. It’s like the difference between a whisper and a shout – you want that rich, aromatic coffee flavor to truly sing in your Coffee Slice! If you absolutely must use instant, go for a high-quality brand and use a bit more than you usually would to compensate for the flavor.
How do I prevent my Coffee Slice from being soggy?
Ah, the dreaded soggy bottom! No one wants that, not even Mary Berry. The key here is to make sure your biscuit or cookie base is sturdy enough to withstand the moisture from the coffee-infused filling. I recommend lightly brushing the base with melted white chocolate (remember, plant-based!) before adding the filling. This creates a barrier. Also, ensure your filling is properly set before slicing. Patience is a virtue, especially when baking!
How long does this Coffee Slice last?
In my house? About five minutes. Just kidding (sort of). Seriously though, this Coffee Slice is best enjoyed within 2-3 days. Keep it stored in an airtight container in the refrigerator. After that, the texture might start to change a bit. Although it will still be safe to eat, it won’t be quite as delightful. Consider it a challenge: can you make it last more than 48 hours? I dare you!
What if I don’t have a square baking pan for making the Coffee Slice?
Don’t fret! Round, rectangular, even heart-shaped, your Coffee Slice will still taste amazing no matter the pan. The baking time might vary slightly depending on the shape and size of your pan, so keep a close eye on it. The important thing is to adjust the quantity of base ingredients depending on the new surface area of the new pan. The world is your Coffee Slice-shaped oyster, so go wild!


Leave a Comment