
Crispy Shrimp Tempura: it’s not just food; it’s an experience. Imagine biting into a delicate, golden shell that gives way to succulent, perfectly cooked shrimp.
I remember the first time I tried making Crispy Shrimp Tempura; it was like attempting to conduct an orchestra with a kazoo. Let’s embark on this culinary adventure together, minus the kitchen disasters, promising a symphony of textures and tastes that’s worth every joyful crunch.
- Achieve restaurant-quality tempura at home with minimal fuss, making it perfect for any home cook.
- Delight in the harmonious blend of crispy coating and tender shrimp, a truly irresistible flavor combination.
- Impress guests with a visually stunning dish, showcasing a beautiful golden hue and delicate presentation.
- Enjoy it as an appetizer, side, or main course, easily paired with your favorite dipping sauces and sides.
Ingredients for Crispy Shrimp Tempura
Here’s what you’ll need to make this delicious dish:
The full ingredients list, including measurements, is provided in the recipe card directly below.
How to Make Crispy Shrimp Tempura
Follow these simple steps to prepare this delicious dish:
Step 1: Prepare the Shrimp
Pat the shrimp dry with paper towels. Lightly dust them with all-purpose flour, ensuring they are fully coated. This step helps the tempura batter stick better.
Step 2: Mix the Tempura Batter
In a bowl, whisk together cornstarch, baking powder, and salt. Gradually add ice water, mixing until just combined. The batter should be thin and slightly lumpy. Overmixing will develop the gluten and result in a less crispy tempura.
Step 3: Heat the Oil
Pour vegetable oil into a deep pot or fryer and heat to 350°F (175°C). Use a thermometer to ensure the oil reaches the correct temperature. If it’s too low, the tempura will be soggy; if it’s too high, it will burn quickly.
Step 4: Fry the Shrimp
Dip each shrimp into the tempura batter, ensuring it’s fully coated. Carefully lower the battered shrimp into the hot oil, frying in batches to avoid overcrowding. Fry for 2-3 minutes, until golden brown and crispy.
Step 5: Drain and Serve
Remove the Crispy Shrimp Tempura from the oil using a slotted spoon and place them on a wire rack to drain excess oil. This helps maintain their crispiness.
Step 6: Serve Immediately
Serve hot with your favorite dipping sauce, such as a mixture of soy sauce, dashi, grated ginger, and daikon radish.
Tips for the Perfect Crispy Shrimp Tempura (formatted as H2 subheading)
Achieving that perfect, restaurant-quality Crispy Shrimp Tempura at home requires more than just a recipe. It’s about understanding the nuances and little secrets that elevate your tempura from good to extraordinary. Let’s dive into these golden nuggets of wisdom.
Keep Everything Cold (formatted as H3 subheading)
Temperature is your best friend when it comes to tempura. The colder, the better! Why, you ask? Cold ingredients inhibit gluten development in the batter. Gluten is what makes bread chewy, but for tempura, we want light and crispy, not chewy. So, keep your ice water ice-cold and even chill the flour and cornstarch in the freezer for about 30 minutes before mixing.
Don’t Overmix the Batter (formatted as H3 subheading)
I cannot stress this enough: overmixing is a tempura sin! The batter should be lumpy. I repeat, LUMPY! A perfectly smooth batter means you’ve worked the gluten too much, resulting in a tough, rather than a delicate, crispy coating. Mix gently until just combined, and don’t worry about those little lumps; they’re your friends.
The Right Oil Temperature is Key (formatted as H3 subheading)
Temperature of the oil is paramount. Invest in a good quality thermometer because guessing just won’t cut it. The ideal oil temperature is 350°F (175°C). Too low, and you’ll end up with greasy, soggy tempura. Too high, and you’ll have beautifully browned tempura on the outside and raw shrimp on the inside. Nobody wants that surprise!
Fry in Small Batches (formatted as H3 subheading)
Patience is a virtue, especially when frying. Overcrowding the pot lowers the oil temperature, leading to unevenly cooked and soggy tempura. Fry in small batches, giving each shrimp enough space to swim and get crispy. It might take a little longer, but the results are well worth the wait.
Use a Wire Rack for Draining (formatted as H3 subheading)
Forget paper towels! After frying, place the Crispy Shrimp Tempura on a wire rack to drain. This allows air to circulate around the tempura, keeping it crispy on all sides. If you use paper towels, the bottom will steam and become soggy, undoing all your hard work.
Presentation Matters (formatted as H3 subheading)
While taste is king, presentation is the queen. Arrange your Crispy Shrimp Tempura artfully on a plate. Serve with a light and refreshing dipping sauce (a mix of soy sauce, dashi, grated ginger, and daikon radish is classic). A sprinkle of green onions or a lemon wedge can also add a touch of elegance.
Experiment with Different Flours (formatted as H3 subheading)
While all-purpose flour and cornstarch are the standard, don’t be afraid to experiment. Rice flour can add an extra level of crispiness, while potato starch creates a slightly different texture. Play around to find your perfect combination.
Make the Dipping Sauce Your Own (formatted as H3 subheading)
The dipping sauce is where you can really let your personality shine. While the classic soy sauce, dashi, ginger, and daikon radish mix is delicious, feel free to add your own twist. A little bit of citrus juice (lemon, lime, or yuzu) can add brightness. A pinch of chili flakes can add heat. Get creative and make it your signature sauce!
Serve Immediately (formatted as H3 subheading)
Crispy Shrimp Tempura is best enjoyed immediately. The longer it sits, the more it loses its crispiness. So, gather your friends and family, and enjoy the fruits (or rather, the shrimp) of your labor while it’s hot and crispy.
Variations and Serving Suggestions (formatted as H2 subheading)
One of the best things about Crispy Shrimp Tempura is its versatility. While the classic recipe is undeniably delicious, there are countless ways to put your own spin on it and create a truly unique dish.
Vegetable Tempura (formatted as H3 subheading)
Why limit yourself to just shrimp? Many vegetables taste amazing when transformed into tempura. Try thinly sliced sweet potatoes, zucchini, bell peppers, broccoli florets, or even asparagus. Just like with the shrimp, make sure to pat them dry before coating them in batter.
Seafood Medley (formatted as H3 subheading)
Mix it up with other types of seafood. Scallops, calamari, and white fish all work wonderfully as tempura. The key is to choose seafood that cooks quickly so that it doesn’t become overcooked while the batter is getting crispy.
Spicy Tempura (formatted as H3 subheading)
Add a kick to your tempura by incorporating some heat into the batter. A pinch of cayenne pepper, a dash of hot sauce, or even some finely chopped jalapeños can do the trick. Adjust the amount to your spice preference.
Tempura Donburi (formatted as H3 subheading)
Turn your Crispy Shrimp Tempura into a satisfying rice bowl. Place a bed of warm rice in a bowl, top with your tempura, and drizzle with a sweet and savory sauce made from soy sauce, sugar, and dashi. Garnish with green onions and a soft-boiled egg for extra richness.
Tempura Udon or Soba (formatted as H3 subheading)
Add your Crispy Shrimp Tempura to a bowl of hot udon or soba noodle soup. The crispy tempura adds a delightful textural contrast to the tender noodles and savory broth.
Tempura Sushi Rolls (formatted as H3 subheading)
Incorporate Crispy Shrimp Tempura into your homemade sushi rolls. The crispy shrimp adds a delicious crunch and flavor to your rolls.
Serving with Different Sauces (formatted as H3 subheading)
While the classic soy sauce, dashi, ginger, and daikon radish dipping sauce is always a winner, there are plenty of other sauces that pair well with tempura. Try a sweet chili sauce, a creamy sriracha mayo, or even a tangy ponzu sauce.
Frequently Asked Questions About Crispy Shrimp Tempura (formatted as H2 subheading)
Making Crispy Shrimp Tempura can seem daunting at first, but with a little knowledge and practice, you can achieve restaurant-quality results at home. Let’s address some common questions to help you on your tempura journey.
Why is my tempura not crispy? (formatted as H3 subheading)
Several factors can contribute to soggy tempura. Overmixing the batter, not using cold enough ingredients, frying at too low of a temperature, or overcrowding the pot can all result in less-than-crispy tempura. Review the tips above to avoid these common mistakes.
Can I make the tempura batter ahead of time? (formatted as H3 subheading)
While it’s best to use the tempura batter immediately after mixing, you can prepare it up to 30 minutes in advance. Keep it in the refrigerator until you’re ready to use it and give it a gentle stir before dipping the shrimp.
Can I reuse the frying oil? (formatted as H3 subheading)
Yes, you can reuse the frying oil a few times, provided it’s properly strained and stored. Let the oil cool completely, then strain it through a fine-mesh sieve lined with cheesecloth to remove any food particles. Store the oil in an airtight container in a cool, dark place. Discard the oil if it becomes dark, thick, or develops an off odor.
What kind of shrimp should I use? (formatted as H3 subheading)
Large or jumbo shrimp work best for tempura. Look for shrimp that are firm, plump, and have a fresh, clean smell. You can use fresh or frozen shrimp, but if using frozen, make sure to thaw them completely and pat them dry before coating them in batter.
Can I bake the tempura instead of frying it? (formatted as H3 subheading)
While baking tempura is possible, it won’t achieve the same level of crispiness as frying. However, if you’re looking for a healthier alternative, you can try baking it. Preheat your oven to 400°F (200°C), place the battered shrimp on a baking sheet lined with parchment paper, and bake for 10-12 minutes, or until golden brown.
What can I do with leftover tempura? (formatted as H3 subheading)
Leftover Crispy Shrimp Tempura is best enjoyed immediately, but if you have some leftover, you can reheat it in a preheated oven or toaster oven at 350°F (175°C) for a few minutes, or until crispy. You can also use it in tempura donburi or add it to noodle soups.
Is tempura gluten-free? (formatted as H3 subheading)
Traditional tempura is not gluten-free because it contains all-purpose flour. However, you can easily make a gluten-free version by using a gluten-free flour blend or a combination of rice flour and potato starch.
Can I add other seasonings to the batter? (formatted as H3 subheading)
Absolutely! Feel free to experiment with different seasonings to customize your tempura batter. Garlic powder, onion powder, paprika, or even a pinch of chili powder can add extra flavor.
How do I keep the fried tempura warm until serving? (formatted as H3 subheading)
If you’re frying in batches and want to keep the tempura warm until serving, place it on a wire rack in a preheated oven at 200°F (95°C). This will help maintain its crispiness without overcooking it.
Perfecting the Cooking Process
To nail that *chef’s kiss* moment with this dish, tackle the sauce first. This allows the flavors to meld while you prep the shrimp. Then, get your tempura batter ready just before frying to keep things light and airy.
Add Your Touch
Feeling adventurous? Swap out regular flour for gluten-free rice flour for an even lighter, crispier tempura. You could also infuse your dipping sauce with a hint of ginger or a dash of citrus zest for an extra zing.
Storing & Reheating
If you have leftovers (though I doubt you will!), store them in an airtight container in the fridge. Reheat them in the oven or air fryer to revive their crispiness; avoid the microwave unless you fancy soggy shrimp!
- Make sure your oil is at the right temperature. Too cold and you’ll end up with greasy tempura; too hot and it will burn before it cooks through!
- Don’t overcrowd the pot or pan. Fry the shrimp in small batches to keep the oil temperature consistent, ensuring that everything is golden brown and crispy.
- Use ice-cold water to make the batter and keep the shrimp chilled before dipping. This temperature difference is key for creating that light, airy texture.
(Personal anecdote formated as paragraph subheading)
I remember the first time I made this for a potluck; everyone thought I’d ordered takeout! The crispy, golden shrimp vanished in minutes, and I’ve been the designated tempura chef ever since.
Dive Into the Delicious World of Crispy Shrimp Tempura
Imagine biting into a delicate, golden-brown crust that gives way to a succulent, juicy shrimp. That, my friends, is the magic of *crispy shrimp tempura*. It’s a dish that sounds fancy, but is surprisingly easy to master at home. Forget those soggy, sad imitations you might have encountered elsewhere; we’re aiming for tempura perfection here. We’re talking restaurant-quality crispiness with a homemade touch that’ll have everyone begging for your secret. This isn’t just a recipe; it’s a culinary adventure. So, grab your apron, sharpen your chopsticks (metaphorically, of course, unless you’re really good), and let’s get frying!
Why This Crispy Shrimp Tempura Recipe Rocks
Let’s face it, there are approximately a gazillion *shrimp tempura* recipes floating around the internet. So, why choose this one? Because this one understands you. It understands your desire for that perfect balance of crispy and tender. It acknowledges your fear of greasy, heavy batter. And it promises to deliver a truly delightful experience, one golden-brown shrimp at a time.
This recipe is all about the details. We’re going to walk you through every step, from selecting the perfect shrimp to mastering the art of the dipping sauce. Plus, we’ll share a few insider secrets that will elevate your *crispy shrimp tempura* from “pretty good” to “absolutely amazing!” We’re making tempura accessible, even for kitchen novices. Trust me, if I can do it, you can too! My first attempt resulted in something resembling deep-fried space debris, so I’ve learned from my mistakes (and I’m sharing them with you so you don’t have to repeat them!).
Gather Your Shrimp Squad: Ingredients You’ll Need
Alright, let’s talk ingredients. Nothing too crazy here, but quality matters. Remember, you’re only as good as your ingredients, so choose wisely!
- **Large Shrimp:** Look for fresh, plump shrimp. Deveined and peeled, with the tails left on for that classic tempura look. About a pound should do the trick.
- **All-Purpose Flour:** The base of our crispy batter. You can also experiment with rice flour for an extra-light texture.
- **Cornstarch:** This secret ingredient helps create that delicate, shatteringly crisp coating.
- **Baking Powder:** A little lift never hurt anyone. This helps keep the batter light and airy.
- **Ice-Cold Water:** This is crucial! The cold water prevents gluten development, resulting in a lighter, crispier tempura.
- **Egg:** Just one egg yolk to add richness and bind the batter.
- **Vegetable Oil:** For frying. Choose an oil with a high smoke point, like canola or peanut oil.
- **Soy Sauce:** The foundation of our dipping sauce.
- **Rice vinegar with sugar (Rice Cooking Grape juice with vinegar Substitute):** We’ll use a blend of rice vinegar and a touch of sugar to mimic the sweetness of Rice vinegar with sugar.
- **Grated Daikon Radish:** Adds a refreshing, slightly spicy kick to the dipping sauce.
- **Grated Ginger:** For a warm, aromatic touch.
Prepping for Tempura Triumph: Step-by-Step Instructions
Now for the fun part! Let’s get cooking, shall we?
Step 1: Shrimp Prep Power
First things first, prepare the shrimp. Pat them dry with paper towels. This is essential for getting that crispy coating to adhere properly. Next, make a few shallow cuts along the inside curve of each shrimp. This prevents them from curling up during frying and ensures even cooking.
Step 2: Batter Up! The Secret to Crispy Perfection
In a large bowl, whisk together the flour, cornstarch, and baking powder. In a separate bowl, whisk together the egg yolk and ice-cold water. Gradually add the wet ingredients to the dry ingredients, whisking lightly until just combined. Don’t overmix! A few lumps are perfectly fine. Overmixing will develop the gluten in the flour, resulting in a tough batter. Keep the batter cold by placing the bowl in a larger bowl filled with ice water.
Step 3: Sauce Boss: Crafting the Perfect Dipping Sauce
While the batter chills, prepare the dipping sauce. In a small bowl, combine the soy sauce, rice vinegar, and sugar. Stir until the sugar is dissolved. Add the grated daikon radish and ginger. Taste and adjust seasonings as needed. If you like it sweeter, add a touch more sugar. If you prefer a little more tang, add a splash more rice vinegar.
Step 4: Frying Frenzy: Achieving Golden-Brown Goodness
Heat the vegetable oil in a large pot or deep fryer to 350°F (175°C). Working in small batches, dip each shrimp into the batter, making sure to coat it evenly. Carefully lower the battered shrimp into the hot oil. Fry for 2-3 minutes per side, or until golden brown and crispy. Remove the shrimp from the oil and place them on a wire rack to drain. This is crucial for maintaining that crispy texture.
Step 5: Serve and Savor: The Grand Finale
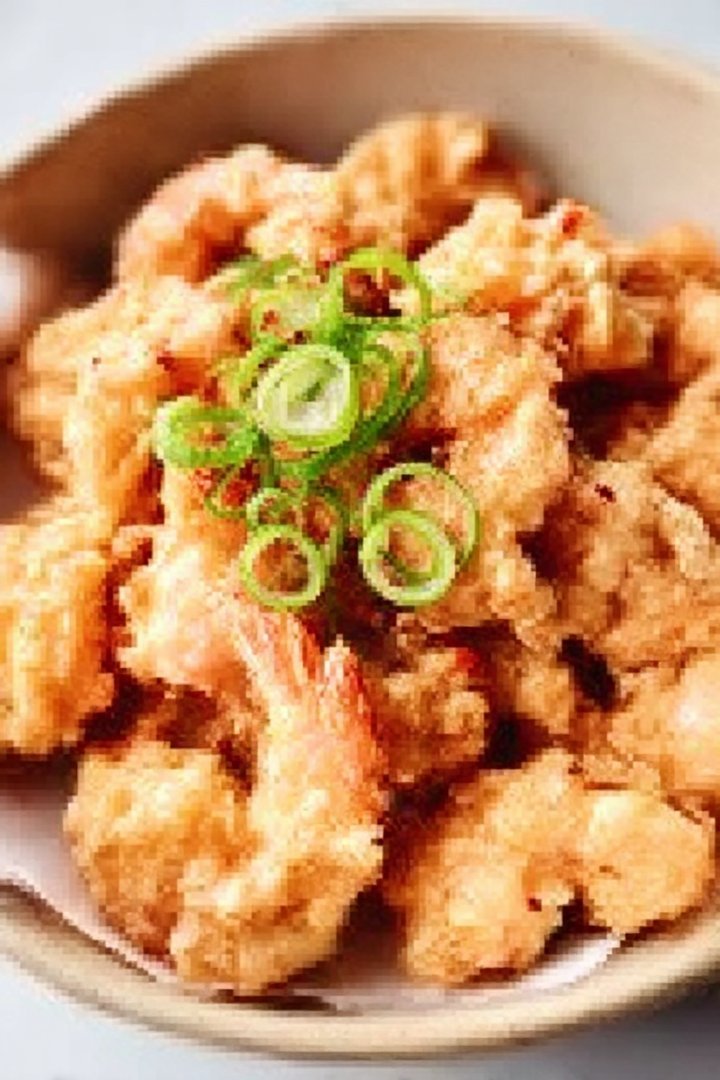
Serve the *crispy shrimp tempura* immediately with the dipping sauce. Garnish with a sprinkle of chopped green onions, if desired. Prepare for the compliments to roll in!
Tempura Troubleshooting: Common Mistakes and How to Avoid Them
Even the best cooks encounter a mishap now and then. Here are a few common tempura pitfalls and how to sidestep them:
- **Soggy Tempura:** This is usually caused by oil that’s not hot enough or overcrowding the pot. Make sure your oil is at the correct temperature and fry the shrimp in small batches.
- **Uneven Coating:** Ensure the shrimp are completely dry before dipping them in the batter. This will help the batter adhere evenly.
- **Tough Batter:** Avoid overmixing the batter. A few lumps are perfectly fine.
- **Burnt Tempura:** Your oil is too hot! Reduce the heat and adjust the frying time accordingly.
Variations and Twists on Classic Shrimp Tempura
*Crispy shrimp tempura* is fantastic on its own, but don’t be afraid to experiment!
- **Vegetable Tempura:** Add some veggies to the mix! Broccoli florets, sliced sweet potatoes, or green beans all work well.
- **Spicy Tempura:** Add a pinch of cayenne pepper or a dash of chili flakes to the batter for a little kick.
- **Coconut Tempura:** Substitute some of the flour with shredded coconut for a tropical twist.
- **Tempura Udon:** Serve your *crispy shrimp tempura* over a bowl of hot udon noodles in a flavorful broth.
Perfecting the Cooking Process
To nail that *chef’s kiss* moment with this dish, tackle the sauce first. This allows the flavors to meld while you prep the shrimp. Then, get your tempura batter ready just before frying to keep things light and airy.
Add Your Touch
Feeling adventurous? Swap out regular flour for gluten-free rice flour for an even lighter, crispier tempura. You could also infuse your dipping sauce with a hint of ginger or a dash of citrus zest for an extra zing.
Storing & Reheating
If you have leftovers (though I doubt you will!), store them in an airtight container in the fridge. Reheat them in the oven or air fryer to revive their crispiness; avoid the microwave unless you fancy soggy shrimp!
- Make sure your oil is at the right temperature. Too cold and you’ll end up with greasy tempura; too hot and it will burn before it cooks through!
- Don’t overcrowd the pot or pan. Fry the shrimp in small batches to keep the oil temperature consistent, ensuring that everything is golden brown and crispy.
- Use ice-cold water to make the batter and keep the shrimp chilled before dipping. This temperature difference is key for creating that light, airy texture.
(Personal anecdote formated as paragraph subheading)
I remember the first time I made this for a potluck; everyone thought I’d ordered takeout! The crispy, golden shrimp vanished in minutes, and I’ve been the designated tempura chef ever since.
Enjoy Your Crispy Shrimp Tempura!
There you have it! Your guide to creating *crispy shrimp tempura* that will rival any restaurant. Remember, practice makes perfect. Don’t be discouraged if your first batch isn’t flawless. Just keep experimenting and tweaking the recipe until you achieve your desired level of crispiness. Now go forth and fry! And don’t forget to share your tempura triumphs with me. Happy cooking!
Conclusion for Crispy Shrimp Tempura:
Making **Crispy Shrimp Tempura** at home might seem intimidating, but with the right tips and tricks, it’s totally achievable. Remember to keep your ingredients cold, your oil hot, and don’t overcrowd the pan. Experiment with different dipping sauces to find your perfect match. Serve immediately on a wire rack to retain all the crispiness. So, grab your chopsticks and prepare to enjoy this amazing, delightful treat! Once you get the hang of it, you’ll be whipping up batches of **Crispy Shrimp Tempura** to enjoy every time.
Print
Crispy Shrimp Tempura
Delicious crispy shrimp tempura recipe with detailed instructions and nutritional information.
- Total Time: 35 minutes
- Yield: 4 servings
Ingredients
- Large shrimp, peeled and deveined with tail left on: 1 pound (about 20-25)
- All-purpose flour: 1 cup
- Cornstarch: 1/2 cup
- Ice water: 1 cup
- Egg: 1 large
- Vegetable oil for frying: 4 cups
- Dipping sauce (soy sauce, dashi, mirin): to taste
Instructions
- Step 1: Prepare the shrimp by making small slits on the underside to prevent curling during frying. Pat dry thoroughly with paper towels.
- Step 2: In a large bowl, whisk together the flour and cornstarch. In a separate bowl, lightly beat the egg. Slowly add the ice water to the egg and whisk until just combined.
- Step 3: Add the wet ingredients to the dry ingredients. Gently fold together until just combined. Do not overmix; a few lumps are okay. The batter should be thin.
- Step 4: Heat the vegetable oil in a large, deep pot or wok to 350-375°F (175-190°C).
- Step 5: Dip each shrimp into the tempura batter, ensuring it's evenly coated. Carefully lower the battered shrimp into the hot oil, a few at a time, to avoid overcrowding.
- Step 6: Fry for 2-3 minutes, or until golden brown and crispy. Remove the shrimp with a slotted spoon and place them on a wire rack to drain excess oil. Serve immediately with dipping sauce.
Notes
- Store leftover tempura in an airtight container in the refrigerator, but be aware it will lose its crispness.
- To restore some crispness, reheat the tempura in a preheated oven at 350°F (175°C) for a few minutes, or until warmed through.
- Serve your crispy shrimp tempura immediately with a side of seasoned rice and a sprinkle of toasted sesame seeds for a complete meal.
- For an extra light and airy batter, use chilled soda water instead of ice water; the bubbles make a difference!
- Prep Time: 15 minutes
- Cook Time: 20 minutes
- Method: Stovetop
- Cuisine: American
FAQs:
Can I use frozen shrimp for Crispy Shrimp Tempura?
Absolutely! Frozen shrimp is perfectly fine, and often more convenient. Just make sure to thaw it completely before you start. Place the frozen shrimp in a colander and run cold water over them until they are fully defrosted. Pat them dry with paper towels to remove any excess moisture, as this will help the batter adhere better and achieve that wonderfully light and airy **Crispy Shrimp Tempura**. Nobody wants soggy tempura, so drying is key to success! Remember to devein them too – unless you’re into that sort of thing, which, honestly, I’m not judging.
What dipping sauce goes best with Shrimp Tempura?
While classic tentsuyu sauce (a mix of dashi, soy sauce, and Rice vinegar with sugar – but we’re skipping the Rice vinegar with sugar and substituting apple juice for sweetness) is delicious, feel free to get creative! A simple mixture of soy sauce and grated ginger works wonders. Or, try a spicy mayo by combining mayonnaise with sriracha to your taste. For a brighter flavor, a sweet chili sauce is also fantastic. The best dipping sauce is the one you love most, so experiment and discover your perfect **Crispy Shrimp Tempura** companion.
How do I keep my Shrimp Tempura Crispy while serving?
The key to maintaining that desirable crispiness is to avoid trapping steam. As soon as the tempura is cooked, place it on a wire rack set over a baking sheet. This allows air to circulate around each piece, preventing them from becoming soggy. If you’re making a large batch, keep the oven warm (around 200°F or 93°C) and place the baking sheet with the tempura in the oven to keep it warm and crispy until serving time. Nobody wants limp **Crispy Shrimp Tempura**, so this step is crucial!
What kind of oil should I use for frying?
The best oil for frying tempura is one with a high smoke point and neutral flavor. Canola oil, vegetable oil, or peanut oil are all excellent choices. Avoid using olive oil, as it has a lower smoke point and can impart a distinct flavor to your **Crispy Shrimp Tempura**. Make sure you have enough oil in your pot or deep fryer to fully submerge the shrimp; this ensures even cooking and that signature crispy coating. Remember to maintain a consistent temperature for optimal results!


Leave a Comment