

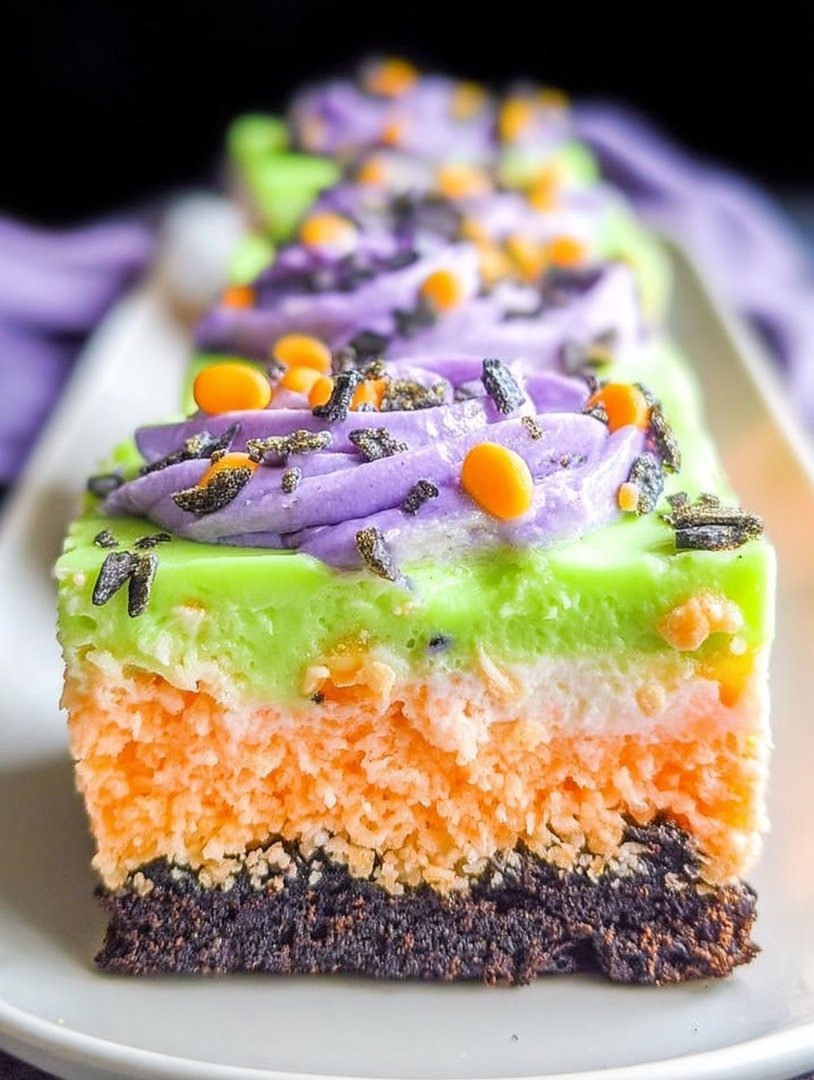
Imagine a dessert so decadent, so layered with delightful textures and contrasting flavors, it practically screams “Halloween!” It’s sweet, it’s spooky, and it’s surprisingly simple: a Halloween Lush that will bewitch your taste buds.
This dreamy dessert combines the crunch of a cookie crust, the creamy smoothness of a cheesecake layer, the fluffy delight of a pudding layer, and the sweet richness of a whipped topping. Every bite is a hauntingly good experience. Get ready to create a culinary masterpiece that will be the star of your Halloween gathering.
Here are a few reasons why this Halloween Lush will be the star of your spooky celebration:
- It’s incredibly easy to make, requiring minimal baking and mostly just layering of ingredients, making it perfect for busy Halloween preparations.
- The combination of textures and flavors, from the crunchy cookie crust to the creamy pudding and whipped topping, creates a truly indulgent experience.
- The layered presentation with Halloween-themed sprinkles and decorations makes it a visually stunning dessert that will impress your guests.
- It’s versatile and can be customized with different pudding flavors, cookie types, and toppings to suit your preferences and dietary needs.
Ingredients for Halloween Lush
Here’s what you’ll need to make this delicious dish:
The full ingredients list, including measurements, is provided in the recipe card directly below.
How to Make Halloween Lush
Follow these simple steps to prepare this delicious dish:
Step 1: Prepare the Cookie Crust
In a food processor, crush the chocolate sandwich cookies until they are fine crumbs. Alternatively, place the cookies in a zip-top bag and crush them with a rolling pin. Melt the butter and mix it with the cookie crumbs until well combined. Press the mixture firmly into the bottom of a 9×13 inch baking dish.
Step 2: Make the Cream Cheese Layer
In a large bowl, beat the softened cream cheese until smooth. Gradually add the powdered sugar and vanilla extract, continuing to beat until well combined and creamy. Spread this mixture evenly over the cookie crust.
Step 3: Prepare the Pudding Layer
In a separate bowl, whisk together the instant vanilla pudding mix and milk until the pudding thickens. This usually takes about 2-3 minutes. Gently spread the pudding layer over the cream cheese layer.
Step 4: Top with Whipped Topping and Decorate
Spread the whipped topping evenly over the pudding layer. Sprinkle generously with Halloween sprinkles. For an extra touch, add gummy worms, candy corn, or other Halloween candies.
Step 5: Chill and Serve
Cover the baking dish with plastic wrap and refrigerate for at least 4 hours, or preferably overnight, to allow the layers to set. Cut into squares and serve chilled. This Halloween Lush is best enjoyed cold, allowing all the flavors to meld together perfectly.
Perfecting the Cooking Process
To achieve the most delightful Halloween Lush, plan your attack! Start by prepping your crust ingredients, then move on to the pudding layers while the crust chills. Assemble everything just before serving for maximum wow factor and to prevent a soggy bottom.
Add Your Touch
Want to get wild? Swap out vanilla pudding for chocolate or butterscotch. Sprinkle crushed ginger cookies on top for extra spice. Feeling fruity? Add a layer of sliced bananas or strawberries between the pudding layers. The possibilities are endless, so get creative!
Storing & Reheating
Keep your Halloween Lush covered in the fridge for up to three days. It’s best served cold; no reheating is needed. Although, sneaking a spoonful straight from the fridge at midnight is highly encouraged! Trust me, it’s a delicious crime.
- Chill the crust thoroughly before adding the pudding layers to prevent it from becoming soggy. A firm base is key to a structurally sound Lush.
- Use room-temperature ingredients for the pudding layers to ensure they mix smoothly without any lumps. Nobody wants a lumpy Lush, trust me.
- Don’t be afraid to experiment with different toppings to add extra flavor and texture. Crushed cookies, nuts, or even chocolate shavings can take it to the next level.
(Personal anecdote formated as paragraph subheading (very important! don’t write any title for this paragraph))
My first attempt at a Halloween Lush ended with a collapsed crust and pudding everywhere. After a few tweaks and a lot of laughs, it’s now the star of every spooky gathering.
Conclusion for Halloween Lush
This Halloween Lush is a dessert that’s designed to impress without stressing you out. It’s about the joy of creating something delicious. It looks amazing without spending hours in the kitchen. Remember, the layers are your canvas, and the ingredients are your paint. Feel free to swap things. Don’t worry to add extra flavors and textures that reflect your unique style. So go forth, my friend, and whip up a Halloween Lush that will be the talk of the tomb!
Print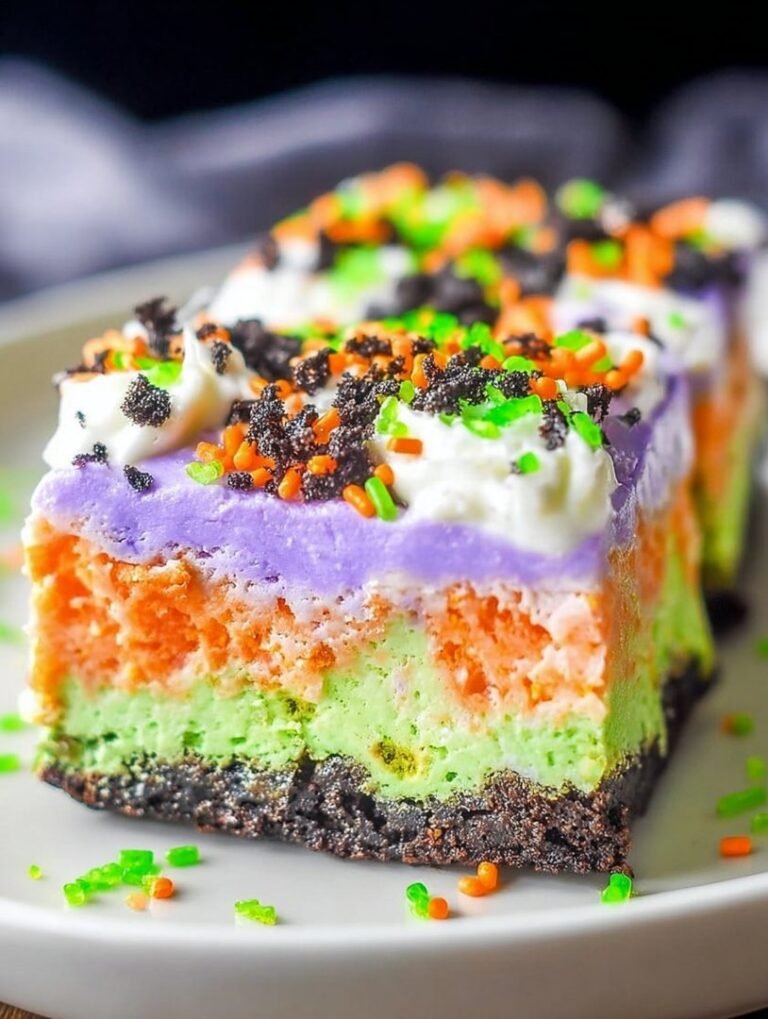
Halloween Lush
Delicious halloween lush recipe with detailed instructions and nutritional information.
- Total Time: 35 minutes
- Yield: 4 servings
Ingredients
- Oreo cookies, crushed: 1 (14.3 oz) package
- Butter, melted: 1/2 cup
- Cream cheese, softened: 8 oz
- Powdered sugar: 1 cup
- Cool Whip, thawed: 8 oz container, divided
- Instant chocolate pudding mix: 3.9 oz package
- Milk: 3 cups
- Halloween sprinkles: As needed
Instructions
- Step 1: In a medium bowl, combine the crushed Oreo cookies and melted butter. Press the mixture into the bottom of a 9×13 inch pan to create the crust.
- Step 2: In a large bowl, beat the softened cream cheese and powdered sugar until smooth. Gently fold in half of the Cool Whip (4 oz). Spread this mixture evenly over the Oreo crust.
- Step 3: In a separate bowl, whisk together the instant chocolate pudding mix and milk until smooth. Let it sit for a few minutes to thicken slightly.
- Step 4: Pour the chocolate pudding mixture over the cream cheese layer, spreading evenly.
- Step 5: Top with the remaining Cool Whip (4 oz), spreading it smoothly over the pudding layer.
- Step 6: Sprinkle generously with Halloween sprinkles. Refrigerate for at least 2 hours before serving to allow the layers to set.
Notes
- Store leftover Halloween Lush in the refrigerator, covered, for up to 3 days to maintain its texture and flavor.
- This dessert is best served chilled, so avoid reheating.
- Garnish individual servings with extra crushed Oreos or a drizzle of chocolate syrup for added indulgence.
- For an extra spooky touch, use Halloween-themed Oreos for the crust; the colored filling will create a fun visual effect!
- Prep Time: 15 minutes
- Cook Time: 20 minutes
- Method: Stovetop
- Cuisine: American
FAQs
What makes this Halloween Lush recipe perfect for a spooky celebration?
Okay, picture this: you’re throwing the ultimate Halloween bash, the playlist is bumping, the costumes are terrifyingly terrific, but something’s missing. Boom! This Halloween Lush is your secret weapon. It’s the kind of dessert that makes people say, “Wow, you actually *made* this?”. It is layered with contrasting textures and flavors. The rich creamy textures will blow your expectations to another level. It’s also ridiculously easy to throw together. You don’t need to be a culinary wizard. It requires zero baking, so you can focus on perfecting your zombie makeup.
Can I make this Halloween Lush recipe ahead of time?
Absolutely! In fact, I highly recommend it. Think of it like marinating a steak; the flavors meld together beautifully over time. Preparing this decadent dessert a day or two in advance not only saves you precious party-prep minutes. It gives the layers a chance to really get to know each other. Just cover it tightly with plastic wrap and store it in the refrigerator. That way, when the ghouls and goblins arrive, your Halloween Lush will be chilled to perfection and ready to steal the show.
What are some spooky variations I can try with this Halloween Lush dessert?
Let’s get creative, shall we? Swap out the regular chocolate pudding for a vibrant green pistachio pudding to give it an eerie swamp monster vibe. Or, swirl in some orange food coloring into the cream cheese layer for a jack-o’-lantern hue. Crushed-up Oreo cookies make a fantastic “dirt” topping, and gummy worms wriggling out add a creepy crawly touch. Candy corn strategically placed can create a festive border. The possibilities are as endless as your imagination. Don’t be afraid to get spooky and have fun.
How do I ensure my Halloween Lush isn’t soggy?
Ah, the dreaded soggy dessert dilemma! Fear not, my friend, I have a secret weapon: the graham cracker crust. Before layering, lightly toast the graham cracker crust in the oven. This will create a moisture barrier, preventing it from getting soggy. Also, make sure your pudding layer has fully set before adding the whipped topping. Lastly, avoid adding any overly wet ingredients directly onto the graham cracker crust. Following these tips will give you a dessert that’s perfectly layered and never soggy.


Leave a Comment