

Homemade peppermint patties are the ultimate cool and refreshing treat, bursting with minty goodness and coated in a rich, dark chocolate shell. Imagine biting into a creamy, smooth center that melts in your mouth, followed by the satisfying snap of the chocolate.
This recipe brings back memories of childhood holidays, when the air was filled with the scent of peppermint and chocolate. Making these at home is easier than you think, and they’re perfect for sharing… or not! Prepare for an amazing flavor experience that will have everyone begging for more.
- Effortlessly create these classic candies with simple steps and readily available ingredients.
- Experience the perfect balance of cool peppermint and rich, decadent chocolate in every bite.
- Achieve a professional-looking treat with a glossy chocolate coating and a smooth, creamy center.
- Customize these patties for any occasion, making them a versatile dessert option for any event.
Ingredients for Homemade Peppermint Patties – A Cool, Creamy, and Chocolatey Delight
Here’s what you’ll need to make this delicious dish:
The full ingredients list, including measurements, is provided in the recipe card directly below.
How to Make Homemade Peppermint Patties – A Cool, Creamy, and Chocolatey Delight
Follow these simple steps to prepare this delicious dish:
Step 1: Prepare the Peppermint Filling
In a large bowl, cream together the softened butter and powdered sugar until light and fluffy. Add the corn syrup, peppermint extract, and milk. Mix until well combined, forming a smooth dough.
Step 2: Shape the Patties
Lightly dust a clean surface with powdered sugar. Roll out the peppermint dough to about 1/4-inch thickness. Use a cookie cutter or a knife to cut out round patties. Re-roll any scraps to maximize yield.
Step 3: Chill the Patties
Place the peppermint patties on a parchment-lined baking sheet. Refrigerate for at least 30 minutes to allow them to firm up. This will make them easier to dip in chocolate.
Step 4: Melt the Chocolate
In a double boiler or microwave-safe bowl, combine the chocolate chips and coconut oil. Heat in 30-second intervals, stirring in between, until the chocolate is completely melted and smooth. Be careful not to overheat the chocolate.
Step 5: Dip the Patties
Using a fork or dipping tools, carefully dip each chilled peppermint patty into the melted chocolate, ensuring it’s fully coated. Place the chocolate-covered patties back on the parchment-lined baking sheet.
Step 6: Set and Enjoy
Refrigerate the chocolate-covered peppermint patties for another 15-20 minutes, or until the chocolate is set. Transfer to a serving plate and enjoy these cool, creamy, and chocolatey delights!
Perfecting the Cooking Process

To achieve peppermint patty perfection, melt your chocolate while the peppermint filling chills. This prevents the filling from melting when coating. Make sure the peppermint filling is firm before dipping for cleaner, more professional patties.
Add Your Touch
Dare to dream beyond the classic! Try infusing your creamy filling with a hint of orange or lemon zest for a citrusy twist. A dash of vanilla extract in the chocolate coating can also deepen the flavor.
Storing & Reheating
Keep your homemade peppermint patties fresh by storing them in an airtight container in the refrigerator. They’ll last for up to two weeks. No reheating needed—enjoy them straight from the fridge for that cool, refreshing bite!
Here are some tips for crafting the perfect Homemade Peppermint Patties:
- Use high-quality chocolate for the coating; it makes a world of difference in the final flavor and texture of your cool treat.
- Don’t overmix the peppermint filling! Overmixing can make it tough, and we want that smooth, melt-in-your-mouth sensation.
- For a perfectly smooth chocolate coating, add a teaspoon of coconut oil to the melted chocolate and stir until combined, creating a shiny finish.
(Personal anecdote)
My family devoured these in minutes last holiday season. My uncle swore I bought them from a fancy chocolatier. It was the ultimate compliment for this homemade peppermint patty enthusiast!
From Humble Beginnings to Chocolatey Bliss: The Peppermint Patty Story
Let’s face it: store-bought peppermint patties are okay, fine, acceptable in a pinch. But they lack that certain *je ne sais quoi*, that homemade magic that makes your taste buds sing. That’s where these **homemade peppermint patties – a cool, creamy, and chocolatey delight** come in! We’re talking about transforming simple ingredients into something truly special, a minty-fresh explosion wrapped in a decadent chocolate shell.
I know, I know. “Homemade candy? Sounds complicated!” Fear not, dear reader. This isn’t some Herculean baking task that requires a culinary degree and an industrial-sized mixer. This recipe is surprisingly straightforward, even for those who consider themselves kitchen-challenged. Think of it as a fun little project, a chance to unleash your inner chocolatier, without the pressure of opening a chocolate shop.
Why Ditch Store-Bought and Embrace Homemade?
Besides the obvious (superior taste, bragging rights), making your own peppermint patties allows you to control the ingredients. No mystery additives, no questionable preservatives, just pure, unadulterated goodness. Plus, it’s a fantastic way to impress your friends and family. Imagine the look on their faces when you present them with a platter of these beauties! They’ll think you’ve been secretly attending pastry school.
And honestly? It’s therapeutic. There’s something incredibly satisfying about melting chocolate, mixing up the peppermint filling, and carefully dipping each patty. It’s like a mini spa day for your soul, with the added bonus of delicious candy at the end. What’s not to love?
Gathering Your Peppermint Power Players: The Ingredients
Now, let’s talk ingredients. You’ll need:
- **Powdered Sugar:** The foundation of our creamy peppermint filling. Don’t skimp on quality; the finer the sugar, the smoother the filling.
- **Unsalted Butter:** A touch of richness and helps bind the filling together. Make sure it’s softened, but not melted, for optimal mixing.
- **Peppermint Extract:** The star of the show! A little goes a long way, so start with a small amount and adjust to your liking.
- **Milk or Cream:** Adds moisture and creaminess to the filling.
- **Semi-Sweet Chocolate Chips:** The perfect balance of sweetness and chocolate intensity for the coating.
- **Coconut Oil (Optional):** A secret weapon for creating a glossy, smooth chocolate coating.
Crafting the Creamy Dream: The Peppermint Filling
This is where the magic happens. In a large bowl, cream together the softened butter and powdered sugar until light and fluffy. This might take a few minutes, but trust me, it’s worth the effort. You want a smooth, airy base for the peppermint flavor to shine.
Next, add the peppermint extract and milk or cream. Start with a small amount of extract (about ½ teaspoon) and taste as you go. Remember, you can always add more, but you can’t take it away! Mix until everything is well combined and the filling is smooth and creamy. If it seems too dry, add a touch more milk or cream. If it’s too wet, add a little more powdered sugar.
Once the filling is ready, cover the bowl with plastic wrap and chill in the refrigerator for at least 30 minutes. This will help the filling firm up and make it easier to shape into patties.
Shaping the Sweetness: Forming the Peppermint Patties
Now for the fun part! Take the chilled peppermint filling out of the refrigerator. Using a teaspoon or a small cookie scoop, scoop out portions of the filling and roll them into small balls. Place the balls on a parchment-lined baking sheet.
Gently flatten each ball into a patty shape. You can use your fingers, a small spatula, or even the bottom of a glass. Don’t worry about making them perfectly round; a little imperfection adds to the homemade charm.
Once all the patties are shaped, return the baking sheet to the refrigerator and chill for another 30 minutes. This will help them firm up even more and prevent them from melting when you dip them in chocolate.
Dipping into Decadence: The Chocolate Coating
While the patties are chilling, it’s time to melt the chocolate. In a heat-safe bowl set over a saucepan of simmering water (make sure the bottom of the bowl doesn’t touch the water), melt the chocolate chips, stirring occasionally until smooth. If you’re using coconut oil, add it to the melted chocolate and stir until combined. This will give the chocolate a beautiful shine.
Remove the bowl from the heat and let the chocolate cool slightly. This will help it adhere to the peppermint patties better.
Take the chilled peppermint patties out of the refrigerator. Using a fork or dipping tools, carefully dip each patty into the melted chocolate, making sure to coat it completely. Place the dipped patties back on the parchment-lined baking sheet.
If desired, sprinkle the tops of the dipped patties with sea salt, crushed peppermint candies, or any other toppings you like.
The Final Flourish: Setting and Storing Your Homemade Masterpieces
Once all the patties are dipped and decorated, return the baking sheet to the refrigerator and chill for at least 30 minutes, or until the chocolate is set.
Once the chocolate is firm, you can transfer the homemade peppermint patties to an airtight container and store them in the refrigerator for up to two weeks. (Although, let’s be honest, they probably won’t last that long!).
Variations to Tempt Your Taste Buds
- **Dark Chocolate Delight:** Use dark chocolate chips instead of semi-sweet for a richer, more intense flavor.
- **Mint Chocolate Chip Mania:** Add mini chocolate chips to the peppermint filling for an extra chocolatey kick.
- **Peppermint Bark Patties:** Sprinkle the tops of the dipped patties with crushed peppermint candies and white chocolate shavings.
- **Orange Zest Zing:** Add a teaspoon of orange zest to the peppermint filling for a citrusy twist.
Troubleshooting Tips for Peppermint Patty Perfection
- **Filling Too Soft:** If the peppermint filling is too soft to shape, add a little more powdered sugar.
- **Chocolate Coating Too Thick:** If the chocolate coating is too thick, add a teaspoon of coconut oil or shortening.
- **Chocolate Coating Not Setting:** If the chocolate coating isn’t setting properly, make sure the patties are chilled and the chocolate is cooled slightly before dipping.
With a little patience and a dash of enthusiasm, you’ll be churning out batches of these irresistible treats that will have everyone begging for the recipe. So, grab your apron, gather your ingredients, and get ready to experience the joy of **homemade peppermint patties – a cool, creamy, and chocolatey delight!** You’ll never look at store-bought patties the same way again. Happy baking!
Conclusion for Homemade Peppermint Patties – A Cool, Creamy, and Chocolatey Delight
In short, making your own Homemade Peppermint Patties – A Cool, Creamy, and Chocolatey Delight, isn’t just about following a recipe; it’s about crafting a little moment of joy. From the refreshing burst of peppermint to the satisfying snap of chocolate, these homemade treats offer a delightful experience that store-bought candies simply can’t match. With a few simple steps, you can create a cool, creamy, chocolatey delight. So go ahead, embrace the fun of making Homemade Peppermint Patties and share the love (and the deliciousness) with everyone around you!
Print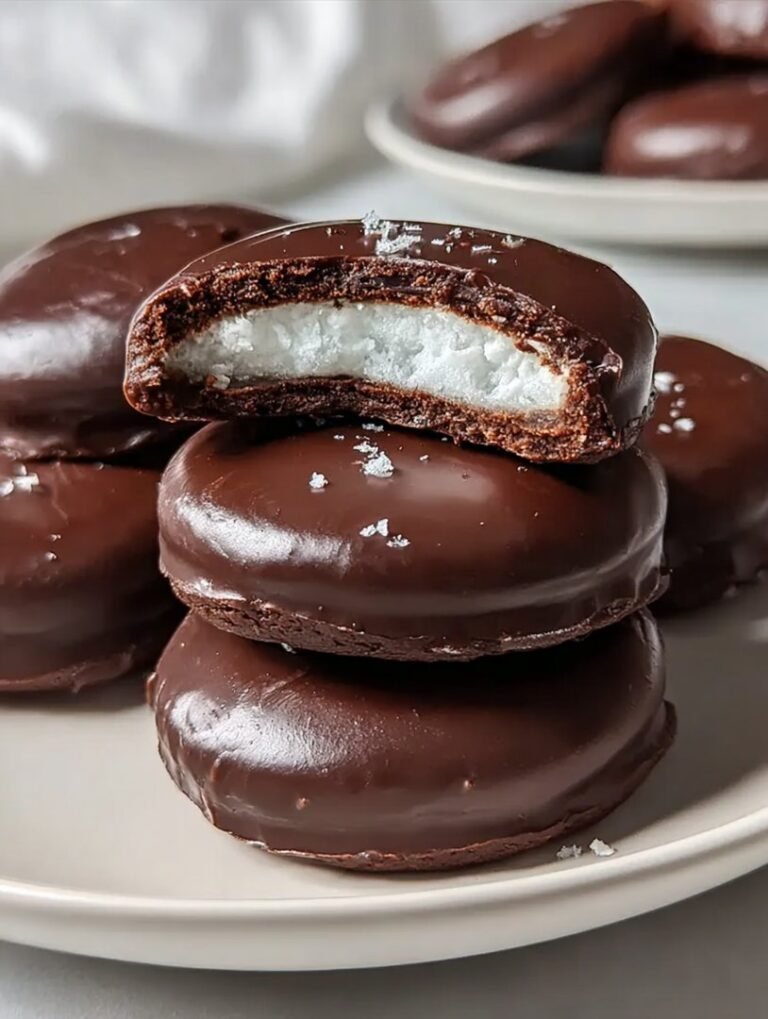
Homemade Peppermint Patties – A Cool, Creamy, and Chocolatey Delight
Delicious homemade peppermint patties – a cool, creamy, and chocolatey delight recipe with detailed instructions and nutritional information.
- Total Time: 35 minutes
- Yield: 4 servings
Ingredients
- Powdered Sugar: 4 cups
- Unsalted Butter, softened: 4 tablespoons
- Milk: 4-6 tablespoons
- Peppermint Extract: 1/2 teaspoon
- Salt: 1/4 teaspoon
- Semi-Sweet Chocolate Chips: 12 ounces
- Coconut Oil: 1 teaspoon
Instructions
- Step 1: In a large bowl, combine the powdered sugar, softened butter, salt, and peppermint extract. Add 4 tablespoons of milk and mix until a dough forms. If the dough is too dry, add more milk, one tablespoon at a time, until it comes together.
- Step 2: On a surface lightly dusted with powdered sugar, roll out the peppermint dough to about 1/4 inch thickness. Use a cookie cutter or knife to cut out round patties.
- Step 3: Place the peppermint patties on a parchment-lined baking sheet and chill in the freezer for at least 30 minutes to firm up.
- Step 4: While the patties are chilling, melt the chocolate chips and coconut oil in a double boiler or microwave in 30-second intervals, stirring in between, until smooth.
- Step 5: Remove the patties from the freezer and dip each one into the melted chocolate, coating completely. Place the dipped patties back on the parchment-lined baking sheet.
- Step 6: Return the patties to the freezer or refrigerator to allow the chocolate to set completely before serving.
Notes
- Store leftover patties in an airtight container in the refrigerator to maintain their cool, creamy texture.
- Reheating isn't recommended, as these are best enjoyed cold straight from the fridge!
- Serve these refreshing patties as a delightful after-dinner treat or alongside a cup of hot cocoa.
- For an extra smooth chocolate coating, ensure your chocolate chips are fully melted and glossy before dipping.
- Prep Time: 15 minutes
- Cook Time: 20 minutes
- Method: Stovetop
- Cuisine: American
FAQs
How do I get the perfect peppermint flavor in my Homemade Peppermint Patties?
Achieving that ideal peppermint punch is easier than you think! The secret lies in the quality of your peppermint extract. Opt for a pure peppermint extract, avoiding imitation versions that can taste artificial. Start with a small amount and gradually increase it, tasting as you go, until you reach your desired level of minty coolness. Remember, a little goes a long way! You can also add a pinch of peppermint oil, but use it sparingly as it is much more potent. This ensures your peppermint patties have a refreshing and authentic flavor that will tantalize your taste buds.
Can I use a different kind of chocolate for my chocolatey delight Homemade Peppermint Patties?
Absolutely! While dark chocolate provides a classic contrast to the cool peppermint filling, feel free to experiment with your favorite chocolate varieties. Milk chocolate will result in a sweeter, creamier patty, while semi-sweet chocolate offers a balanced flavor profile. White chocolate, especially when dyed a fun color, can be a visually stunning option. Just ensure the chocolate you choose melts smoothly and coats the peppermint filling evenly. No matter your choice, these delightful candies will always be a pleasure to make and share. Get creative and find your perfect chocolate pairing!
What if my peppermint filling is too soft or too firm in my cool, creamy Homemade Peppermint Patties?
Achieving the right consistency for your peppermint filling is crucial for that perfect patty experience. If the filling is too soft, try adding a tablespoon of powdered sugar at a time until it firms up slightly. On the other hand, if it’s too firm, add a tiny bit of milk or water, just a teaspoon at a time, until it reaches a smoother, more pliable texture. The goal is a filling that holds its shape but remains soft and yielding when you bite into it. Remember, patience is key! Small adjustments will lead to a peppermint patty that is just right.
How do I store these delicious Homemade Peppermint Patties to keep them fresh?
Proper storage is key to maintaining the freshness and flavor of your homemade treats. Once the chocolate coating has completely set, store the peppermint patties in an airtight container. For optimal results, place them in a single layer between sheets of parchment or wax paper to prevent sticking. Store them in a cool, dry place or in the refrigerator. Refrigerating will make them last longer but can also make the chocolate slightly harder. They’ll stay fresh and delicious for up to a week, although they’re unlikely to last that long!


Leave a Comment