

Let’s get this party started with some irresistible Oreo Balls! Imagine sinking your teeth into a perfectly chilled, chocolatey sphere, the creamy filling exploding in your mouth a delightful symphony of sweet and crunchy. These aren’t just Oreo Balls; they’re tiny edible masterpieces.
These little treats are so easy to make, they’re practically begging you to whip up a batch. Perfect for any occasion, from a casual movie night to a fancy party, these Oreo Balls are guaranteed to be a hit. Prepare yourself for an explosion of flavor!
These Oreo Balls are simply amazing because:
They’re incredibly easy to make, requiring minimal effort and time.
The flavor combination is a perfect blend of sweet and chocolatey goodness.
Their round shape and glossy coating make them visually appealing and delightful.
Their versatility allows for easy customization with different toppings and flavors.
Ingredients for Oreo Balls
Here’s what you’ll need to make this delicious dish:
The full ingredients list, including measurements, is provided in the recipe card directly below.
How to Make Oreo Balls
Follow these simple steps to prepare this delicious dish:
Step 1: Crushing the Oreos
Finely crush the Oreo cookies using a food processor or a zip-top bag and a rolling pin. Aim for a fine crumb consistency, avoiding large chunks.
Step 2: Mixing the Filling
In a medium bowl, combine the crushed Oreos and softened cream cheese. Mix thoroughly until a well-combined dough forms. If the mixture seems too dry, add a teaspoon of milk at a time until it comes together. If you want a firmer ball, add a small amount of agar-agar powder according to package instructions.
Step 3: Shaping the Balls
Roll the Oreo mixture into small, roughly one-inch balls. If your hands are getting sticky, rinse them under cold water. This step is surprisingly therapeutic, and you can get creative with the size of your Oreo Balls.
Step 4: Melting the Chocolate
In a double boiler or a heat-safe bowl set over a pot of simmering water, melt the milk chocolate chips, stirring occasionally until smooth. If using, melt the white chocolate chips separately.
Step 5: Coating the Balls
Dip each Oreo ball into the melted chocolate, ensuring it’s fully coated. You can use a fork or a toothpick to help with dipping. For a fancy touch, drizzle some melted white chocolate over the milk chocolate-coated balls.
Step 6: Decorating and Chilling
Place the chocolate-covered Oreo balls on a parchment-lined baking sheet. Sprinkle with your favorite toppings while the chocolate is still wet, then transfer them to the refrigerator to chill for at least 30 minutes to allow the chocolate to fully set.
Serve your Oreo Balls chilled and enjoy! They’re the perfect sweet treat for any occasion.
Perfecting the Cooking Process

Crush the Oreos first, then combine them with the softened cream cheese. Roll into balls, chill them, and then melt the chocolate. Dip the balls in the melted chocolate, add sprinkles (optional!), and let them set. It’s that simple.
Add Your Touch
Get creative! Swap the cream cheese for peanut butter or Nutella. Use white chocolate instead of milk chocolate. Add chopped nuts, dried fruit, or even a drizzle of melted caramel for extra flair.
Storing & Reheating
Store your Oreo Balls in an airtight container in the refrigerator for up to a week. No reheating needed; they’re best served cold!
Use room-temperature cream cheese for easier mixing. Avoid over-mixing the Oreo crumbs, as it can lead to a dense texture. Chill the balls thoroughly before dipping for perfect chocolate coating.
My grandma’s recipe, passed down through generations, always used milk chocolate. My twist? I add a pinch of sea salt to the chocolate for an unexpected salty-sweet perfection.
The Deliciously Simple Oreo Ball Recipe
This recipe is a celebration of simplicity and deliciousness. Forget complicated steps and long ingredient lists; these Oreo Balls are all about capturing the perfect balance of sweet, crunchy, and creamy.
The Magic Ingredient List
:
For these delightful treats, you’ll need:
24 Oreo cookies (original, double-stuffed, or whatever your heart desires!)
8 ounces cream cheese, softened (trust me, room temperature is key)
12 ounces semi-sweet chocolate chips (or white chocolate, get wild!)
Sprinkles, chopped nuts, or other fun toppings (optional, but highly encouraged!)
The Symphony of Flavors
: A Step-by-Step Guide
This recipe is so intuitive, even a monkey could do it (maybe not, but you can definitely handle it).
First, prepare your Oreos. Using a food processor, carefully crush the cookies into fine crumbs. If you don’t have a food processor, you can put them in a zip-top bag and bash them to smithereens with a rolling pin. It’s more of a workout but definitely doable.
Now, for the magic: In a medium-sized bowl, combine the crushed Oreos and softened cream cheese. I know, simple but amazing. Gently mix until everything is evenly combined. Don’t over-mix, remember.
Next, take about a tablespoon of the mixture and roll it into a small ball. Repeat this process until you’ve used all the mixture. If it becomes sticky, chill the mixture for a little bit. This is when I usually grab a couple of Oreo balls and eat them straight up; not gonna lie, it’s great!
Now for the final touches. Place the chocolate chips in a microwave-safe bowl and microwave in 30-second intervals, stirring until completely melted and smooth. Remember, the most important thing is that you can easily dip the balls in the chocolate and have it cover evenly.
Once the chocolate is melted and ready, take your chilled Oreo balls and carefully dip them into the melted chocolate, making sure they’re fully coated. Let them set for a while.
Finally, while the chocolate is still wet, sprinkle them with those fun toppings you set aside. Let them sit and fully set. That’s it! You just made some amazing Oreo balls.
Troubleshooting Your Oreo Ball Symphony
Even the most seasoned chefs can face a minor mishap, but this is nothing to be scared about.
If your Oreo balls are too crumbly, try adding a tablespoon or two of milk or melted chocolate to your mixture. If your balls become too sticky, chill them in the refrigerator for 30 minutes before proceeding. And if you happen to accidentally eat most of them before they’re completely done, well… I can’t help you there!
The Grand Finale
: Serving Suggestions
Serve these bite-sized delights at parties, potlucks, or simply as an afternoon treat. They are surprisingly satisfying. They’re perfect for any occasion where you need a little bit of sweet deliciousness in your life. And let’s be honest, isn’t that always the case?
Beyond the Basics
: Unleashing Your Inner Oreo Ball Artist
Don’t be afraid to experiment. These Oreo Balls are a blank canvas for your culinary creativity. Try different types of Oreos—mint, peanut butter, even the limited-edition ones. Or how about adding different types of chocolate?
These Oreo balls are a testament to the fact that simplicity can be surprisingly satisfying. From a quick dessert to a delightful gift, these are sure to impress your friends and family. So, get those cookie crumbs ready and prepare for a delicious adventure!
Conclusion for Oreo Balls
Oreo Balls are a remarkably simple yet incredibly satisfying treat. Their ease of preparation, combined with their customizable nature and incredible taste, makes them perfect for any occasion. From casual gatherings to fancy parties, these little bites of joy are sure to be a hit. Remember to chill them properly for best results, and don’t be afraid to experiment with different coatings and additions to find your perfect Oreo Ball recipe. Enjoy the sweet, delicious success!
Print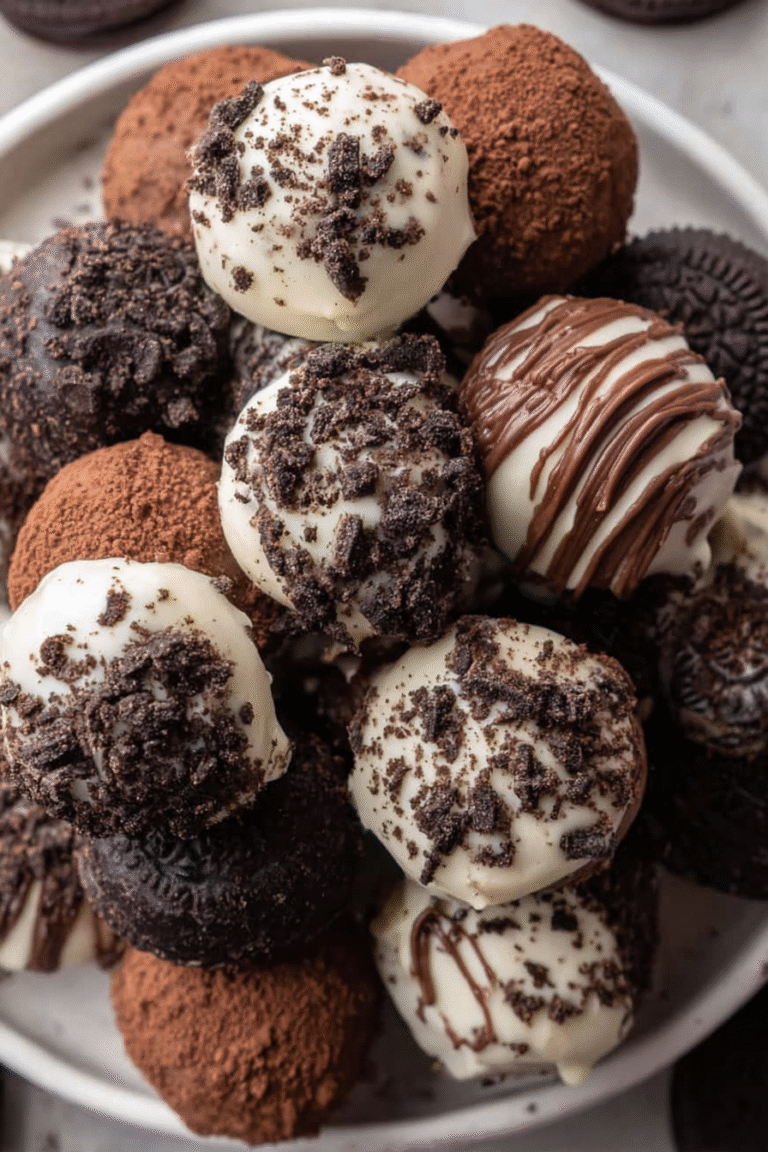
Oreo Balls
Delicious oreo balls recipe with detailed instructions and nutritional information.
- Total Time: 35 minutes
- Yield: 4 servings 1x
Ingredients
- 1 package (16 ounces) Oreo cookies
- 8 ounces cream cheese, softened
- 1 cup chocolate chips
- 1/2 cup white chocolate chips (optional)
- 1/4 cup chopped nuts (optional)
- Sprinkles (optional)
Instructions
- Step 1: Finely crush the Oreo cookies in a food processor or by placing them in a zip-top bag and crushing them with a rolling pin. You want fine crumbs, with minimal larger pieces.
- Step 2: In a medium bowl, beat the softened cream cheese until smooth. Add the crushed Oreos and mix thoroughly until a dough-like consistency is achieved.
- Step 3: Roll the mixture into 1-inch balls. Place them on a baking sheet lined with parchment paper and refrigerate for at least 30 minutes to firm up.
- Step 4: Melt the chocolate chips in a double boiler or in the microwave in 30-second intervals, stirring until smooth. If using white chocolate, melt it separately.
- Step 5: Dip each Oreo ball into the melted chocolate, using a fork to lift them in and out. If using, drizzle white chocolate over the top or add sprinkles, nuts, or other desired toppings.
- Step 6: Place the coated Oreo balls back onto the parchment-lined baking sheet. Refrigerate for at least 15 minutes to allow the chocolate to set completely.
Notes
- Store Oreo balls in an airtight container in the refrigerator for up to a week to maintain their freshness and prevent them from drying out.
- For a slightly gooey center, let the Oreo balls sit at room temperature for 10-15 minutes before serving.
- Serve these delightful treats alongside a scoop of vanilla ice cream or a cup of strong coffee for an extra decadent dessert experience.
- To prevent the chocolate from seizing, ensure the melted chocolate is not too hot before dipping the Oreo balls, and work quickly to avoid temperature fluctuations.
- Prep Time: 15 minutes
- Cook Time: 20 minutes
- Method: Stovetop
- Cuisine: American
FAQs
How long do Oreo Balls last?
Oreo Balls, stored in an airtight container in the refrigerator, will happily hang out for about a week. But let’s be honest, they’re usually gone much sooner! The magic of these little chocolatey delights is their irresistible deliciousness, and their tendency to vanish quicker than a plate of freshly baked cookies at a children’s party. So, while they’ll technically last a week, don’t bet on it.
Can I make Oreo Balls ahead of time?
Absolutely! In fact, making Oreo Balls ahead of time is a fantastic idea. The flavors meld beautifully, and they’re even easier to handle once they’ve chilled in the fridge. Prepare them a day or two before your party or event, and store them in an airtight container. This will allow you to relax and enjoy your celebration without the last-minute stress of frantically rolling chocolate balls.
Are Oreo Balls gluten-free?
This depends entirely on the ingredients you use! Standard Oreo cookies do contain gluten. However, many gluten-free Oreo alternatives exist on the market. Make sure to check the packaging of your Oreos to confirm their gluten status before you start rolling. If you’re making these for someone with a gluten intolerance, it’s crucial to verify that all components are certified gluten-free for a truly safe treat.
What can I use to coat Oreo Balls instead of chocolate?
The beauty of Oreo Balls is their adaptability! While melted chocolate is classic, you can explore other coatings. White chocolate is a delightful alternative. You could also try melted dark chocolate, or even get creative with different flavored melts. If you’re looking for a healthier option, consider a yogurt coating, or even simply rolling them in crushed nuts for added texture and flavor. The possibilities, much like the deliciousness of Oreo Balls, are endless!


Leave a Comment