
When that irresistible craving for something sweet, buttery, and strikingly green hits, nothing else will do. Forget complicated layer cakes; we are diving straight into the luscious simplicity ofPistachio Dream Cookie Bars.
These bars are guaranteed to transport you to a state of pure, nutty bliss, requiring minimal effort but delivering maximum flavor impact. Get ready to ditch the mixing bowl angst and embrace cookie bar perfection!
- This recipe offers unmatched simplicity, letting you achieve dessert immortality using just one pan and about ten minutes of active prep time.
- The flavor profile perfectly balances rich, toasted pistachio notes with a creamy, subtle sweetness that avoids being overwhelmingly sugary, delighting every palate.
- Their gorgeous emerald hue, naturally derived from the nuts, makes these bars visually stunning and an instant centerpiece for any potluck or celebration.
- Enjoy these versatile cookie bars chilled, at room temperature, or warmed up with a scoop of vanilla ice cream, making them suitable for any season.
The Saga of the One-Pan Wonder
My culinary journey with pistachios began, as most great food stories do, with a disastrous attempt at sophistication. I thought I needed a complex French pastry to truly honor the noble pistachio. I spent an entire Saturday wrestling with delicate puff pastry, trying to create thin, crisp layers, only to end up with something that looked suspiciously like green, flaky roadkill. My husband, ever the supportive one, bravely tried a piece, immediately coughed, and suggested we order pizza. The moral of the story? Sometimes, the simplest path leads to the most spectacular results.
I realized the pistachio deserves better than structural complexity; it deserves to shine in a simple, straightforward format that highlights its delicate flavor and stunning color. That’s how the idea forPistachio Dream Cookie Barswas born. These bars combine the chewy edges of a classic cookie with the moist, dense center of a brownie, all infused with a robust, nutty undertone. You can forget about chilling dough, rolling pin wars, or worrying about uneven baking. This is a press-and-bake miracle, designed for those who appreciate gourmet flavor without the fuss. We simply melt the butter, mix everything together in one bowl, press it into the pan, and wait for that incredible, nutty aroma to fill the house.
Mastering the Cookie Bar Texture
Achieving the perfect texture is non-negotiable when making bar cookies. Nobody wants a crumbly bar or, worse, one that requires a hydraulic lift to remove from the pan. The secret to these particular bars lies in two key areas: melted butter and strategic baking time. When you use melted butter instead of softened butter, the structure of the resulting cookie changes dramatically. Melted butter inhibits gluten development, resulting in a chewier, denser texture, rather than a cakey one.
We use a combination of granulated sugar and brown sugar. The molasses in the brown sugar contributes moisture and chewiness, ensuring the bars stay soft even after cooling. Many people make the mistake of over-baking cookie bars. You want the center to look slightly underdone and just barely set when you pull them out of the oven. The residual heat trapped in the pan continues the cooking process—a phenomenon bakers call carryover cooking—ensuring the center remains beautifully soft while the edges brown nicely. This technique gives thePistachio Dream Cookie Barsthat quintessential fudgy middle that everyone fights over.
Why Pistachios are the Superstar Nut
Pistachios are truly the royalty of the nut world. They offer a slightly earthy, robust flavor that stands up beautifully to sugar and butter without getting lost. Beyond their taste, they provide that dazzling green color that makes this dessert so visually appealing. To maximize the flavor of the pistachios, using high-quality, raw or lightly roasted, unsalted pistachios is crucial. If you only have pre-shelled, salted pistachios, rinse them gently and pat them completely dry before using them.
For the best results in these cookie bars, you must process the pistachios correctly. You need two different textures: a fine powder, almost like flour, to incorporate into the dough for overall flavor, and larger, roughly chopped chunks to sprinkle on top. These larger pieces provide textural contrast and that satisfying, crunchy bite. If you skip powdering some of the nuts, you miss out on that deep, integrated nutty flavor that makes these bars truly dreamy. Remember, a food processor is your best friend here, turning shelled nuts into perfect baking components in mere seconds. Don’t pulse too long, though, or you’ll accidentally create pistachio butter!
Ingredients for Pistachio Dream Cookie Bars
Here’s what you’ll need to make this delicious dish:
- All-Purpose FlourThe structural backbone of the bar, ensuring the perfect balance between chewiness and softness.
- Baking Powder and Baking SodaThese leavening agents provide a gentle lift, keeping the bars from becoming too dense or flat.
- SaltEssential for balancing the sweetness and enhancing the deep, earthy flavor of the pistachios.
- Unsalted ButterMelted butter is crucial here; it gives the bars their signature dense, chewy texture.
- Granulated Sugar and Light Brown SugarThe combination provides both sweetness and moisture, ensuring a moist crumb and rich caramel undertones.
- EggsAct as a binder, holding the dough together and contributing to the rich texture of the cookie base.
- Vanilla PowderUse pure extract to enhance the overall flavor profile, complementing the nuttiness beautifully.
- PistachiosUse shelled, raw or lightly roasted nuts, divided into finely ground powder and roughly chopped pieces for texture.
- Almond Paste (Optional)A small amount intensifies the nut flavor without overpowering the delicate pistachio notes.
The full ingredients list, including measurements, is provided in the recipe card directly below.
How to Make Pistachio Dream Cookie Bars
Follow these simple steps to prepare this delicious dish:
-
Prepare the Pan and Dry Ingredients
Preheat your oven to 350°F (175°C). Line a 9×13 inch baking pan with parchment paper, ensuring the paper hangs slightly over the edges—this creates handles for easy removal later. In a large bowl, whisk together the flour, baking powder, baking soda, and salt. Set the mixture aside, ensuring no clumps remain.
-
Cream the Fats and Sugars
In a separate, medium-sized bowl, melt the unsalted butter thoroughly. Stir in both the granulated sugar and light brown sugar until combined and glossy. Incorporate the eggs one at a time, mixing well after each addition, followed by the vanilla powder and the optional almond paste. This mixture will look slightly loose but very rich.
-
Combine the Dough and Pistachios
Gradually add the dry ingredients to the wet ingredients, mixing only until just combined. Be careful not to overmix, as that develops gluten and results in tougher bars. Fold in the finely ground pistachio powder until the dough turns a lovely, pale green hue. The dough will be thick and slightly sticky at this point.
-
Press and Top
Transfer the dough to the prepared baking pan. Using lightly moistened fingers or a rubber spatula, press the dough evenly into the bottom of the pan. It does not need to be perfect, but ensure the thickness is generally uniform. Sprinkle the roughly chopped pistachio pieces generously over the top of the dough, gently pressing them into the surface.
-
Bake to Perfection
Bake the cookie bars for 25 to 30 minutes. The bars are done when the edges look golden brown and set, but the center still appears soft and slightly underbaked. If you insert a toothpick into the center, it should come out with moist crumbs attached, not wet batter. Remove the pan from the oven and let it cool completely on a wire rack before cutting.
-
Slice and Serve
Once cooled completely—patience is key here—lift the bars out of the pan using the parchment paper handles. Place them on a cutting board and slice into 24 uniform bars or 12 large squares.
Transfer to plates and drizzle with a light glaze or dust with powdered sugar for the perfect finishing touch.
Tips for Flawless Pistachio Dream Cookie Bars
Achieving bakery-level quality at home usually requires a few insider secrets. First, always use room-temperature eggs. They incorporate much better into the melted butter and sugar mixture, leading to a smoother emulsion and a more uniform texture in the final bake. If you forgot to take them out ahead of time, simply place the eggs in a bowl of warm (not hot) water for five minutes.
Another crucial tip involves resting the baked bars. Do not, under any circumstances, try to slice these warm. Warm cookie bars crumble, tear, and generally make a mess that will ruin your presentation. Allowing them to cool completely—ideally for at least two hours or even better, chilling them in the refrigerator for 30 minutes—allows the fats to solidify and the structure to set properly. This ensures clean, sharp cuts every time.
Storage and Prep Ahead Advice
These bars store wonderfully, which is excellent news if you plan to make a big batch. You can store the cooledPistachio Dream Cookie Barsin an airtight container at room temperature for up to four days. If you want to keep them longer, they freeze beautifully. Simply cut the bars, wrap them tightly in plastic wrap, and then place them in a freezer bag. They will stay fresh for up to three months. Thaw them overnight in the refrigerator or briefly on the counter.
For advanced meal prep, you can make the cookie dough ahead of time. Prepare the dough, press it into the pan, cover it tightly, and refrigerate it for up to 24 hours before baking. Just add about 3 to 5 minutes to the baking time since the dough will be cold when it enters the oven.
Variations to Customize Your Cookie Bars
While the classic recipe for Pistachio Dream Cookie Bars is perfection, feel free to experiment with complementary flavors. You could add a layer of white chocolate chips to the base dough; the creaminess of the white chocolate pairs beautifully with the earthy nuttiness of the pistachios. Alternatively, for a zesty twist, try adding the finely grated zest of one lemon or orange to the dough mixture. Citrus lifts the heavy flavors and provides a bright finish. If you want an extra chewy top, sprinkle a light dusting of turbinado sugar over the bars before baking for a nice, crunchy crust.
For those who enjoy texture, folding in shredded coconut alongside the pistachios introduces a tropical element. Just ensure you use unsweetened coconut so the final result is not overly sweet. Remember, baking is about following the rules until you understand them, and then breaking them creatively.
Frequently Asked Questions About Pistachio Cookie Bars
Do I have to grind the pistachios, or can I use them whole?
You absolutely must grind at least some of the pistachios into a fine powder. This is essential for infusing the entire dough with that deep, authentic pistachio flavor and contributing to the soft texture. You use the remaining, roughly chopped nuts for textural contrast on top.
What if I don’t have parchment paper?
If you don’t have parchment paper, you can thoroughly grease and flour the pan instead. However, parchment paper is highly recommended as it guarantees easy, clean removal of the bars, eliminating the risk of sticking.
How can I make these bars even greener?
The natural color comes purely from the pistachios. If you desire a more vibrant emerald color for aesthetic purposes, you can add one or two drops of green food coloring to the wet ingredients before mixing in the flour.
Can I substitute another type of nut?
While you could substitute walnuts or pecans, the essence of thePistachio Dream Cookie Barsrelies on the specific flavor and unique color of the pistachios. If you substitute, the flavor profile will change dramatically, moving away from the signature “dream” quality.
When that irresistible craving for something sweet, buttery, and strikingly green hits, nothing else will do. Forget complicated layer cakes; we are diving straight into the luscious simplicity ofPistachio Dream Cookie Bars.
These bars are guaranteed to transport you to a state of pure, nutty bliss, requiring minimal effort but delivering maximum flavor impact. Get ready to ditch the mixing bowl angst and embrace cookie bar perfection!
- This recipe offers unmatched simplicity, letting you achieve dessert immortality using just one pan and about ten minutes of active prep time.
- The flavor profile perfectly balances rich, toasted pistachio notes with a creamy, subtle sweetness that avoids being overwhelmingly sugary, delighting every palate.
- Their gorgeous emerald hue, naturally derived from the nuts, makes these bars visually stunning and an instant centerpiece for any potluck or celebration.
- Enjoy these versatile cookie bars chilled, at room temperature, or warmed up with a scoop of vanilla ice cream, making them suitable for any season.
The Saga of the One-Pan Wonder
My culinary journey with pistachios began, as most great food stories do, with a disastrous attempt at sophistication. I thought I needed a complex French pastry to truly honor the noble pistachio. I spent an entire Saturday wrestling with delicate puff pastry, trying to create thin, crisp layers, only to end up with something that looked suspiciously like green, flaky roadkill. My husband, ever the supportive one, bravely tried a piece, immediately coughed, and suggested we order pizza. The moral of the story? Sometimes, the simplest path leads to the most spectacular results.
I realized the pistachio deserves better than structural complexity; it deserves to shine in a simple, straightforward format that highlights its delicate flavor and stunning color. That’s how the idea forPistachio Dream Cookie Barswas born. These bars combine the chewy edges of a classic cookie with the moist, dense center of a brownie, all infused with a robust, nutty undertone. You can forget about chilling dough, rolling pin wars, or worrying about uneven baking. This is a press-and-bake miracle, designed for those who appreciate gourmet flavor without the fuss. We simply melt the butter, mix everything together in one bowl, press it into the pan, and wait for that incredible, nutty aroma to fill the house.
Mastering the Cookie Bar Texture
Achieving the perfect texture is non-negotiable when making bar cookies. Nobody wants a crumbly bar or, worse, one that requires a hydraulic lift to remove from the pan. The secret to these particular bars lies in two key areas: melted butter and strategic baking time. When you use melted butter instead of softened butter, the structure of the resulting cookie changes dramatically. Melted butter inhibits gluten development, resulting in a chewier, denser texture, rather than a cakey one.
We use a combination of granulated sugar and brown sugar. The molasses in the brown sugar contributes moisture and chewiness, ensuring the bars stay soft even after cooling. Many people make the mistake of over-baking cookie bars. You want the center to look slightly underdone and just barely set when you pull them out of the oven. The residual heat trapped in the pan continues the cooking process—a phenomenon bakers call carryover cooking—ensuring the center remains beautifully soft while the edges brown nicely. This technique gives thePistachio Dream Cookie Barsthat quintessential fudgy middle that everyone fights over.
Why Pistachios are the Superstar Nut
Pistachios are truly the royalty of the nut world. They offer a slightly earthy, robust flavor that stands up beautifully to sugar and butter without getting lost. Beyond their taste, they provide that dazzling green color that makes this dessert so visually appealing. To maximize the flavor of the pistachios, using high-quality, raw or lightly roasted, unsalted pistachios is crucial. If you only have pre-shelled, salted pistachios, rinse them gently and pat them completely dry before using them.
For the best results in these cookie bars, you must process the pistachios correctly. You need two different textures: a fine powder, almost like flour, to incorporate into the dough for overall flavor, and larger, roughly chopped chunks to sprinkle on top. These larger pieces provide textural contrast and that satisfying, crunchy bite. If you skip powdering some of the nuts, you miss out on that deep, integrated nutty flavor that makes these bars truly dreamy. Remember, a food processor is your best friend here, turning shelled nuts into perfect baking components in mere seconds. Don’t pulse too long, though, or you’ll accidentally create pistachio butter.
Ingredients for Pistachio Dream Cookie Bars
Here’s what you’ll need to make this delicious dish:
- All-Purpose FlourThe structural backbone of the bar, ensuring the perfect balance between chewiness and softness.
- Baking Powder and Baking SodaThese leavening agents provide a gentle lift, keeping the bars from becoming too dense or flat.
- SaltEssential for balancing the sweetness and enhancing the deep, earthy flavor of the pistachios.
- Unsalted ButterMelted butter is crucial here; it gives the bars their signature dense, chewy texture.
- Granulated Sugar and Light Brown SugarThe combination provides both sweetness and moisture, ensuring a moist crumb and rich caramel undertones.
- EggsAct as a binder, holding the dough together and contributing to the rich texture of the cookie base.
- Vanilla PowderUse pure extract to enhance the overall flavor profile, complementing the nuttiness beautifully.
- PistachiosUse shelled, raw or lightly roasted nuts, divided into finely ground powder and roughly chopped pieces for texture.
- Almond Paste (Optional)A small amount intensifies the nut flavor without overpowering the delicate pistachio notes.
The full ingredients list, including measurements, is provided in the recipe card directly below.
How to Make Pistachio Dream Cookie Bars
Follow these simple steps to prepare this delicious dish:
-
Prepare the Pan and Dry Ingredients
Preheat your oven to 350°F (175°C). Line a 9×13 inch baking pan with parchment paper, ensuring the paper hangs slightly over the edges—this creates handles for easy removal later. In a large bowl, whisk together the flour, baking powder, baking soda, and salt. Set the mixture aside, ensuring no clumps remain.
-
Cream the Fats and Sugars
In a separate, medium-sized bowl, melt the unsalted butter thoroughly. Stir in both the granulated sugar and light brown sugar until combined and glossy. Incorporate the eggs one at a time, mixing well after each addition, followed by the vanilla powder and the optional almond paste. This mixture will look slightly loose but very rich.
-
Combine the Dough and Pistachios
Gradually add the dry ingredients to the wet ingredients, mixing only until just combined. Be careful not to overmix, as that develops gluten and results in tougher bars. Fold in the finely ground pistachio powder until the dough turns a lovely, pale green hue. The dough will be thick and slightly sticky at this point.
-
Press and Top
Transfer the dough to the prepared baking pan. Using lightly moistened fingers or a rubber spatula, press the dough evenly into the bottom of the pan. It does not need to be perfect, but ensure the thickness is generally uniform. Sprinkle the roughly chopped pistachio pieces generously over the top of the dough, gently pressing them into the surface.
-
Bake to Perfection
Bake the cookie bars for 25 to 30 minutes. The bars are done when the edges look golden brown and set, but the center still appears soft and slightly underbaked. If you insert a toothpick into the center, it should come out with moist crumbs attached, not wet batter. Remove the pan from the oven and let it cool completely on a wire rack before cutting.
-
Slice and Serve
Once cooled completely—patience is key here—lift the bars out of the pan using the parchment paper handles. Place them on a cutting board and slice into 24 uniform bars or 12 large squares.
Transfer to plates and drizzle with a light glaze or dust with powdered sugar for the perfect finishing touch.
Tips for Flawless Pistachio Dream Cookie Bars
Achieving bakery-level quality at home usually requires a few insider secrets. First, always use room-temperature eggs. They incorporate much better into the melted butter and sugar mixture, leading to a smoother emulsion and a more uniform texture in the final bake. If you forgot to take them out ahead of time, simply place the eggs in a bowl of warm (not hot) water for five minutes.
Another crucial tip involves resting the baked bars. Do not, under any circumstances, try to slice these warm. Warm cookie bars crumble, tear, and generally make a mess that will ruin your presentation. Allowing them to cool completely—ideally for at least two hours or even better, chilling them in the refrigerator for 30 minutes—allows the fats to solidify and the structure to set properly. This ensures clean, sharp cuts every time.
Storage and Prep Ahead Advice
These bars store wonderfully, which is excellent news if you plan to make a big batch. You can store the cooledPistachio Dream Cookie Barsin an airtight container at room temperature for up to four days. If you want to keep them longer, they freeze beautifully. Simply cut the bars, wrap them tightly in plastic wrap, and then place them in a freezer bag. They will stay fresh for up to three months. Thaw them overnight in the refrigerator or briefly on the counter.
For advanced meal prep, you can make the cookie dough ahead of time. Prepare the dough, press it into the pan, cover it tightly, and refrigerate it for up to 24 hours before baking. Just add about 3 to 5 minutes to the baking time since the dough will be cold when it enters the oven.
Variations to Customize Your Cookie Bars
While the classic recipe for Pistachio Dream Cookie Bars is perfection, feel free to experiment with complementary flavors. You could add a layer of white chocolate chips to the base dough; the creaminess of the white chocolate pairs beautifully with the earthy nuttiness of the pistachios. Alternatively, for a zesty twist, try adding the finely grated zest of one lemon or orange to the dough mixture. Citrus lifts the heavy flavors and provides a bright finish. If you want an extra chewy top, sprinkle a light dusting of turbinado sugar over the bars before baking for a nice, crunchy crust.
For those who enjoy texture, folding in shredded coconut alongside the pistachios introduces a tropical element. Just ensure you use unsweetened coconut so the final result is not overly sweet. Remember, baking is about following the rules until you understand them, and then breaking them creatively.
Frequently Asked Questions About Pistachio Cookie Bars
Do I have to grind the pistachios, or can I use them whole?
You absolutely must grind at least some of the pistachios into a fine powder. This is essential for infusing the entire dough with that deep, authentic pistachio flavor and contributing to the soft texture. You use the remaining, roughly chopped nuts for textural contrast on top.
What if I don’t have parchment paper?
If you don’t have parchment paper, you can thoroughly grease and flour the pan instead. However, parchment paper is highly recommended as it guarantees easy, clean removal of the bars, eliminating the risk of sticking.
How can I make these bars even greener?
The natural color comes purely from the pistachios. If you desire a more vibrant emerald color for aesthetic purposes, you can add one or two drops of green food coloring to the wet ingredients before mixing in the flour.
Can I substitute another type of nut?
While you could substitute walnuts or pecans, the essence of thePistachio Dream Cookie Barsrelies on the specific flavor and unique color of the pistachios. If you substitute, the flavor profile will change dramatically, moving away from the signature “dream” quality.
The Quest for the Ultimate Cookie Bar
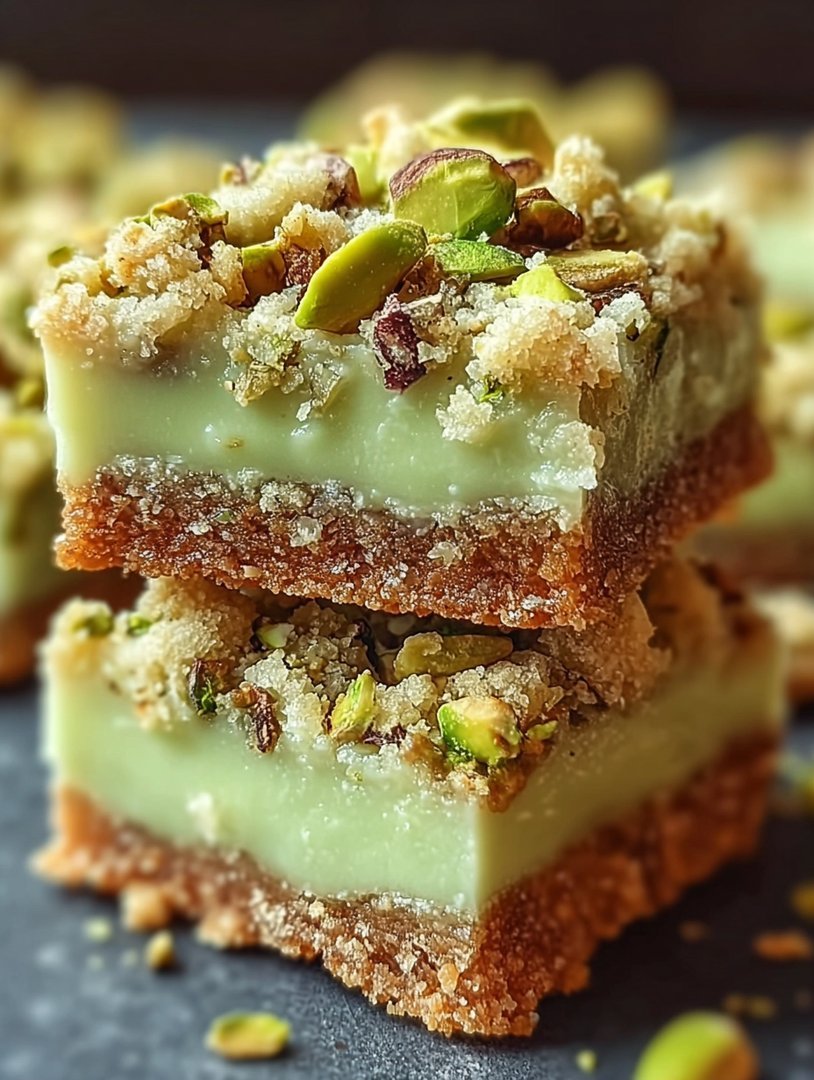
There are cookie bars, and then there arePistachio Dream Cookie Bars. These are the kind of treats that halt conversations, inspire poetry (bad poetry, usually), and make you question every other dessert decision you have ever made. I spent years searching for a sweet treat that tasted intensely luxurious yet felt utterly accessible. My mission began innocently enough, trying to combine the earthy richness of nuts with the creamy smoothness of a truly decadent filling. The result of this culinary deep dive? A bar so good, my neighbors started leaving passive-aggressive notes asking if I was intentionally starving them of baked goods.
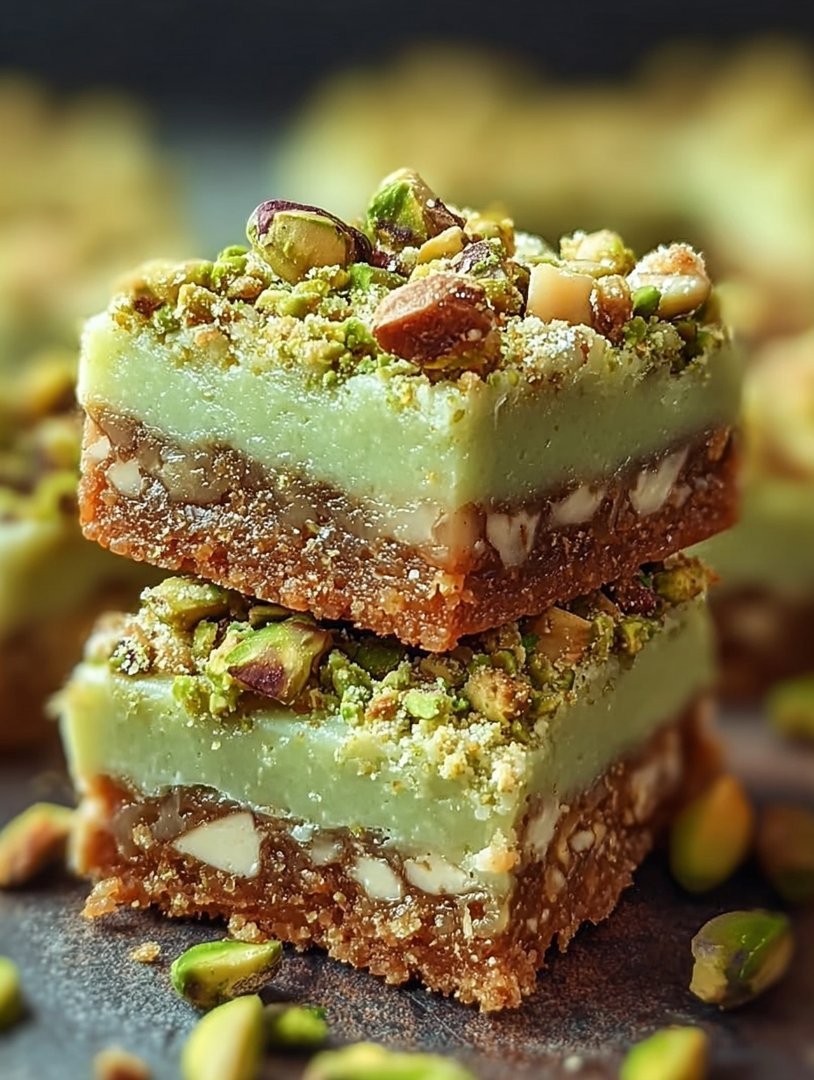
The beauty of this recipe lies in its elegant simplicity. You get a perfect trifles of texture: a buttery, slightly salty shortbread base that melts on your tongue, a smooth, vibrant green center bursting with authentic pistachio flavor, and a crunchy topping that provides the perfect contrast. Forget those pale, timid pistachio desserts; this recipe brings the flavor front and center. I remember the first time my partner tried a batch; he stood frozen mid-sentence, fork hovering, before declaring, “This tastes like winning the lottery and finding a forgotten twenty dollar bill in your winter coat simultaneously.” That, my friends, is high praise.
Baking should never feel like a stressful science experiment. It should be a joyful expression of edible art. These bars are incredibly forgiving, making them the perfect project for both novice bakers and seasoned pros looking for their next showstopper. We are skipping complicated techniques and embracing straightforward layers of flavor. Get ready to turn your kitchen into a fragrant, inviting bakery and witness the magic of truly excellent nutty cookie bars come to life.
Gathering the Essential Ingredients
Quality ingredients are the backbone of any dream recipe. Because the pistachio is the star, investing in high-quality, shelled, unsalted pistachios will make a noticeable difference in the final product. Resist the urge to use those overly salted, red-dyed nuts from the convenience store; we want flavor, not flashbacks to college football games.
For the Buttery Crust
- 2 cups all-purpose flour
- 1/2 cup granulated sugar
- 1/2 teaspoon fine sea salt
- 1 cup (2 sticks) unsalted butter, chilled and cubed
- 1 teaspoon pure vanilla powder
For the Pistachio Dream Filling
- 1 cup shelled, unsalted pistachios (plus 1/4 cup for topping)
- 1/2 cup all-purpose flour
- 1 cup packed light brown sugar
- 2 large eggs
- 1/2 teaspoon baking powder
- 1/4 teaspoon salt
- 1/2 cup unsalted butter, melted
- 1 cup white chocolate chips or chopped baking bar
- 2 teaspoons vanilla powder
- A tiny splash of almond paste (optional, for depth)
Crafting the Layers: Step-by-Step Instructions
Preheat your oven to 350°F (175°C). Line a 9×13 inch baking pan with parchment paper, ensuring the paper overhangs the sides. This makes removal significantly easier, preventing a frantic, post-bake struggle that nobody needs in their life.
Preparing the Shortbread Crust
In a large bowl, whisk together the two cups of flour, granulated sugar, and salt. Now, incorporate the chilled, cubed butter using a pastry blender or your fingertips. Work quickly until the mixture resembles coarse, pea-sized crumbs. If you possess a food processor, pulsing the ingredients a few times saves elbow grease and yields perfect crumbs almost instantly. Stir in the vanilla powder.
Press this crumb mixture evenly into the bottom of the prepared 9×13 inch pan. Press firmly, making sure the crust is compact, especially around the edges. Bake the crust for 15 minutes until it looks lightly set and slightly golden around the edges. While this preliminary bake is happening, you move on to the luxurious filling.
Developing the Creamy Pistachio Layer
The secret to the vibrant flavor in these cookie bars is grinding the pistachios. Place the one cup of pistachios into a food processor. Process until they form a fine, almost flour-like meal. Be careful not to process too long, or you will end up with pistachio butter, which is delicious but not what we need for this texture.
In a separate medium bowl, whisk the eggs lightly. Add the brown sugar, the remaining flour, baking powder, and salt. Stir until just combined. Incorporate the melted butter, vanilla powder, and almond paste (if using). Finally, fold in the ground pistachios and the white chocolate chips. The mixture will be thick and wonderfully fragrant.
Assembling and Baking the Pistachio Dream Cookie Bars
Remove the partially baked crust from the oven. Carefully and evenly spread the thick pistachio filling mixture over the warm crust. Use an offset spatula to ensure the layer is smooth from edge to edge. This step is crucial for even baking.
Take the reserved quarter cup of whole or roughly chopped pistachios and sprinkle them generously over the top of the filling. This provides a beautiful visual cue and an extra layer of crunch.
Return the pan to the oven. Bake for an additional 25 to 30 minutes. The bars are done when the edges look golden brown and the center appears set, though it should still look slightly soft—a gentle jiggle test is useful here. Avoid overbaking, as this will lead to dry bars. We want chewy, moist perfection.
The hardest part of the entire recipe is waiting for the bars to cool. Let the pan sit on a wire rack until completely cooled to room temperature, which usually takes about two hours. If you try to cut them while warm, the decadent filling will ooze everywhere, resulting in messy, albeit delicious, fragments. Once cool, lift the bars out using the parchment paper overhang and slice them into 24 perfect squares. Enjoy the applause.
Customizing and Serving Suggestions
These cookie bars are divine on their own, but they also welcome a little extra flourish. For a decadent holiday twist, try swirling a few tablespoons of raspberry jam into the pistachio filling before baking. The combination of green and red, along with the tartness of the berry, is truly spectacular.
Pair thesePistachio Dream Cookie Barswith a cup of strong, dark roast coffee or, if you are feeling fancy, a scoop of vanilla bean ice cream. The creamy coldness contrasts beautifully with the warm, rich texture of the bar. For a simple glaze, whisk powdered sugar with a tiny bit of orange juice until smooth, then drizzle it over the cooled bars. The citrus note brightens the entire flavor profile. Remember, cooking is about joy, so feel free to experiment!
I once brought a batch of these bars to a friend’s housewarming party. Before the main course was even served, the entire tray had vanished. I discovered later that the host had stashed three squares specifically for himself, hidden behind a stack of clean napkins. That, truly, is the highest compliment any baker can receive.
- Toast your pistachios lightly before grinding them to amplify their rich, earthy flavor profile. This simple technique adds depth without extra effort.
- Ensure your butter is truly cold for the crust mixture; this prevents gluten development, guaranteeing a delightfully tender and crumbly base.
- For clean, sharp slices, place the completely cooled bars in the refrigerator for thirty minutes before cutting with a long, sharp chef’s knife.
Perfecting the Cooking Process
Start by preparing the crust and getting it baked quickly; this foundational step sets the clock. While the shortbread pre-bakes, you should utilize that time to measure and process the pistachios and mix the filling. This overlapping sequence maximizes efficiency and guarantees the filling hits the crust while it is still warm.
Add Your Touch
Consider swapping half the white chocolate for dark chocolate chips for a richer flavor profile that balances the pistachio sweetness beautifully. Alternatively, add 1/4 teaspoon of cardamom to the filling mixture for an unexpected, warm, and sophisticated spice note. You can also press a thin layer of fig jam onto the crust before adding the filling.
Storing & Reheating
Store leftover cookie bars in an airtight container at room temperature for up to four days for optimal freshness. If you need to keep them longer, refrigerate for up to one week. They freeze exceptionally well; wrap individual bars tightly and thaw them at room temperature when the craving strikes.
Frequently Asked Questions About Baking Cookie Bars
Can I use a different type of nut in this recipe?
Absolutely, while the keyphrase is Pistachio Dream Cookie Bars, you can easily substitute walnuts or pecans for a completely different but equally delicious flavor. Almonds also work well, mimicking the rich texture of the original recipe perfectly.
Why are my cookie bars crumbling when I cut them?
Crumbling usually occurs if the bars were cut while still warm or if the crust was not pressed firmly enough into the pan before baking. Ensure the bars are completely cool and use a heavy hand when compacting the shortbread base.
How do I ensure the pistachios retain their green color?
To maximize the vibrant green hue, blanching the pistachios briefly in boiling water before peeling the outer skin helps. However, using high-quality nuts usually provides sufficient natural color without extra steps, especially once ground into the filling.
What size pan is best if I don’t have a 9×13 inch pan?
You can use a 10×15 inch jelly roll pan for thinner bars, reducing the baking time by about five minutes. If you use an 8×8 inch pan, the bars will be much thicker, requiring you to increase the baking time by ten to fifteen minutes.
Do I need to blind bake the crust?
Blind baking the crust for 15 minutes is highly recommended. This step prevents a soggy bottom layer, ensuring your crust remains perfectly crisp and buttery, providing the necessary structural integrity for the heavy, creamy filling.
Conclusion for Pistachio Dream Cookie Bars
You have successfully conquered the quest for the ultimate snack, transforming simple pantry ingredients into the truly spectacularPistachio Dream Cookie Bars. These vibrant bars are significantly more than just a typical dessert; they represent a buttery, nutty, and brightly colored statement piece guaranteed to vanish rapidly from any serving platter. We discovered the culinary magic of balancing the slightly salty nuts with a rich, sweet frosting, resulting in a texture that is simultaneously chewy, tender, and delightfully robust. Whether you are baking these beautiful creations for a large special occasion or simply because Monday morning necessitates a treat, embrace the overall simplicity and joyful green hue of this incredibly satisfying recipe. Go forth and spread the pistachio joy—your friends, family, and appreciative coworkers will certainly thank you profoundly for embarking on this delightful culinary adventure.
Print
Pistachio Dream Cookie Bars
Achieve supreme chewiness with these Pistachio Dream Bars! The instant pudding ensures an impossibly soft, rich crumb. Cream butter and sugars, then bake until golden.
- Total Time: 35 minutes
- Yield: 4 servings 1x
Ingredients
- 2 cups All-Purpose Flour
- 1 cup (2 sticks) Unsalted Butter, softened
- 3/4 cup Light Brown Sugar, packed
- 1/4 cup Granulated Sugar
- 1 box (3.4 oz) Instant Pistachio Pudding Mix
- 1 large Egg
- 1 teaspoon Vanilla Powder
- 1/2 cup Chopped Salted Pistachios, plus extra for topping
Instructions
- Step 1: Preheat oven to 350°F (175°C). Line a 9×13 inch baking pan with parchment paper, leaving an overhang on the sides for easy removal, and lightly grease the exposed pan or paper.
- Step 2: In a large bowl or stand mixer, cream together the softened butter, brown sugar, and granulated sugar until light and fluffy. Beat in the egg and alcohol-free vanilla extract until fully incorporated.
- Step 3: In a separate medium bowl, whisk together the flour, the instant pistachio pudding mix powder, and a pinch of salt (if using unsalted pistachios). Gradually add the dry ingredients to the wet mixture, mixing on low speed until just combined, being careful not to overmix.
- Step 4: Fold in the 1/2 cup of chopped pistachios. Press the dough evenly into the prepared 9×13 inch pan. Sprinkle the top with any additional chopped pistachios for decoration, if desired.
- Step 5: Bake for 25 to 30 minutes, or until the edges are light golden brown and the center is set. The bars may look slightly underdone in the center, but they will finish setting as they cool.
- Step 6: Allow the bars to cool completely in the pan on a wire rack (about 2 hours) before lifting them out using the parchment paper overhang and cutting them into squares.
Notes
- These bars stay perfectly soft for up to a week; store them at room temperature in an airtight container, separated by wax paper if stacking.
- While delicious cold, a quick 5-10 second blast in the microwave will restore that fresh-baked warmth and melt-in-your-mouth texture.
- Enhance the "Dream" factor by serving these bars slightly chilled with a scoop of vanilla bean ice cream or a light drizzle of white chocolate ganache.
- Since the instant pudding mix already guarantees a tender dough, stop mixing the moment the dry ingredients disappear to prevent overworking the gluten and maintain a super soft bar texture.
- Prep Time: 15 minutes
- Cook Time: 20 minutes
- Method: Stovetop
- Cuisine: American
FAQs
How can I make my Pistachio Dream Cookie Bars even greener for maximum visual impact?
Achieving that vibrant, neon-green color is part of the fun! While ground pistachios naturally provide a pale green hue, if you desire a truly dazzling result, incorporate a small amount of food coloring gel into the wet ingredients before mixing. Start with just one or two drops of quality green food coloring and mix until fully incorporated. Remember, the color sometimes deepens slightly upon baking. If you are aiming for a natural boost, try using a tiny pinch of powdered spinach (which is surprisingly flavorless in baking) alongside the crushed nuts to enhance the natural green tint of these incredible treats without resorting to artificial coloring.
What is the best way to store these decadent Pistachio Dream Cookie Bars to maintain freshness?
Proper storage ensures your cookie bars stay chewy and delicious for days, especially since these treats are so irresistible. Once the bars are completely cooled and cut, place them immediately in an airtight container at room temperature. They will retain their peak freshness and structural integrity for up to four days. If you need to store them longer, you can refrigerate them for up to a week, though they might firm up slightly. For maximum longevity, consider freezing the fully cooled bars, wrapped tightly in plastic wrap and placed inside a heavy-duty freezer bag, where they will last happily for up to three months. Just thaw them overnight when the inevitable craving strikes.
Can I use a different type of nut or add complementary flavors to this Pistachio Cookie Bar recipe?
Absolutely! While the intense pistachio flavor profile is truly divine and highly recommended, you can certainly experiment with substitutions if necessary. If you don’t have pistachios on hand, substitute them with an equal measure of finely chopped almonds or walnuts, though the specific “dream” factor might diminish slightly! To truly complement the pistachio flavor if you are using them, try adding a quarter teaspoon of almond paste or even a tiny amount of pure vanilla paste to the frosting for an unexpected depth. White chocolate chips also pair beautifully with the nutty base, adding an extra layer of creamy sweetness to the mixture. Just ensure that the total volume of dry add-ins remains consistent to keep the cookie bar structure perfectly intact.
I want to guarantee a perfectly soft and chewy texture for my Pistachio Dream Cookie Bars. What is the secret ingredient?
The secret to achieving that coveted, perfectly chewy center in your cookie bars lies primarily in two key factors: measuring your flour correctly and precise management of the baking time. Always use the “spoon and level” method for flour to avoid adding too much, which invariably results in dry, disappointingly cakey bars. Another crucial tip is slightly underbaking them—remove the bars from the oven when the edges are set and lightly golden brown, but the very center still looks slightly soft or glossy. They will continue to set as they cool in the hot pan, ensuring that delightful, soft, and profoundly satisfying chewiness that elevates these cookie bars above the standard dessert.


Leave a Comment