
You know that specific, immediate craving for something ridiculously creamy yet floral, crunchy yet smooth? That’s precisely how the legendaryRose Pistachio Cheesecake Ice Creamwas born, merging rich New York decadence with delicate Middle Eastern elegance.
Forget boring vanilla; this is the dessert equivalent of finding a hidden garden party inside a bustling city—it’s vibrant, luxurious, and perfectly unforgettable.
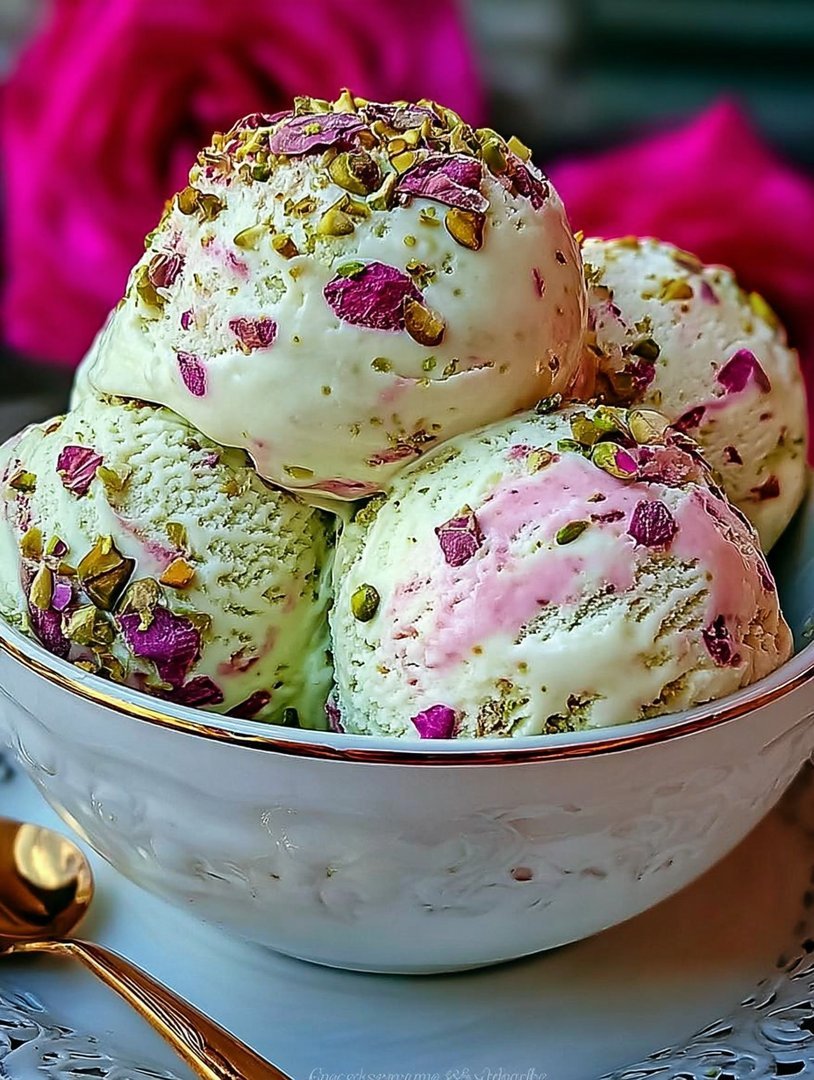
- The luxurious dual texture offers a tangy cheesecake swirl mixed seamlessly with the creamy, delicate rose-flavored custard base.
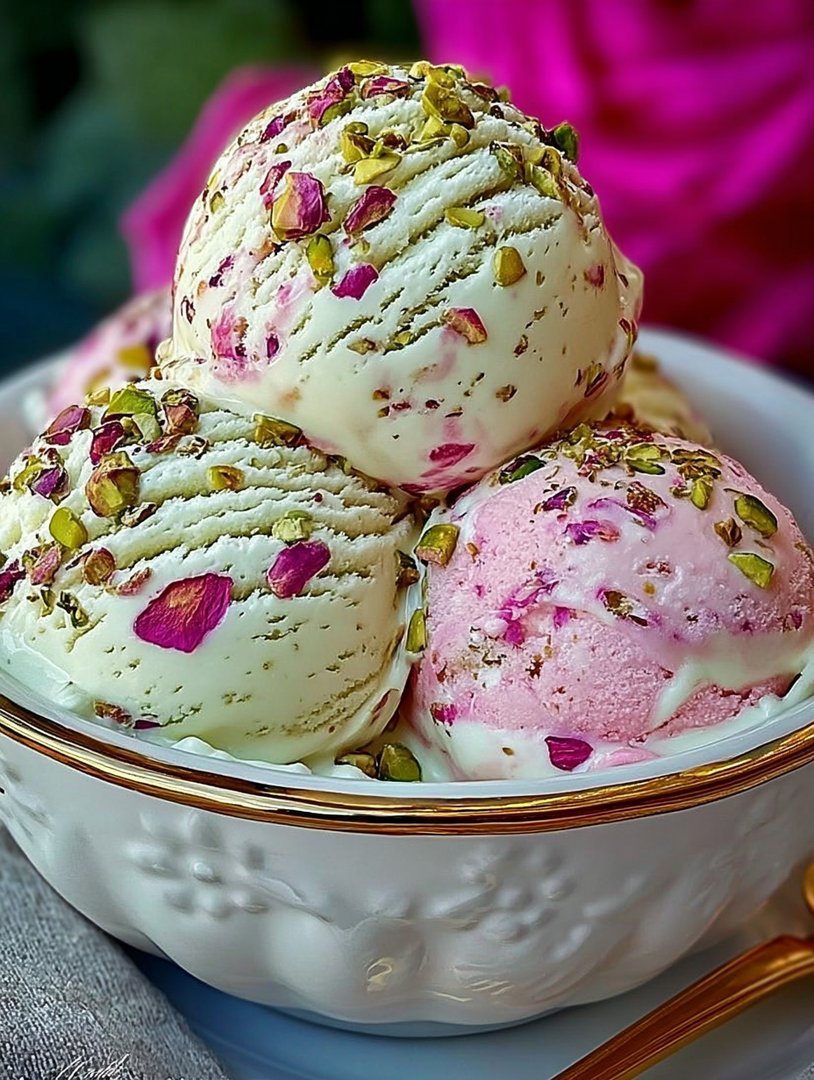
- Visually stunning, this vibrant green and soft pink dessert elevates any gathering, transforming a simple scoop into a work of art.
- Preparation is straightforward; churn this rich concoction easily, even for novice dessert makers looking for impressive results.
- Versatile enough for elegant dinner parties or cozy movie nights, this sophisticated flavor profile appeals to everyone who loves unique treats.
Why This Isn’t Just Any Ice Cream
We have all been there: standing in front of the freezer aisle, staring mournfully at the usual suspects. Chocolate, vanilla, maybe mint chip if we’re feeling adventurous. But sometimes, life demands a dessert that screams, “I am fabulous, and I know it.” I discovered the need for this particular scream one summer afternoon when my neighbor, bless her heart, tried to pass off a store-bought lime sherbet as an acceptable birthday treat. I realized right then that the world needed more complexity, more romance, and definitely more pistachios.
This recipe for Rose Pistachio Cheesecake Ice Cream is my defiant answer to culinary mediocrity. It’s the culmination of three weeks spent perfecting a balance that is both comforting and exotic. Imagine the smooth, slightly salty tang of a classic baked cheesecake hitting the palate, immediately followed by the subtle, fragrant sweetness of rosewater, all anchored by the nutty crunch of roasted pistachios. This isn’t just a dessert; it’s a personality upgrade for your summer.
The Quest for the Perfect Creamy Swirl
The biggest challenge when creating a cheesecake ice cream isn’t the ice cream itself, but preventing the cheesecake element from becoming rock-hard and chewy once frozen. Traditional methods often result in sad, icy clumps. I spent several disastrous evenings trying everything from mixing in stabilized sour cream to using a tiny bit of plant-based gelling agent, only to create something that tasted vaguely of floral putty. The secret, I finally realized, lay in whipping the cream cheese with a high-fat dairy component and a hint of cornstarch before folding it into the base. This process ensures the cheesecake swirl remains pliable and tangy, cutting through the richness of the rose-infused custard base beautifully.
The resulting Rose Pistachio Cheesecake Ice Cream offers a culinary journey. You get the richness of the deep freeze, the unexpected lift of the rose, and the satisfying texture from the nuts. It guarantees that anyone who takes a spoonful will stop mid-sentence and ask exactly what kind of wizardry you performed in your kitchen.
The Flavor Profile: East Meets West in a Freezer
What makes this specific flavor combination so captivating is its cultural bridge. Cheesecake is the quintessential American indulgence—dense, rich, and utterly satisfying. Rose water and pistachios, however, transport you immediately to the fragrant markets of the Middle East and South Asia. When these flavors unite, they create harmony rather than chaos.
The rose water should be high quality, as cheap versions can taste soapy. It provides a light, almost ethereal perfume that lingers pleasantly. The pistachios must be lightly toasted to enhance their earthy flavor and ensure that their crunch remains prominent against the creamy backdrop. We use a double-churn method for the best results: first churning the rose custard, then swirling in the prepared tangy cheesecake ribbon and the vibrant green pistachios during the final five minutes.
Balancing Sweetness and Fragrance for Rose Pistachio Cheesecake Ice Cream
Achieving the perfect balance requires precision. Ice cream bases generally require more sugar than you might expect because the cold dulls sweetness. However, too much rose water quickly overwhelms the delicate dairy and pistachio notes. Start conservatively with the rose essence—you can always add more, but you certainly cannot take it back out. If you accidentally overshoot the rose, adding a touch of lemon zest to the cheesecake component can help pull the flavor profile back toward brightness and away from overwhelming florals.
Remember that the quality of your dairy will define this dessert. Use heavy cream and whole milk, not lower-fat alternatives, to achieve the luxurious, melt-in-your-mouth texture that makes this ice cream truly decadent. This rich foundation supports the subtle floral notes, allowing the Rose Pistachio Cheesecake Ice Cream to shine as a sophisticated dessert.
Ingredients for Rose Pistachio Cheesecake Ice Cream
Here’s what you’ll need to make this delicious dish:
- Heavy CreamChoose a high-fat content cream for maximum richness, which prevents ice crystal formation.
- Whole MilkProvides the necessary liquid base; avoid skim milk for the best texture and flavor.
- Granulated SugarSweetens the base and lowers the freezing point, contributing to a softer texture.
- Egg YolksThese create a traditional custard base, acting as an emulsifier to ensure incredible creaminess.
- Pure Rose WaterUse culinary-grade rose water, starting with a small amount and tasting before adding more.
- Cream CheeseFull-fat, softened cream cheese is essential for creating the rich and tangy cheesecake swirl.
- Roasted PistachiosLightly roast these yourself or purchase high-quality roasted nuts, roughly chopped for texture.
- Lemon Juice and ZestA small amount adds necessary acidity and brightness to the cheesecake swirl component.
The full ingredients list, including measurements, is provided in the recipe card directly below.
How to Make Rose Pistachio Cheesecake Ice Cream
Follow these simple steps to prepare this delicious dish:
-
Prepare the Rose Custard Base
In a medium saucepan, gently heat the whole milk, half of the sugar, and a pinch of salt until steaming. In a separate bowl, whisk the egg yolks with the remaining sugar until pale. Temper the egg yolks by slowly whisking in the warm milk mixture, then return everything to the saucepan. Cook over medium-low heat, stirring constantly, until the custard coats the back of a spoon (about 175°F or 80°C).
-
Infuse and Chill the Base
Remove the custard from the heat and strain it through a fine-mesh sieve into a bowl containing the heavy cream. Stir in the measured amount of rose water. Cover the bowl and chill the base completely in the refrigerator for at least 6 hours, preferably overnight. A fully chilled base is crucial for successful churning.
-
Make the Cheesecake Swirl
While the base chills, prepare the swirl. Using a stand mixer or hand mixer, beat the softened cream cheese with the remaining sugar, lemon juice, and zest until perfectly smooth and fluffy. Transfer this mixture to a piping bag or a container and refrigerate until ready to use. This mixture should be firm but spreadable.
-
Churn the Rose Ice Cream
Pour the thoroughly chilled rose custard base into your ice cream machine and churn according to the manufacturer’s instructions, typically for 20 to 25 minutes, until the ice cream resembles soft-serve consistency.
-
Layer and Freeze
Stop the machine and quickly transfer half of the churned ice cream to a freezer-safe container. Drizzle or spoon half of the chilled cheesecake swirl and sprinkle half of the chopped pistachios over the top. Gently layer the remaining ice cream, cheesecake, and pistachios. Use a spoon or knife to create light ribbons for the swirl effect, but avoid overmixing.
-
Harden and Serve
Cover the container tightly with plastic wrap pressed directly onto the surface to prevent freezer burn, then seal with a lid. Freeze theRose Pistachio Cheesecake Ice Creamfor a minimum of 4 hours to harden to a scoopable texture.
Transfer to bowls and top with extra chopped pistachios and a fresh rose petal for the perfect finishing touch.
Tips for the Ultimate Creamy Texture
The holy grail of homemade ice cream is that perfectly soft, scoopable texture, free of annoying ice crystals. The first, and most crucial, step is proper chilling. If your base is even slightly warm when it enters the churning machine, the results will be less than optimal. Ensure your machine’s bowl is frozen solid—usually 24 hours in the deep freeze is required. Additionally, incorporating egg yolks via the custard method adds protein and fat, which naturally lowers the freezing point and keeps the final product soft. Never rush the process; patience truly pays off here.
Another excellent tip is to use a small splash of high-quality vegetable glycerin in your base mixture. While completely optional, glycerin is a natural humectant, meaning it binds to water molecules and prevents them from forming large, noticeable ice crystals, guaranteeing a super smooth mouthfeel. If you want the ultimate professional creamy texture, this secret ingredient is worth finding.
Troubleshooting Your Ice Cream Base
Sometimes things go awry. If your custard base curdles during cooking, don’t panic! Immediately remove it from the heat and try blitzing it briefly with an immersion blender. If the curdling is minor, the blender can often smooth out the lumps, salvaging your base. If the base tastes too strongly of rose, as mentioned earlier, amp up the tanginess of the cheesecake swirl with extra lemon juice or a pinch of citric acid to counteract the floral intensity.
If your finished ice cream is too hard, you likely did not incorporate enough sugar or fat, or you added the rose water (which is water-based) without sufficient emulsification. Next time, try adding an extra tablespoon of sugar to the initial custard base to help keep the final result softer when frozen. Always make sure your mixing bowl is covered tightly in the freezer; exposure to air is the fastest route to freezer burn and a gritty texture.
Frequently Asked Questions
Can I make this without an ice cream maker?
Yes, you can use the “no-churn” method, though the texture will be slightly denser. To do this, fold the chilled rose custard base into 2 cups of stiffly whipped heavy cream. Add the cheesecake swirl and pistachios, then freeze. You must stir the mixture thoroughly every 30 to 45 minutes for the first three hours to break up ice crystals and emulate the churning process.
What can I substitute for cream cheese?
If you prefer a different tang, you can substitute the cream cheese swirl with an equal amount of labneh (strained yogurt), which offers a similar thickness and sour profile, or use a high-quality mascarpone cheese for a richer, less tangy, but equally smooth ribbon.
How long does homemade ice cream last?
For the best texture and flavor, consume your homemade Rose Pistachio Cheesecake Ice Cream within one to two weeks. While it remains safe to eat for up to a month, the quality and freshness begin to degrade after about two weeks, making it susceptible to absorbing freezer odors.
What is the best way to get bright green pistachios?
For the most vibrant appearance, look for raw, shelled, natural pistachios. Blanching them quickly in boiling water for 30 seconds and then peeling off the thin brown skins before chopping will reveal the bright green kernel underneath, making your finished dessert visually pop.
Can I use a different nut instead of pistachios?
While the combination of rose and pistachio is iconic, you could successfully substitute blanched almonds or cashews if needed. However, to maintain the color and flavor profile, pistachios are highly recommended for the authentic Rose Pistachio Cheesecake Ice Cream experience.
The Unexpected Culinary Love Story
You know those recipes that just hit differently? This isn’t just dessert; it’s a dramatic saga involving creamy, tangy cheesecake elements, the subtle perfume of genuine rosewater, and the satisfying crunch of brilliant green pistachios. We are talking about the masterpiece known asRose Pistachio Cheesecake Ice Cream. I first stumbled upon this concept during a particularly disastrous attempt at making French macarons, which, naturally, ended in tears and sugar dust. But failure, my friends, often births brilliance.
I realized I needed a dessert that offered complexity without the fuss of delicate baking. Ice cream seemed the perfect canvas. But plain vanilla? Absolutely not. We needed drama, texture, and aroma. Picture this: a creamy, dense frozen delight base infused with rich cream cheese and bright lemon zest, then laced with fragrant rosewater that smells like a secret garden, all punctuated by salty, earthy pistachios. It sounds incredibly complicated, but trust me, the hardest part of this recipe is waiting for the churning to finish.
This recipe transforms a simple frozen treat into an elegant, show-stopping dessert that requires no oven whatsoever—just patience and an ice cream maker. Forget the heavy springform pan; we’re taking all those marvelous, comforting cheesecake flavors and spinning them into pure, chilly gold. This unique frozen dessert quickly became the star of every gathering, mainly because everyone assumes it took three days of non-stop labor, when in reality, it mostly took three hours of Netflix while the base chilled.
Gathering the Ingredients for Dessert Royalty
Achieving that perfect balance of floral, tangy, and nutty requires precision in sourcing ingredients. Don’t skimp on the quality here; your taste buds will thank you. Since we are creating a luxurious, dense texture typical of New York-style cheesecake, we rely heavily on high-fat dairy, which is crucial for preventing iciness.
Creamy Cheesecake Base Ingredients
- 1 cup (240ml) heavy cream (35% fat minimum)
- 2 cups (480ml) whole milk
- 3/4 cup granulated sugar, divided
- 5 large egg yolks (for tempering and richness)
- 8 ounces (226g) full-fat cream cheese, softened
- 1/4 cup light brown sugar, packed
- 1 teaspoon pure alcohol-free vanilla extract
- Pinch of fine sea salt
The Rose and Pistachio Finish
These components are what elevate the dessert beyond a standard frozen cream cheese mixture. The rosewater adds an unexpected layer of aroma, making this dessert truly unforgettable and complex.
- 1 1/2 teaspoons high-quality rosewater (essential for the floral aroma)
- 1/2 cup shelled, unsalted pistachios, roughly chopped and lightly toasted
- Zest of 1 lemon (to cut through the richness and mimic cheesecake tartness)
- Optional: A few drops of natural pink food coloring (for aesthetic drama)
Step-by-Step Instructions: Churning Dreams
Making homemade frozen desserts often sounds intimidating, but it is fundamentally just making a custard and then freezing it fast. This specific rose pistachio dessert requires tempering the eggs, which adds unmatched silkiness and prevents that icy, crystalline texture nobody wants in a scoop of frozen perfection. Remember, cleanliness is key; start with fresh ingredients and clean equipment.
Creating the Silky Custard Base
Start by combining the heavy cream and whole milk in a medium saucepan. Add half of the granulated sugar and the pinch of salt. Heat this mixture over medium heat until small bubbles form around the edges—do not let it boil, as scorching the milk impacts the flavor profile terribly. While the milk heats, whisk the egg yolks with the remaining granulated sugar in a separate, heatproof bowl until the mixture lightens in color and thickens slightly, achieving the characteristic “ribbon stage.”
This next step is critical: tempering. Slowly ladle about a cup of the hot milk mixture into the egg yolks while constantly whisking. This gently raises the temperature of the yolks without scrambling them, safeguarding your efforts. Once incorporated, pour the tempered egg mixture back into the saucepan with the remaining cream mixture. Continue stirring constantly over low heat until the custard thickens enough to coat the back of a wooden spoon (reaching about 175°F or 80°C). Strain the custard immediately through a fine-mesh sieve into a clean bowl to ensure ultimate smoothness; skipping this step risks a grainy texture.
Infusing the Cheesecake and Rose Flavors
In a large bowl, beat the softened cream cheese with the brown sugar and lemon zest using an electric mixer until completely smooth and lump-free. It should look homogenous and airy. Once the strained custard base has cooled slightly (around room temperature, or ideally cooler), slowly whisk it into the cream cheese mixture until fully combined. This meticulous blending guarantees you won’t have stubborn chunks of unmixed cream cheese in your final product.
Now, introduce the essential floral notes. Stir in the alcohol-free vanilla extract and the rosewater. Be brave with the rosewater, but proceed carefully—a little goes a long way, and too much can overwhelm the palate. If using, mix in the natural pink coloring now for a beautiful blush hue. Cover the bowl tightly and chill the entire custard base in the refrigerator for at least 6 hours, though overnight is truly best. A perfectly cold base churns into a much creamier, less icy result, yielding superior density for your frozen delicacy.
The Thrill of the Churn
Once fully chilled, pour the custard mixture into your pre-frozen ice cream maker bowl and churn according to the manufacturer’s instructions. This mechanical process usually takes about 20 to 30 minutes, depending on your machine. The mixture should resemble soft-serve ice cream when finished—thick, cold, and ready for hardening. During the last five minutes of churning, gently mix in most of the chopped, toasted pistachios. Reserve some for garnishing, as the bright green contrast looks fantastic.
Transfer the soft churned dessert to an airtight freezer container. Top it with the remaining pistachios for visual appeal. Press plastic wrap directly onto the surface of the dessert to prevent freezer burn and oxidation, then securely seal the container. Freeze for a minimum of 4 hours, or until firmly set. Serving this luxurious, complex Rose Pistachio Cheesecake Ice Cream is the ultimate reward for your patience and effort.
Achieving Peak Creaminess and Flavor
While the steps seem straightforward, making exceptional homemade frozen desserts, especially something as rich as this chilled treat, requires a few technical secrets. Mastering the chilling process and understanding ingredient balance are key to avoiding a rock-hard, bland block of ice. Following these minor adjustments guarantees success.
Why Chilling Time is Non-Negotiable
Many novice dessert makers rush the chilling process, but this step is essential for two reasons related to structure. First, chilling allows the fats in the dairy to solidify and integrate fully with the sugars and flavorings, dramatically improving the final texture and density. Second, and critically, if the base isn’t ice-cold before churning, the machine cannot freeze it quickly enough, leading to larger, undesirable ice crystals and a gritty texture. This extra time ensures the maximum incorporation of air during churning.
Troubleshooting Textural Issues
If your final result is too hard, you might need to adjust your sugar or fat content next time. Sugar acts as an antifreeze, keeping the final product scoopable. The high fat content from the heavy cream and cream cheese also helps keep the texture smooth and dense. Another trick is to let the finished product temper on the counter for five to ten minutes before attempting to scoop it; this slight warming enhances the nuanced rose and lemon flavors dramatically, releasing their full aromatic potential.
Perfecting the Cooking Process
Efficiency is vital when dealing with custard bases. Begin by tempering the yolks and making the custard, then strain it immediately. While the strained custard cools slightly, beat the cream cheese and sugar, ensuring it is perfectly smooth before incorporating the warm base slowly for a seamless, lump-free mixture.
Add Your Touch
You can easily substitute the pistachios with finely chopped candied walnuts or toasted almonds for crunch. If you prefer a stronger tang, increase the lemon zest or swirl in a tablespoon of thick sour cream alongside the cream cheese. For sweetness, ribbon a homemade raspberry or apricot jam through the mixture before the final freeze.
Storing & Reheating
Store your frozen dessert in a shallow, airtight container in the coldest part of your freezer for up to two weeks. Always press plastic wrap against the surface before sealing the lid to prevent freezer burn. Allow it to sit on the counter for ten minutes before serving to soften and ensure optimal flavor.
My sister tried this flavor for the first time last summer, and she immediately demanded the recipe, declaring it far superior to any store-bought premium brand she had ever tasted. That feedback made all the custard tempering worthwhile!
-
Always toast the pistachios lightly before adding them; this significantly enhances their earthy flavor and crunch, preventing them from becoming soggy.
-
Ensure your rosewater is high quality; cheap brands can taste soapy. Start with less and add slowly, tasting frequently until the desired floral note is reached.
-
Use full-fat cream cheese only, as the extra richness and lower water content prevent excessive iciness, yielding that desirable dense, cheesy texture.
Frequently Asked Questions About Rose Pistachio Cheesecake Ice Cream
What is the best way to substitute rosewater if I don’t have it?
If you absolutely must substitute rosewater, a tiny splash of orange blossom water can provide a similar floral aroma, although the flavor profile will shift slightly. You could also use a quarter teaspoon of pure vanilla bean paste for rich depth.
Do I need an ice cream maker for this recipe?
While an ice cream maker provides the smoothest and creamiest results, you can use the “no-churn” method by pouring the chilled base into a metal pan and freezing it, beating vigorously every 45 minutes for the first three hours to break up crystals.
Can I make a savory dish using pistachios and rose?
While this recipe is sweet, the combination of rose and pistachios works beautifully in savory contexts, particularly in rice pilafs or alongside slow-cooked lamb or turkey dishes, adding aromatic complexity and crunch.
How can I make this flavor even more intense?
For an intensified flavor experience, you can add 1/4 teaspoon of ground cardamom to the custard mixture along with the alcohol-free vanilla extract, deepening the aromatic complexity alongside the subtle rose. This adds a warm, spicy layer.
Why did my cheesecake ice cream turn out icy?
Icy texture usually means the base wasn’t cold enough before churning, or it lacked sufficient fat and sugar content. Always chill the base overnight and make sure your ice cream maker bowl is frozen solid for 24 hours.
There you have it—the blueprint for crafting a dessert that tastes like a decadent picnic in a Persian garden, crossed with the cozy comfort of a New York deli cheesecake. This Rose Pistachio Cheesecake Ice Cream is a testament to the fact that the best desserts are often the ones that blend unexpected flavors into a harmonious, irresistible scoop. Go forth and churn creamy magic!
The Unexpected Romance of Rose and Pistachio
We all have those moments in the kitchen where ambition greatly exceeds reality. Mine involved a high-stakes dinner party and a desperate need to ditch my usual vanilla scoop. I wanted something elegant, something that whispered “I have excellent taste,” not yelled “I bought this tub on sale.” That’s when I envisioned this creamy masterpiece. The combination sounds complicated, maybe even a little pretentious, but trust me, it’s pure, delicious genius. Think vibrant green pistachios meeting the delicate floral kiss of rose water, all wrapped up in a tangy, luxurious cheesecake swirl. This recipe for chilled cheesecake dessert is far easier to achieve than you might imagine, and it completely transforms the standard freezer staple.
Gathering Your Flavor Arsenal: Ingredients
Before we dive into the churning (or no-churn magic), ensure your ingredients are top-notch. Quality truly matters when dealing with such distinct flavors. You want deep, earthy pistachio flavor and fragrant, not soapy, rose water.
The Base Components
- 1 (8 ounce) package full-fat cream cheese, softened
- 1 cup granulated sugar
- 2 cups heavy cream (very cold)
- 1 cup whole milk
- 1 teaspoon pure alcohol-free vanilla extract
- 1/4 teaspoon fine sea salt
The Signature Flavor Additions
- 2 tablespoons premium rose water (start here; you can add more later!)
- 1 cup shelled, roasted, and salted pistachios, roughly chopped
- Green food coloring (optional, for that dramatic, vibrant color)
- 1 teaspoon lemon juice (to enhance the “cheesecake” tang)
Mixing Magic: Creating the Creamy Base
The secret to achieving that smooth, dense texture starts with the cream cheese. If it’s cold, you will end up with lumps, and nobody wants a lumpy dessert. Make sure the cream cheese is perfectly soft before you begin whisking. Use a stand mixer or a hand mixer—save your arm muscles for lifting the heavy tub later! First, cream the softened cheese and sugar together until the mixture looks light and fluffy, scraping down the sides often. This process takes about three minutes. Next, introduce the liquids. Slowly whisk in the cold heavy cream, milk, vanilla, salt, and lemon juice. Add the essential rose water now. Start with the recommended amount. Remember, it is potent! Mix until everything is homogenous and beautifully smooth.
The Green Flash: Infusing the Pistachio Power
This is where the visuals come into play. If you desire that stunning, vibrant green associated with pistachio treats, now is the time to add a tiny drop or two of green food coloring to the base. It’s entirely optional, but it definitely ups the visual drama. Once the color is perfect, stir in about two-thirds of the chopped pistachios. We reserve the remaining nuts for sprinkling on top later, adding a crucial textural crunch after freezing. Cover the mixture and chill it thoroughly in the refrigerator for at least four hours, but preferably overnight. This cooling process is vital for ensuring the best possible texture when churning.
Churning and Freezing for the Perfect Scoop
If you own an ice cream machine, you know the sound of churning is the sound of anticipation. Pour the chilled base into your machine and churn according to the manufacturer’s instructions. This usually takes between 20 to 30 minutes, resulting in a consistency similar to soft-serve. If you are making a no-churn version (using condensed milk and whipped cream), skip the machine step entirely and fold the chilled components together carefully.
Once the base is churned, transfer the chilled cheesecake dessert mixture to a freezer-safe container. Sprinkle the remaining chopped pistachios over the top. Press plastic wrap directly onto the surface of the mixture to prevent ice crystal formation, commonly known as freezer burn. Seal the container tightly and freeze until it is firm enough to scoop, typically requiring at least six hours. For the absolute best texture, allow the frozen treat to sit at room temperature for five to ten minutes before serving. This allows the frozen dessert to soften slightly, bringing out its complex, beautiful flavors.
Conclusion for Rose Pistachio Cheesecake Ice Cream
This chilled cheesecake dessert truly elevates the simple frozen treat into an experience. We’ve combined the satisfying crunch of pistachios with the intoxicating perfume of rose, anchoring it all within a tangy, luxurious cream cheese base. This recipe proves that sophistication in the kitchen doesn’t require complexity, just a willingness to experiment with bold, beautiful flavors. Whether you use a churner or rely on the magic of the no-churn method, you will achieve a dessert that is memorable, creamy, and undeniably elegant. Share this unique flavor combination with friends, or keep the entire tub for yourself—we won’t judge!
Print
Rose Pistachio Cheesecake Ice Cream
Achieve velvety perfection! Our Rose Pistachio Cheesecake ice cream recipe requires blending the gently warmed dairy base with soft cream cheese for zero lumps.
- Total Time: 35 minutes
- Yield: 4 servings
Ingredients
- Heavy Cream: 2 cups
- Whole Milk: 1 cup
- Granulated Sugar: 3/4 cup
- Cream Cheese (full fat, softened): 4 ounces
- Culinary Rosewater: 1 tablespoon
- Roasted, Shelled Pistachios (roughly chopped): 1/2 cup
- Pinch of fine sea salt
Instructions
- Step 1: In a medium saucepan, combine the heavy cream, whole milk, granulated sugar, and salt. Heat over medium-low heat, stirring constantly, until the sugar is completely dissolved and the mixture is warm but not boiling (do not scorch the milk). Remove from heat.
- Step 2: In a blender or large bowl, combine the softened cream cheese and the warm cream mixture. Blend or whisk until the base is completely smooth and there are absolutely no lumps of cream cheese remaining. Stir in the rosewater.
- Step 3: Pour the cheesecake ice cream base into an airtight container and refrigerate for at least 6 to 8 hours, or preferably overnight, until the mixture is thoroughly chilled (it must be very cold for proper churning).
- Step 4: Once chilled, churn the mixture in an ice cream maker according to the manufacturer's instructions. The ice cream will be soft-serve consistency when finished churning (typically 20-30 minutes).
- Step 5: During the last 5 minutes of churning, or immediately after transferring the soft ice cream to a freezer-safe container, fold in the chopped pistachios. Press plastic wrap directly onto the surface and freeze for an additional 3 to 4 hours to harden to a scoopable consistency.
Notes
- To guarantee a silky smooth base, ensure the cream cheese is truly at room temperature and blend it with the warm milk mixture until absolutely no tiny lumps are visible; a stick blender works wonders for this step.
- If the ice cream has frozen rock-solid, let it 'temper' on the countertop for 5 to 10 minutes before scooping, allowing the high-fat content to soften slightly for the best texture.
- This floral, creamy scoop is decadent served alongside fresh raspberries or drizzled with a touch of high-quality honey for added sweetness and complexity.
- For long-term storage, transfer any remaining ice cream to a smaller, airtight container and place a layer of parchment or plastic wrap directly on the surface before sealing; this prevents ice crystals and freezer burn.
- Prep Time: 15 minutes
- Cook Time: 20 minutes
- Method: Stovetop
- Cuisine: American
FAQs
How do I prevent my Rose Pistachio Cheesecake Ice Cream from becoming icy or grainy?
Preventing graininess starts with ensuring your cream cheese is completely smooth and incorporated before chilling the base. To avoid ice crystals, make sure you thoroughly chill the mixture before churning, and use full-fat dairy products; the fat content inhibits crystal formation. Additionally, covering the surface directly with plastic wrap before freezing minimizes air exposure and keeps that wonderfully smooth texture. If using a no-churn method, whipping the cream until stiff peaks form also helps trap air, ensuring a luxurious and creamy scoop every time. Proper freezing technique is essential for this rich cheesecake base.
Can I make Rose Pistachio Cheesecake Ice Cream without an ice cream maker?
Absolutely! You can easily adapt this recipe for a no-churn method, yielding a wonderfully creamy result. Instead of churning the base, you will prepare the mixture as directed, excluding the whole milk. Separately, whip 2 cups of heavy cream until stiff peaks form. Then, gently fold the chilled rose-pistachio cream cheese mixture into the whipped cream along with one can of sweetened condensed milk. The condensed milk provides the necessary sugar and lower freezing point required for a successful no-churn freezer dessert. Transfer this combined mixture to a loaf pan and freeze until solid, following the same preparation steps.
What are the best substitutions if I don’t like using rose water in this recipe?
While the combination of rose and pistachio is iconic, if rose water isn’t your preference, you have excellent alternatives. You could substitute the rose water with 1/2 teaspoon of alcohol-free almond extract to complement the nutty flavor of the pistachios beautifully, enhancing the dessert’s richness. Another delightful option is adding a small amount of orange blossom water; use this sparingly, as it is quite potent, giving the frozen treat a slightly citrusy, floral lift. Alternatively, doubling the alcohol-free vanilla extract and increasing the lemon juice slightly will produce a fantastic traditional pistachio cheesecake dessert, focusing purely on the tart cream cheese elements.
How long will homemade Rose Pistachio Cheesecake Ice Cream last in the freezer?
Properly stored homemade Rose Pistachio Cheesecake Ice Cream will generally maintain its quality and texture for about two weeks in a deep freeze. After that period, while still safe to consume, the quality tends to diminish, and it may start developing ice crystals or absorb odors from the freezer, especially if the container isn’t airtight. To maximize its lifespan, always use an extremely tightly sealed, dedicated freezer container, not just plastic wrap over a bowl. For the optimal fresh flavor and texture, we strongly recommend enjoying this creamy delight within the first week of preparation.


Leave a Comment