
Ah, Rotisserie Chicken Enchiladas, a symphony of savory chicken, melty cheese, and zesty sauce all wrapped in a warm tortilla blanket. The aroma alone is enough to transport you to a cozy kitchen filled with laughter and the promise of a truly satisfying meal.
Think of a Tuesday night, the kind where takeout menus are calling your name. Instead, picture this: tender, flavorful chicken nestled in tortillas, smothered in a vibrant homemade sauce, and baked to bubbly perfection. It’s comfort food elevated, and surprisingly easy to whip up.
Here’s why these Rotisserie Chicken Enchiladas will become your new weeknight hero:
- Effortless thanks to pre-cooked rotisserie chicken, making prep time a breeze.
- A delightful combination of smoky chicken, gooey cheese, and a tangy homemade enchilada sauce.
- Visually stunning with vibrant colors that make any meal feel like a fiesta.
- Incredibly versatile, allowing you to customize the filling and sauce to suit your taste.
Ingredients for Rotisserie Chicken Enchiladas
Here’s what you’ll need to make this delicious dish:
- Rotisserie Chicken About 3 cups, shredded. This is the star of the show, providing a shortcut to deliciousness.
- Corn Tortillas 10-12 tortillas. These will hold all the goodness together; warm them slightly for easier rolling.
- Shredded Cheddar Cheese 2 cups, divided. Use a good quality cheddar for the best flavor and melt.
- Onion 1 medium, diced. Adds a savory base note to the enchilada filling.
- Bell Pepper 1 medium, diced (any color). Contributes a subtle sweetness and crunch.
- Canned Diced Tomatoes 1 (14.5 ounce) can, undrained. Provides acidity and texture to the sauce.
- Tomato Paste 2 tablespoons. Concentrates the tomato flavor and helps thicken the sauce.
- Chicken Broth 1 cup. Adds moisture and depth to the enchilada sauce.
- Chili Powder 2 tablespoons. Gives the enchiladas that classic warm, spicy flavor.
- Cumin 1 teaspoon. Adds an earthy, smoky note to the sauce.
- Garlic Powder 1 teaspoon. Enhances the savory flavors of the enchiladas.
- Dried Oregano 1/2 teaspoon. Contributes a subtle herbaceousness.
- Salt and Pepper To taste. Seasoning is key to bringing out all the flavors.
- Olive Oil 1 tablespoon. Used for sauteing the vegetables.
The full ingredients list, including measurements, is provided in the recipe card directly below.
How to Make Rotisserie Chicken Enchiladas
Follow these simple steps to prepare this delicious dish:
Step 1: Prepare the Enchilada Sauce
In a medium saucepan, heat olive oil over medium heat. Add diced onion and bell pepper and cook until softened, about 5 minutes. Stir in tomato paste, chili powder, cumin, garlic powder, dried oregano, salt, and pepper. Cook for 1 minute, stirring constantly, until fragrant.
Step 2: Simmer the Sauce
Add canned diced tomatoes (undrained) and chicken broth to the saucepan. Bring to a simmer, then reduce heat and cook for 15 minutes, stirring occasionally, until the sauce has thickened slightly.
Step 3: Assemble the Enchiladas
Preheat oven to 375°F (190°C). Lightly grease a 9×13 inch baking dish. Warm the corn tortillas slightly in a dry skillet or microwave to make them more pliable.
Step 4: Fill the Tortillas
Spread a thin layer of enchilada sauce on the bottom of the prepared baking dish. Fill each tortilla with shredded rotisserie chicken and a sprinkle of cheddar cheese. Roll up tightly and place seam-side down in the baking dish.
Step 5: Bake the Enchiladas
Pour the remaining enchilada sauce over the enchiladas, ensuring they are evenly coated. Sprinkle with the remaining cheddar cheese. Bake for 20-25 minutes, or until the cheese is melted and bubbly and the enchiladas are heated through.
Step 6: Serve
Let the enchiladas cool for a few minutes before serving. Garnish with your favorite toppings, such as sour cream, chopped cilantro, or sliced avocado. Transfer to plates and drizzle with any remaining sauce for the perfect finishing touch.
Tips and Tricks for Perfect Rotisserie Chicken Enchiladas (formated as H2 subheading)
Want to elevate your Rotisserie Chicken Enchiladas game? Here are some insider tips and tricks to make them truly unforgettable:
Get Creative with the Filling (formated as H3 subheading)
Don’t be afraid to experiment! Mix in some black beans, corn, or sautéed mushrooms with the chicken for added texture and flavor. A little bit of cream cheese can also add a tangy creaminess that takes these enchiladas to the next level. Think of it as your enchilada canvas – paint it with deliciousness!
Homemade Sauce vs. Store-Bought (formated as H3 subheading)
While a homemade enchilada sauce is undeniably delicious, a good quality store-bought sauce can save you time without sacrificing too much flavor. Just be sure to choose one that you enjoy and that complements the flavors of the chicken and cheese. If you do opt for store-bought, consider doctoring it up with a little extra chili powder, cumin, or a squeeze of lime juice to give it a more homemade taste.
Tortilla Talk: Corn vs. Flour (formated as H3 subheading)
This recipe calls for corn tortillas, which offer a classic enchilada flavor and texture. However, if you prefer flour tortillas, feel free to substitute them. Just keep in mind that flour tortillas tend to be more delicate, so be careful not to overfill them.
Preventing Soggy Enchiladas (formated as H3 subheading)
Nobody likes a soggy enchilada! To prevent this culinary catastrophe, lightly fry the tortillas in a dry skillet before filling them. This creates a barrier that helps them hold their shape and prevents them from absorbing too much sauce. Also, don’t overfill the enchiladas, as this can also contribute to sogginess.
Spice It Up (or Tone It Down) (formated as H3 subheading)
If you like your enchiladas with a kick, add a pinch of cayenne pepper or a dash of your favorite hot sauce to the enchilada sauce. Alternatively, if you prefer a milder flavor, reduce the amount of chili powder or omit the cayenne pepper altogether. Taste as you go and adjust the seasonings to your liking.
Serving Suggestions for Rotisserie Chicken Enchiladas (formated as H2 subheading)
These Rotisserie Chicken Enchiladas are a complete meal on their own, but they also pair well with a variety of side dishes. Here are a few suggestions to round out your fiesta:
Classic Sides (formated as H3 subheading)
You can never go wrong with classic Mexican sides like rice and beans. A simple cilantro-lime rice and a side of black beans or refried beans are the perfect complements to the rich and flavorful enchiladas.
Fresh and Crunchy Salads (formated as H3 subheading)
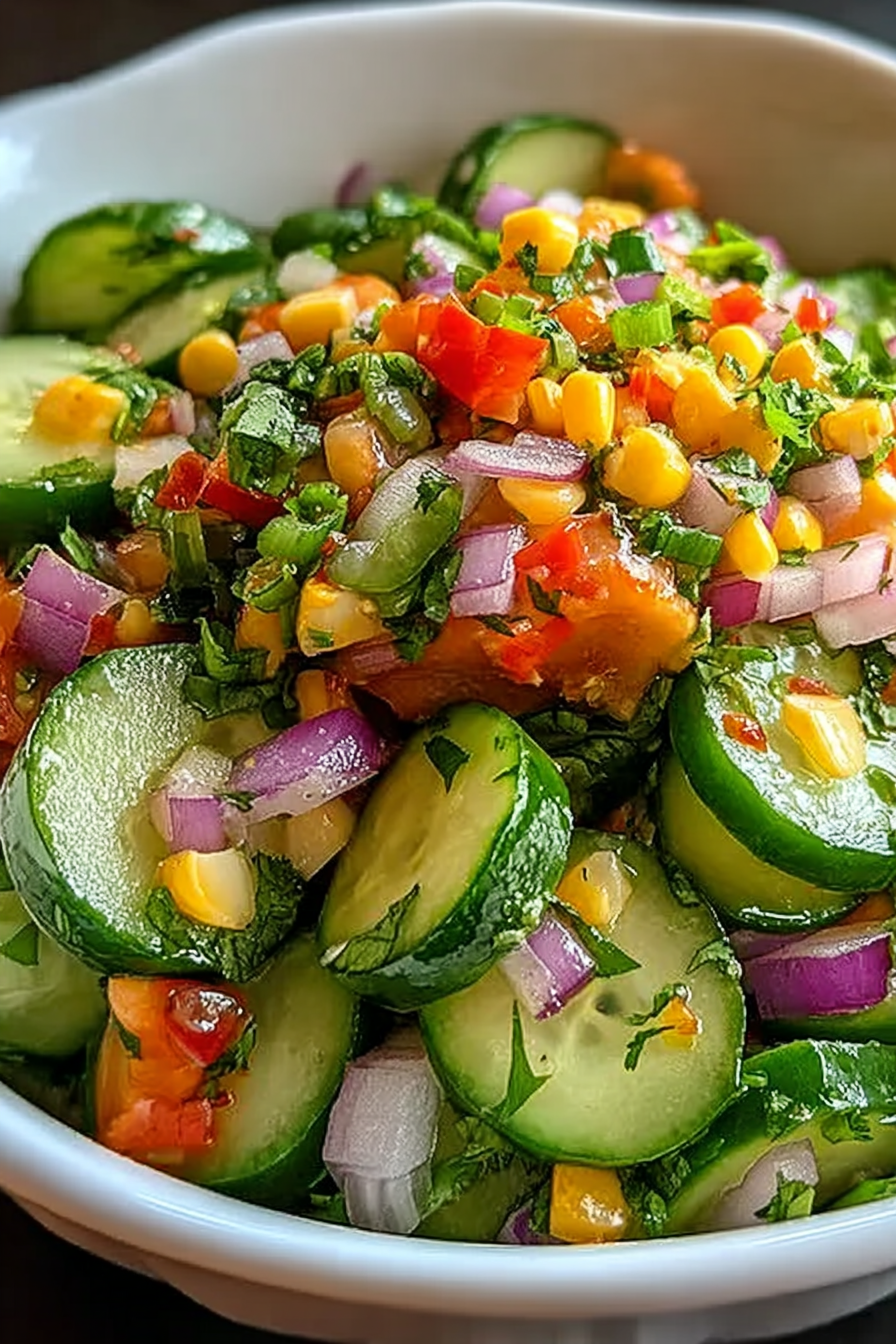
A light and refreshing salad can provide a welcome contrast to the richness of the enchiladas. Consider a simple green salad with a vinaigrette dressing, or a more elaborate salad with avocado, corn, and a tangy lime dressing.
Guacamole and Chips (formated as H3 subheading)
No Mexican-inspired meal is complete without guacamole and chips! Serve a bowl of freshly made guacamole with tortilla chips for a crowd-pleasing appetizer or side dish.
Festive Garnishes (formated as H3 subheading)
Don’t forget the garnishes! A sprinkle of chopped cilantro, a dollop of sour cream, or a few slices of avocado can add visual appeal and extra flavor to your Rotisserie Chicken Enchiladas.
Make Ahead and Storage Instructions for Rotisserie Chicken Enchiladas (formated as H2 subheading)
Life is busy, and sometimes you need to get a head start on dinner. Good news: these Rotisserie Chicken Enchiladas are perfect for making ahead!
Assembling Ahead of Time (formated as H3 subheading)
You can assemble the enchiladas several hours or even a day in advance. Simply prepare the sauce, fill the tortillas, and arrange them in the baking dish. Cover the dish tightly with plastic wrap and refrigerate until you’re ready to bake. When you’re ready to bake, remove the plastic wrap and bake as directed, adding a few extra minutes to the baking time if necessary.
Freezing Instructions (formated as H3 subheading)
For longer storage, you can freeze the assembled enchiladas. Wrap the baking dish tightly with plastic wrap and then with foil. Freeze for up to 2-3 months. When you’re ready to bake, thaw the enchiladas in the refrigerator overnight. Remove the plastic wrap and foil and bake as directed, adding extra time to ensure they are heated through.
Storing Leftovers (formated as H3 subheading)
Leftover enchiladas can be stored in the refrigerator for up to 3-4 days. Reheat them in the oven, microwave, or skillet until heated through. They’re just as delicious the next day!
Nutritional Information for Rotisserie Chicken Enchiladas (formated as H2 subheading)
Knowing what’s in your food is important, so here’s a general overview of the nutritional information for these Rotisserie Chicken Enchiladas. Keep in mind that the exact values will vary depending on the specific ingredients you use.
Calorie Count (formated as H3 subheading)
One serving of Rotisserie Chicken Enchiladas (approximately 2 enchiladas) typically contains around 400-500 calories.
Macronutrient Breakdown (formated as H3 subheading)
The macronutrient breakdown is typically around 30-40% carbohydrates, 30-40% protein, and 20-30% fat.
Important Nutrients (formated as H3 subheading)
These enchiladas are a good source of protein, calcium, and iron. They also provide vitamins and minerals from the vegetables and spices used in the sauce.
*Note: This nutritional information is an estimate and should be used as a general guide only.*
Perfecting the cooking process involves a strategic sequence. First, prepare your rotisserie chicken by shredding it. Next, warm the tortillas while you assemble the enchiladas, layering in the cheesy goodness. Finally, bake until bubbly and golden. This order ensures efficiency and optimal deliciousness.
Add your touch to these rotisserie chicken enchiladas by swapping the Monterey Jack for a spicier pepper jack. Consider adding a dash of smoked paprika to the chicken mixture for extra depth. Black beans or corn would also be delightful additions. Customize to your heart’s content!
Storing & reheating these enchiladas is a breeze. Keep leftovers in an airtight container in the fridge for up to three days. Reheat in the oven at 350°F (175°C) until warmed through, or microwave individual portions for a quick and satisfying meal.
Here are a few tips to elevate your enchilada game:
- Ensure even sauce coverage to prevent dry spots, resulting in a uniformly moist and flavorful enchilada experience.
- Don’t overfill the tortillas, because an overflowing enchilada can be a saucy mess, making them hard to handle.
- Let the enchiladas rest for a few minutes after baking; this allows the flavors to meld beautifully before serving.
(Personal anecdote formated as paragraph subheading (very important! don’t write any title for this paragraph))
I remember the first time I made these. My family devoured them so quickly, I barely got one! They declared them the “best enchiladas ever,” and I’ve been making them ever since.
Conclusion for Rotisserie Chicken Enchiladas :
So there you have it: Rotisserie Chicken Enchiladas, a dish that’s both easy to make and incredibly satisfying. With rotisserie chicken as the star, you’re already halfway to a delicious dinner. Just remember to properly heat those tortillas, don’t overfill them, and feel free to get creative with your toppings and sides. Whether you’re making them for a quick weeknight meal or a weekend fiesta, these enchiladas are sure to be a hit. Enjoy!
Print
Rotisserie Chicken Enchiladas
Delicious rotisserie chicken enchiladas recipe with detailed instructions and nutritional information.
- Total Time: 35 minutes
- Yield: 4 servings
Ingredients
- Rotisserie chicken, shredded: 3 cups
- Corn tortillas: 10
- Enchilada sauce: 2 cups
- Shredded Monterey Jack cheese: 2 cups
- Onion, chopped: 1/2 cup
- Sour cream: 1/2 cup
- Olive oil: 1 tablespoon
- Green onions, chopped: 2 tablespoons
Instructions
- Step 1: Preheat oven to 350°F (175°C). Lightly grease a 9×13 inch baking dish.
- Step 2: Heat olive oil in a skillet over medium heat. Add chopped onion and cook until softened, about 5 minutes.
- Step 3: In a large bowl, combine shredded rotisserie chicken, cooked onion, and 1 cup of shredded Monterey Jack cheese.
- Step 4: Warm the corn tortillas slightly to make them more pliable. Dip each tortilla in enchilada sauce, then fill with the chicken and cheese mixture. Roll up the tortilla and place it seam-side down in the prepared baking dish.
- Step 5: Pour the remaining enchilada sauce over the enchiladas and sprinkle with the remaining 1 cup of Monterey Jack cheese.
- Step 6: Bake for 20-25 minutes, or until the cheese is melted and bubbly. Top with sour cream and green onions before serving.
Notes
- Store leftover enchiladas in an airtight container in the refrigerator for up to 3 days.
- For best results, reheat individual enchiladas in the microwave or bake the entire dish covered with foil to prevent drying out.
- Serve these enchiladas with a side of Mexican rice and black beans for a complete and satisfying meal.
- Don't overfill the tortillas to prevent them from tearing during rolling; a little goes a long way!
- Prep Time: 15 minutes
- Cook Time: 20 minutes
- Method: Stovetop
- Cuisine: American
FAQs :
Can I use pre-shredded cheese for these Rotisserie Chicken Enchiladas?
Absolutely! Using pre-shredded cheese is a fantastic shortcut, especially on those busy weeknights. Just make sure you’re grabbing a good quality blend that melts well. Sometimes, pre-shredded cheese can have anti-caking agents, which can affect how smoothly it melts. But hey, even if it’s not perfect, it’ll still be cheesy and delicious! I personally love using a Mexican blend or a sharp cheddar for that extra zing. It’s all about convenience and getting those tasty rotisserie chicken enchiladas on the table quickly!
What’s the best way to heat tortillas so they don’t crack when rolling my Chicken Enchiladas?
Tortilla cracking is the enemy of enchilada perfection! My favorite method is to lightly steam them. Just wrap a stack of tortillas in damp paper towels and microwave them for about 30-60 seconds. They should be pliable and ready to roll. You can also heat them individually in a dry skillet over medium heat for a few seconds per side. Another pro tip? Don’t overfill the enchiladas. A little filling goes a long way in preventing those dreaded cracks. Now, go forth and roll like a pro!
What are some good side dishes to serve with Rotisserie Chicken Enchiladas?
Oh, the possibilities are endless! For a fresh and vibrant contrast, I love serving a simple cilantro-lime rice. It’s bright and cuts through the richness of the enchiladas. A crisp and refreshing salad, like a Mexican street corn salad or a classic garden salad with a zesty vinaigrette, is also a great choice. And don’t forget the toppings! Sour cream, guacamole, and pico de gallo are always a crowd-pleaser. Basically, anything that adds texture and flavor is a win in my book!
Can I make these Rotisserie Chicken Enchiladas ahead of time?
You bet you can! Making enchiladas ahead of time is a total lifesaver. Assemble the enchiladas as directed in the recipe, but don’t bake them. Cover the dish tightly with plastic wrap and refrigerate for up to 24 hours. When you’re ready to bake, let the dish sit at room temperature for about 30 minutes while the oven preheats. Then, bake as directed, adding a few extra minutes if needed to ensure they are heated through and bubbly. This way, dinner is ready whenever you are.


Leave a Comment