

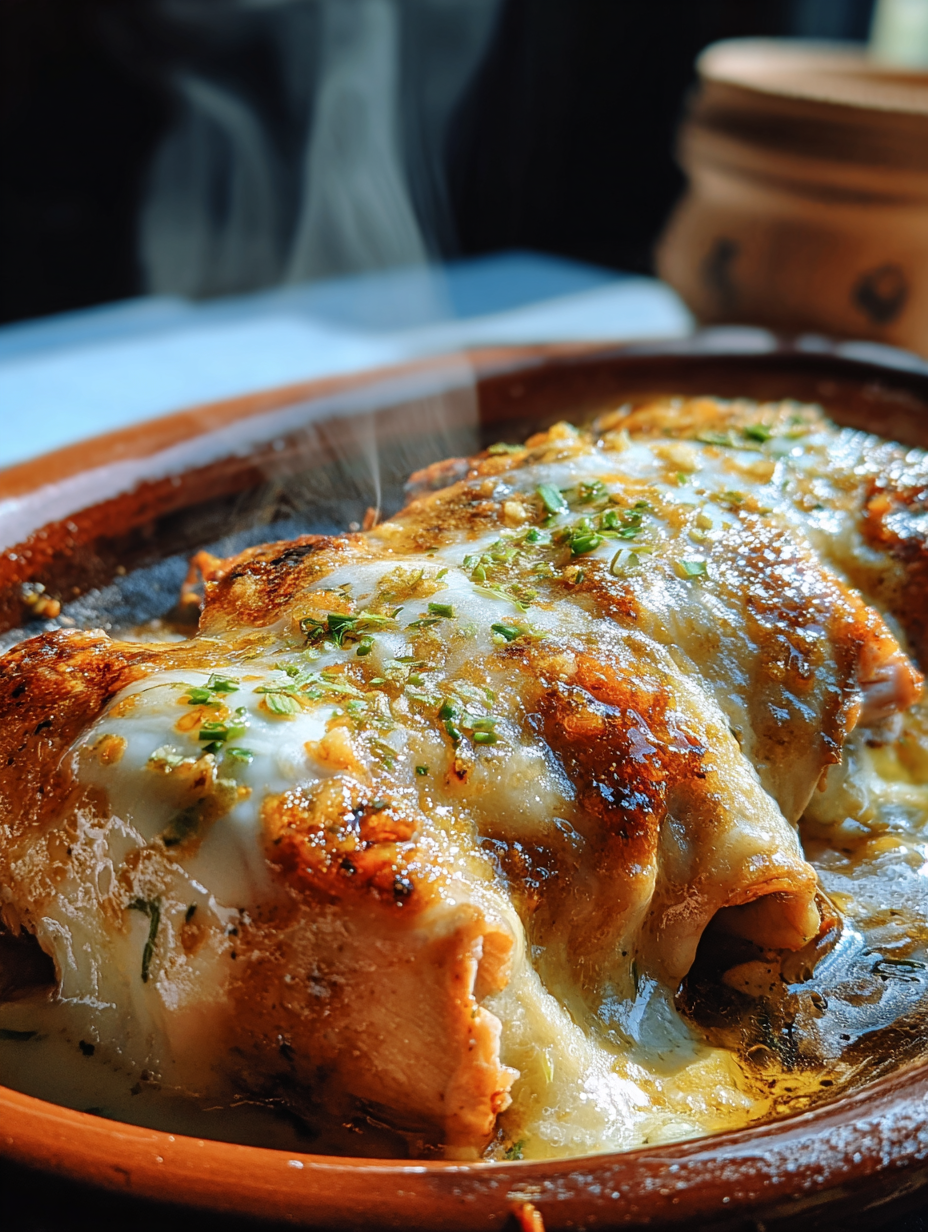
Ah, the enchirito. Just the name conjures up images of cheesy, saucy goodness, doesn’t it? Imagine sinking your fork into a warm, comforting blanket of tortillas hugging a flavorful filling, all swimming in a sea of savory sauce. This Enchirito Recipe Is the Comfort Food You’ve Been Craving, trust me on this one.
Remember those nights when you needed a culinary hug? This enchirito recipe is basically that, but in food form. It’s the kind of dish that makes everything feel a little bit better, a little bit warmer, and a whole lot more delicious. Get ready for an explosion of flavors that will transport you to your happy place.
Here’s why you’ll absolutely adore this enchirito recipe:
- It’s surprisingly simple to whip up, even on a busy weeknight, making it a perfect solution for those “hangry” emergencies.
- The combination of savory filling, melted cheese, and zesty sauce creates a symphony of flavors that dance on your taste buds.
- The vibrant colors and textures make it a feast for the eyes as well as the stomach, guaranteed to impress your family and friends.
- You can easily customize it with your favorite fillings and toppings, making it a versatile dish that caters to your personal preferences.
Ingredients for This Enchirito Recipe Is the Comfort Food You’ve Been Craving
Here’s what you’ll need to make this delicious dish:
The full ingredients list, including measurements, is provided in the recipe card directly below.
How to Make This Enchirito Recipe Is the Comfort Food You’ve Been Craving
Follow these simple steps to prepare this delicious dish:
Step 1: Prepare the Chicken
Boil chicken until it reaches an internal temperature of 165°F (74°C). Shred the chicken with two forks and set aside.
Step 2: Sauté the Vegetables
Heat the olive oil in a large skillet over medium heat. Add the diced onion and bell pepper and cook until softened, about 5-7 minutes.
Step 3: Combine the Filling Ingredients
Add the shredded chicken, corn kernels, and black beans to the skillet. Stir in the chili powder, cumin, garlic powder, salt, and pepper. Cook for another 5 minutes, stirring occasionally, until the flavors have melded together.
Step 4: Assemble the Enchiritos
Preheat oven to 350°F (175°C). Spread a thin layer of enchilada sauce in the bottom of a 9×13 inch baking dish. Fill each tortilla with about 1/2 cup of the chicken mixture and roll it up tightly. Place the enchiritos seam-side down in the baking dish.
Step 5: Bake the Enchiritos
Pour the remaining enchilada sauce over the enchiritos, ensuring they are well covered. Sprinkle generously with shredded cheddar cheese. Bake for 20-25 minutes, or until the cheese is melted and bubbly and the sauce is heated through.
Step 6: Serve and Enjoy
Let the enchiritos cool for a few minutes before serving. Garnish with your favorite toppings, such as sour cream, guacamole, or chopped cilantro.
Transfer to plates and drizzle with sour cream for the perfect finishing touch.
Variations on This Enchirito Recipe Is the Comfort Food You’ve Been Craving (formatted as H2 heading)
Want to mix things up a bit? Here are a few fun variations you can try:
Beef Enchiritos (formatted as H3 heading)
Swap the chicken for ground beef. Brown the ground beef in the skillet before adding the vegetables, making sure to drain off any excess grease. This will give you a richer, heartier flavor profile.
Turkey Enchiritos (formatted as H3 heading)
Ground turkey is a leaner alternative to ground beef. Follow the same instructions as above, adjusting cooking times as needed.
Vegetarian Enchiritos (formatted as H3 heading)
Omit the chicken altogether and add more vegetables. Consider adding mushrooms, zucchini, or spinach to the filling. You can also add crumbled tofu for extra protein.
Spicy Enchiritos (formatted as H3 heading)
Add a pinch of cayenne pepper or a chopped jalapeño to the filling for an extra kick. You can also use a spicier enchilada sauce.
Tips for Making the Best Enchirito Recipe Is the Comfort Food You’ve Been Craving (formatted as H2 heading)
To ensure your enchiritos are a resounding success, here are a few helpful tips:
Don’t Overfill the Tortillas (formatted as H3 heading)
Overfilling the tortillas can make them difficult to roll and prone to tearing. Aim for about 1/2 cup of filling per tortilla.
Warm the Tortillas Before Rolling (formatted as H3 heading)
Warming the tortillas slightly in the microwave or on a dry skillet will make them more pliable and less likely to crack.
Use High-Quality Ingredients (formatted as H3 heading)
Using fresh, high-quality ingredients will make a noticeable difference in the flavor of your enchiritos.
Don’t Be Afraid to Experiment (formatted as H3 heading)
This recipe is a great starting point, but don’t be afraid to experiment with different fillings, sauces, and toppings to create your own signature enchiritos.
Serving Suggestions for This Enchirito Recipe Is the Comfort Food You’ve Been Craving (formatted as H2 heading)
Enchiritos are delicious on their own, but they can also be served with a variety of side dishes:
Rice and Beans (formatted as H3 heading)
A classic combination that perfectly complements the flavors of the enchiritos.
Salad (formatted as H3 heading)
A fresh, crisp salad adds a refreshing element to the meal.
Guacamole and Chips (formatted as H3 heading)
A crowd-pleasing appetizer that’s perfect for sharing.
Sour Cream and Salsa (formatted as H3 heading)
Essential toppings that add a creamy and zesty finish to the enchiritos.
Storage Instructions for This Enchirito Recipe Is the Comfort Food You’ve Been Craving (formatted as H2 heading)
If you have any leftover enchiritos, you can store them in the refrigerator for up to 3 days.
Reheating Instructions (formatted as H3 heading)
To reheat, simply microwave the enchiritos for a few minutes until heated through. You can also reheat them in the oven at 350°F (175°C) for about 15-20 minutes.
Freezing Instructions (formatted as H3 heading)
For longer storage, you can freeze the enchiritos. Wrap them individually in plastic wrap and then place them in a freezer-safe bag or container. They can be stored in the freezer for up to 2 months.
Thawing Instructions (formatted as H3 heading)
Thaw the enchiritos in the refrigerator overnight before reheating.
Why This Enchirito Recipe Is the Comfort Food You’ve Been Craving Will Be Your New Favorite (formatted as H2 heading)
In conclusion, This Enchirito Recipe Is the Comfort Food You’ve Been Craving offers a delightful combination of flavors, ease of preparation, and versatility. It’s a dish that’s perfect for any occasion, whether you’re looking for a quick and easy weeknight meal or a crowd-pleasing dish to serve at your next gathering. So, gather your ingredients, put on your apron, and get ready to create a culinary masterpiece that will have everyone asking for seconds. Enjoy!
Perfecting the Cooking Process
To achieve the ultimate enchilada experience, orchestrate your cooking sequence like a culinary maestro. First, sear the chicken until golden and irresistible, then while that’s happening, prep all the ingredients, finally get your enchilada sauce ready to go to make your own version of **this enchilada recipe**.
Add Your Touch
Want to put your own spin on things? Go wild. Swap out the chicken for seasoned ground beef or shredded turkey. Experiment with different types of cheese—Monterey Jack or sharp cheddar are both fantastic. A dash of smoked paprika can also kick things up a notch.
Storing & Reheating
Got leftovers? Lucky you. Store your enchiladas in an airtight container in the fridge for up to three days. Reheat them in the oven at 350°F (175°C) until heated through or microwave in 1 minute intervals for a speedy fix.
Here are some tips to make **this enchilada recipe** a total success:
- Don’t overcrowd the pan when searing the chicken; sear in batches to ensure a beautiful, even browning, which maximizes flavor.
- Warm your tortillas slightly before filling to prevent them from cracking when you roll them, ensuring structurally sound and delicious enchiladas.
- Don’t be shy with the cheese! A generous layer of cheese both inside and on top creates that melty, gooey perfection everyone craves.
(Personal anecdote formated as paragraph subheading)
My first attempt involved a cheese explosion. Let’s just say the enchiladas were more cheese than tortilla. Now, I’m all about strategic cheese placement for optimal gooeyness.
Dive into the Deliciousness: Unveiling the Magic of This Enchilada Recipe
Alright, buckle up, buttercups, because we’re about to embark on a flavor journey that will leave your taste buds singing and your soul feeling all warm and fuzzy. Today, we’re tackling that quintessential comfort food classic: enchiladas. But not just *any* enchiladas. We’re diving headfirst into what makes **this enchilada recipe** truly special. Forget dry, bland, and boring. We’re talking saucy, cheesy, and bursting with flavor.
You know, sometimes I think food is just edible therapy. And if that’s true, then enchiladas are like a warm, comforting hug after a long day. They’re the culinary equivalent of putting on your favorite pair of sweatpants and curling up on the couch with a good book. The kind of food that makes you say, “Ahhhh, yes. *This* is what I needed.”
But let’s be honest, the world is already overflowing with enchilada recipes. So, what makes *this* one worthy of your precious time and energy? Well, my friend, that’s what we’re here to uncover. We’re going to break down every step, every ingredient, and every little secret that will transform you from an enchilada novice to an enchilada *expert*.
Prepare to be amazed. Prepare to be delighted. And most importantly, prepare to experience enchilada bliss like never before. Let’s do this!
The Heart of the Matter: Selecting the Perfect Ingredients for the Ultimate Enchiladas
Let’s talk ingredients, shall we? Because let’s be real, the quality of your ingredients is the foundation upon which all culinary masterpieces are built. No pressure, though. I always tell my kids, use fresh, quality ingredients when possible. This recipe is packed with flavor, so it is best when it’s fresh.
First, and foremost, the chicken. Opt for boneless, skinless chicken breasts, and feel free to use boneless chicken thighs for extra juiciness and flavor. Sear the chicken until golden brown and cooked through. Next, grab your favorite enchilada sauce. The selection of this can dramatically alter the flavor profile, so try a few different brands. A good enchilada sauce is key to making **this enchilada recipe** successful.
Then, the tortillas! Corn or flour, that is the question. Personally, I’m a flour tortilla kind of gal. They’re more pliable and less likely to crack when you’re rolling up those enchilada masterpieces. Corn tortillas add that authentic flavor, though, so if you love them, go for it! Just warm them slightly before filling to prevent any unfortunate cracking incidents.
And of course, the cheese. Oh, the glorious cheese! I’m a big fan of a Mexican cheese blend for enchiladas. It melts beautifully and offers a fantastic combination of flavors. Monterey Jack, cheddar, and sometimes even a little bit of queso quesadilla all work wonders here.
Finally, don’t forget the supporting cast of characters: onions, bell peppers, garlic, and your favorite spices. These are the unsung heroes that add depth and complexity to the overall flavor profile.
Don’t settle for mediocre ingredients. Choose the best you can find, and I promise you, the results will be worth it.
Spice It Up: Mastering the Art of Enchilada Seasoning
Okay, let’s talk spice! Because let’s face it, bland enchiladas are a crime against humanity. So, how do we ensure that our enchiladas are bursting with flavor? That’s where the spices come in.
Start with a base of chili powder, cumin, and garlic powder. These three amigos are the foundation of any good enchilada seasoning. Then, add a pinch of smoked paprika for a hint of smoky goodness. I like to add a little onion powder to increase the flavor.
Want to kick things up a notch? Throw in a pinch of cayenne pepper for a little heat. Or, if you’re feeling adventurous, try adding a dash of chipotle powder for a smoky, spicy flavor that will knock your socks off.
Don’t be afraid to experiment! Taste as you go and adjust the seasonings to your liking. Remember, you are the master of your own culinary destiny. And if you are looking to enhance **this enchilada recipe**, experiment with flavor.
(Personal anecdote formated as paragraph subheading)
I once accidentally added way too much cayenne pepper. My family thought they were breathing fire, but hey, at least they were awake! Lesson learned: spice with caution.
Rolling with the Punches: A Step-by-Step Guide to Assembling Enchiladas Like a Pro
Alright, folks, it’s showtime! Time to assemble those enchiladas. This is where the magic happens, so pay close attention.
First, preheat your oven to 375°F (190°C). Then, lightly grease a baking dish. This will prevent the enchiladas from sticking and make cleanup a breeze.
Next, warm your tortillas. As I mentioned before, this is crucial to prevent cracking. You can warm them in a dry skillet, in the microwave, or even in the oven. Just make sure they’re pliable and ready to roll.
Now, the fun part: filling the tortillas. Spoon a generous amount of your chicken mixture into the center of each tortilla. Then, sprinkle with cheese. Don’t be shy with the cheese, folks. This is not the time to skimp.
Roll up the tortilla tightly and place it seam-side down in the prepared baking dish. Repeat with the remaining tortillas and filling.
Once all the enchiladas are snug as a bug in a rug in the baking dish, pour your enchilada sauce over the top. Make sure every enchilada is generously coated in that flavorful sauce.
Finally, sprinkle with even more cheese. Because why not?
Bake for 20-25 minutes, or until the cheese is melted, bubbly, and golden brown.
Let them cool slightly before serving, because molten cheese is no joke. And trust me, these will be worth the wait.
Sauce Boss: Choosing or Crafting the Perfect Enchilada Sauce
Let’s talk sauce, baby! Because the enchilada sauce is what truly makes or breaks this dish. You can use store-bought sauce, there are so many great options.
For those of you who are feeling ambitious, homemade enchilada sauce is surprisingly easy to make. It allows you to customize the flavor to your exact preferences.
Whether you choose store-bought or homemade, make sure you love the sauce you use. It’s the star of the show, so it needs to be good!
If you don’t have any sauce, tomato sauce with a little chili powder works great to make **this enchilada recipe** delicious.
Beyond the Basics: Elevating Your Enchiladas to Culinary Stardom
Okay, so you’ve mastered the basics. Congratulations! But if you’re anything like me, you’re always looking for ways to take things to the next level. So, let’s talk about some ways to elevate your enchiladas from good to *amazing*.
Garnish, garnish, garnish! A sprinkle of fresh cilantro, a dollop of sour cream, or a drizzle of hot sauce can all add a pop of flavor and visual appeal. Get creative!
Serve with sides that complement the flavors of the enchiladas. Rice and beans are classic choices, but don’t be afraid to think outside the box. A fresh salad or some grilled corn on the cob can also be fantastic additions.
(Personal anecdote formated as paragraph subheading)
I once tried serving enchiladas with mashed potatoes. It was… interesting. Let’s just say it wasn’t a match made in culinary heaven. Stick to rice and beans, folks.
Vegetarian Ventures: Adapting This Enchilada Recipe for Plant-Based Palates
For my vegetarian friends out there, fear not! This enchilada recipe can easily be adapted to suit your plant-based preferences.
Instead of chicken, try filling the tortillas with a mixture of black beans, corn, and diced sweet potatoes. Or, sauté some mushrooms, onions, and bell peppers for a flavorful vegetarian filling.
You can also use plant-based cheese alternatives. There are so many great options available these days. Just make sure you choose one that melts well.
You can still achieve enchilada perfection without any meat involved.
Enchiladas for Everyone: Adjusting Portion Sizes and Serving Suggestions
Whether you’re cooking for a crowd or just for yourself, it’s important to adjust the portion sizes accordingly. This recipe can easily be scaled up or down to meet your needs.
If you’re cooking for a large group, you can assemble the enchiladas ahead of time and bake them just before serving. This is a great way to save time and stress on the day of the event.
If you’re cooking for just yourself, you can freeze individual enchiladas for a quick and easy meal on a busy weeknight. Just wrap them tightly in plastic wrap and store them in the freezer for up to three months.
No matter how many people you’re feeding, enchiladas are always a crowd-pleaser.
Conclusion for This Enchirito Recipe Is the Comfort Food You’ve Been Craving :
This enchilada recipe will guide you on a journey to achieve pure culinary comfort. Whether you stick to the classic recipe or get creative with fillings and spices, the most important thing is to have fun in the kitchen. This recipe is a guaranteed crowd-pleaser that’s perfect for cozy nights in or gatherings with friends and family. So, gather your ingredients, preheat your oven, and get ready to create some enchilada magic. Enjoy this recipe; it’s a hearty, cheesy, and incredibly satisfying meal.
Print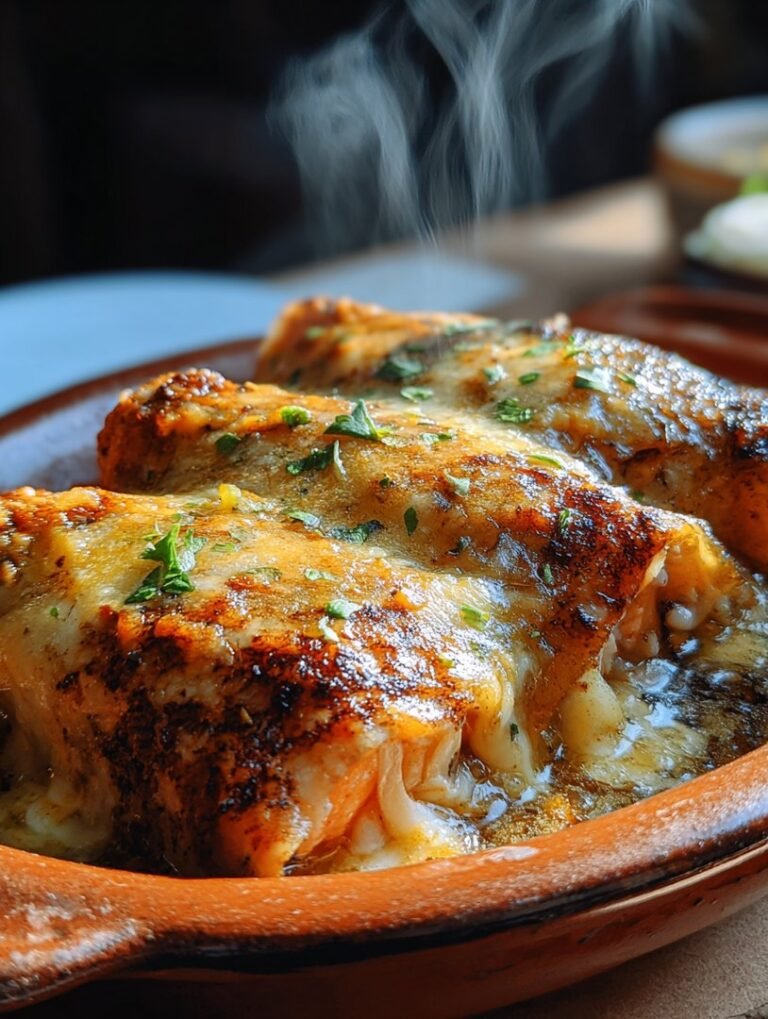
This Enchirito Recipe Is the Comfort Food You’ve Been Craving
Delicious this enchirito recipe is the comfort food you’ve been craving recipe with detailed instructions and nutritional information.
- Total Time: 35 minutes
- Yield: 4 servings
Ingredients
- Ground beef: 1 pound
- Onion: 1 medium, chopped
- Enchilada sauce: 28 ounces
- Refried beans: 1 (16-ounce) can
- Cheddar cheese: 2 cups, shredded
- Flour tortillas: 8 (6-inch)
- Olive oil: 1 tablespoon
Instructions
- Step 1: Preheat oven to 350°F (175°C). In a large skillet, heat olive oil over medium heat. Add ground beef and onion and cook until beef is browned and onion is softened, about 8-10 minutes. Drain any excess grease.
- Step 2: Stir in 1 cup of the enchilada sauce and the refried beans into the beef mixture. Heat through, stirring occasionally.
- Step 3: Warm the tortillas slightly, either in a dry skillet or microwave, to make them more pliable.
- Step 4: Spoon about 1/2 cup of the beef mixture into the center of each tortilla. Roll up tightly and place seam-down in a 9×13 inch baking dish.
- Step 5: Pour the remaining enchilada sauce over the enchiladas and sprinkle with the shredded cheddar cheese.
- Step 6: Bake in preheated oven for 20-25 minutes, or until cheese is melted and bubbly and enchiladas are heated through. Let cool slightly before serving.
Notes
- Content generation failed due to API limits. Please try again later. Original prompt:
- Write up to 4 concise, practical notes for a recipe called 'This Enchirito Recipe Is the Co…
- Prep Time: 15 minutes
- Cook Time: 20 minutes
- Method: Stovetop
- Cuisine: American
FAQs :
Can I make this Enchirito Recipe ahead of time?
Absolutely! As a matter of fact, these enchiritos are fantastic for meal prepping. Assemble them completely, then cover the baking dish tightly with foil. You can refrigerate them for up to 24 hours before baking. Just add an extra 10-15 minutes to the baking time to ensure they are heated all the way through when you eventually bake them. This trick will transform you into a meal-prepping ninja, ready to conquer the week with delicious enchiritos. Just imagine future you, thanking present you for this stroke of genius!
What kind of filling variations can I try for my Enchirito?
Oh, the possibilities are endless! Think shredded chicken seasoned with taco spices, or maybe some seasoned ground beef. Vegetarian? No problem! Try black beans, corn, and sweet potatoes. You could even get fancy with some quinoa and roasted vegetables. Feel free to adjust spices to your preference; make it mild, medium, or spicy! The best part about this enchirito recipe is that it’s completely customizable. If you’re feeling adventurous, throw in some unexpected ingredients and surprise yourself!
How can I make this Enchirito Recipe spicier?
Spice lover alert! If you want to kick up the heat a notch, here are some ideas. You can add a pinch or two of cayenne pepper or red pepper flakes to your enchilada sauce. Another option is to use a spicier salsa when assembling the enchiritos. Diced jalapeños are also a great way to add some extra kick. For the truly daring, a dash of hot sauce after baking is the perfect finishing touch. Just remember, start small and add more spice to taste. You can always add more, but you can’t take it away!
What is the secret for preventing soggy Enchirito?
Ah, the age-old question! Nobody likes a soggy enchirito. The key is to lightly fry or toast the tortillas before filling and rolling. This creates a barrier that prevents the sauce from soaking in too much. Also, don’t overfill the tortillas. The other important tip is to not add too much sauce to the tortilla as this can result in the wrap being soggy. A light coating will work perfectly. Less moisture equals a happier, less soggy enchirito experience. You’ll thank me later!


Leave a Comment